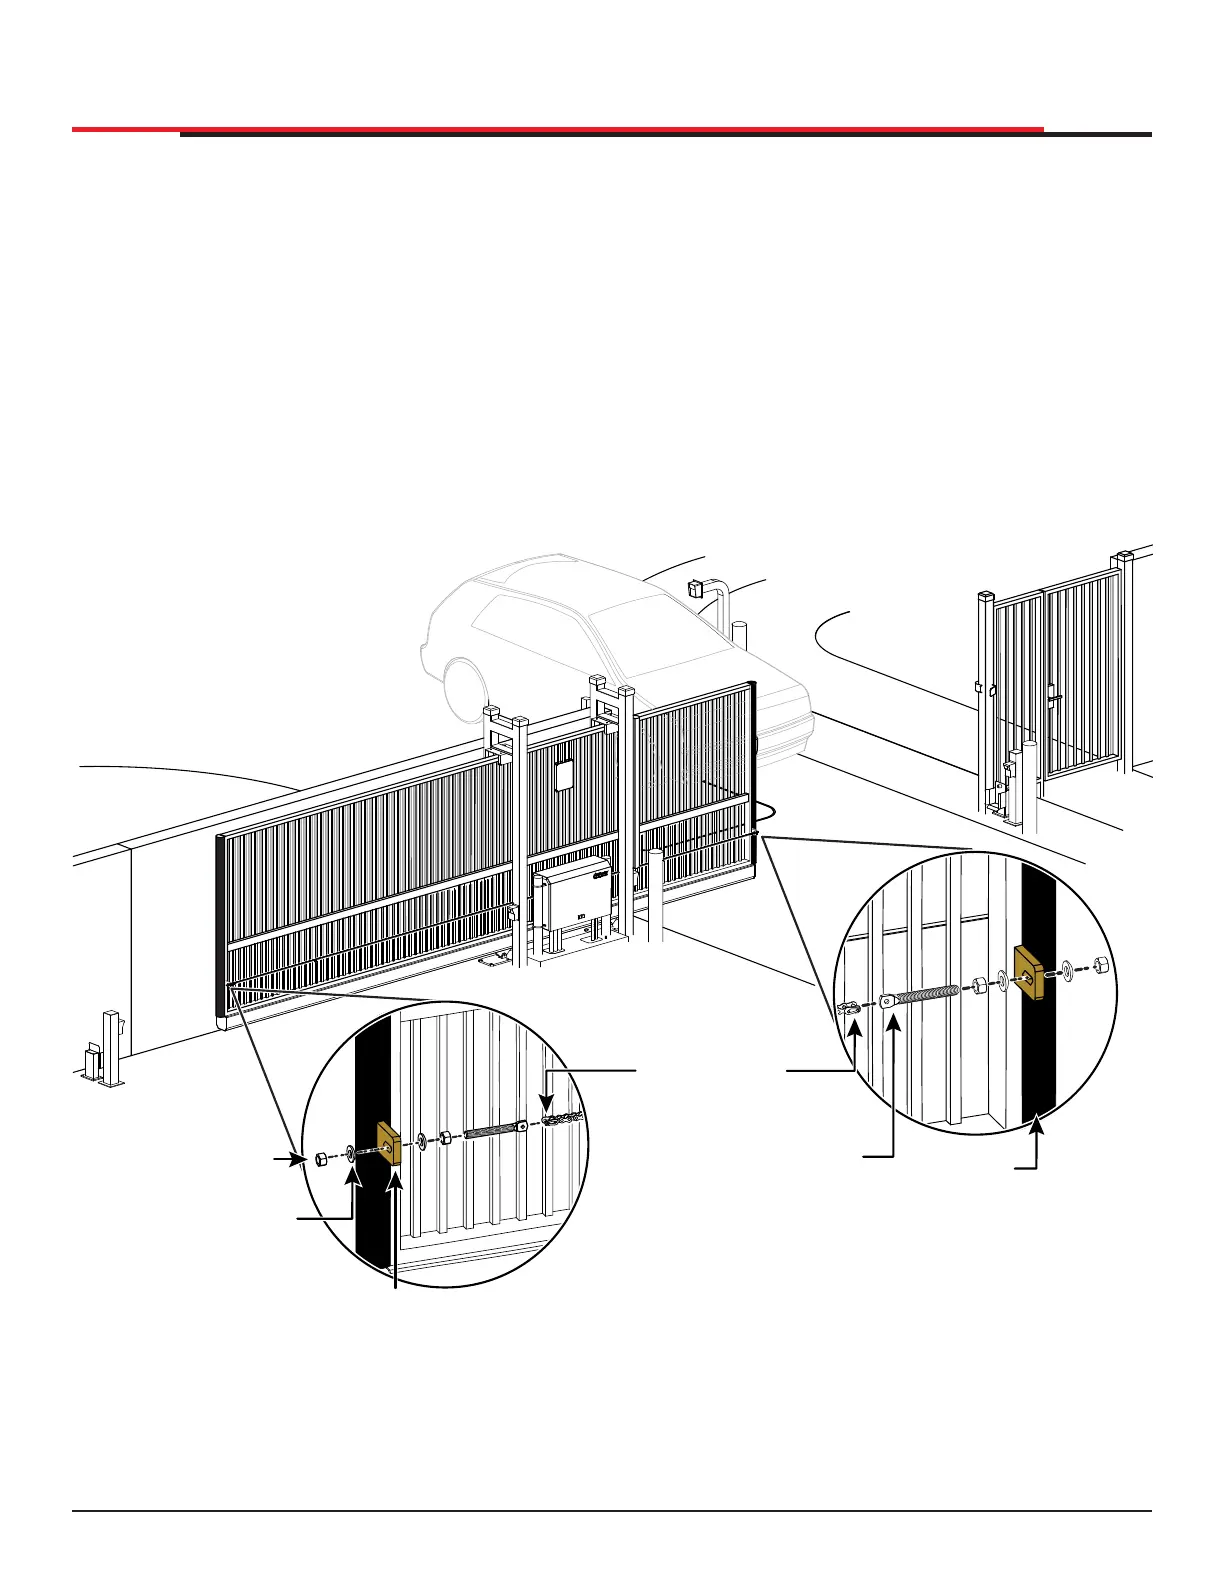
GATE BRACKET AND CHAIN INSTALLATION
1. Secure the gate to prevent movement.
2. Measure for proper chain alignment BEFORE
welding the brackets to the gate. Make sure
the chain will run horizontal to the ground and
parallel with the gate.
3. Weld the chain bracket in two places: leading
edge and trailing edge. You may need to cut
the length of the bracket to achieve proper
chain alignment.
INSTALLATION
4. Attach the eye bolts to the brackets, and then
attach the connector link between the chain
and eye bolt.
5. Feed the chain around the idler wheels and
over the sprocket (See Figure 11) and attach
the chain to the bracket on the opposite end
of the gate. Make sure the chain is horizontal
to the ground and parallel to the gate.
6. Adjust the nuts on the eye bolt to tighten the
chain (minimize sag, but avoid overtightening).
Chain sag should be about 1/4 − 3/8 inches
per foot over travel length.
Figure 10. Gate Bracket and Chain Installation
Public Side
Secure Side
HEX NUT
FLAT
WASHER
CONNECTOR
LINK
CHAIN
BRACKET
BOLT
CHAIN
END
LEADING
EDGE
SENSOR
SlideSmart HD Programming and Operations
2121
MX4435 Rev.G ©2022