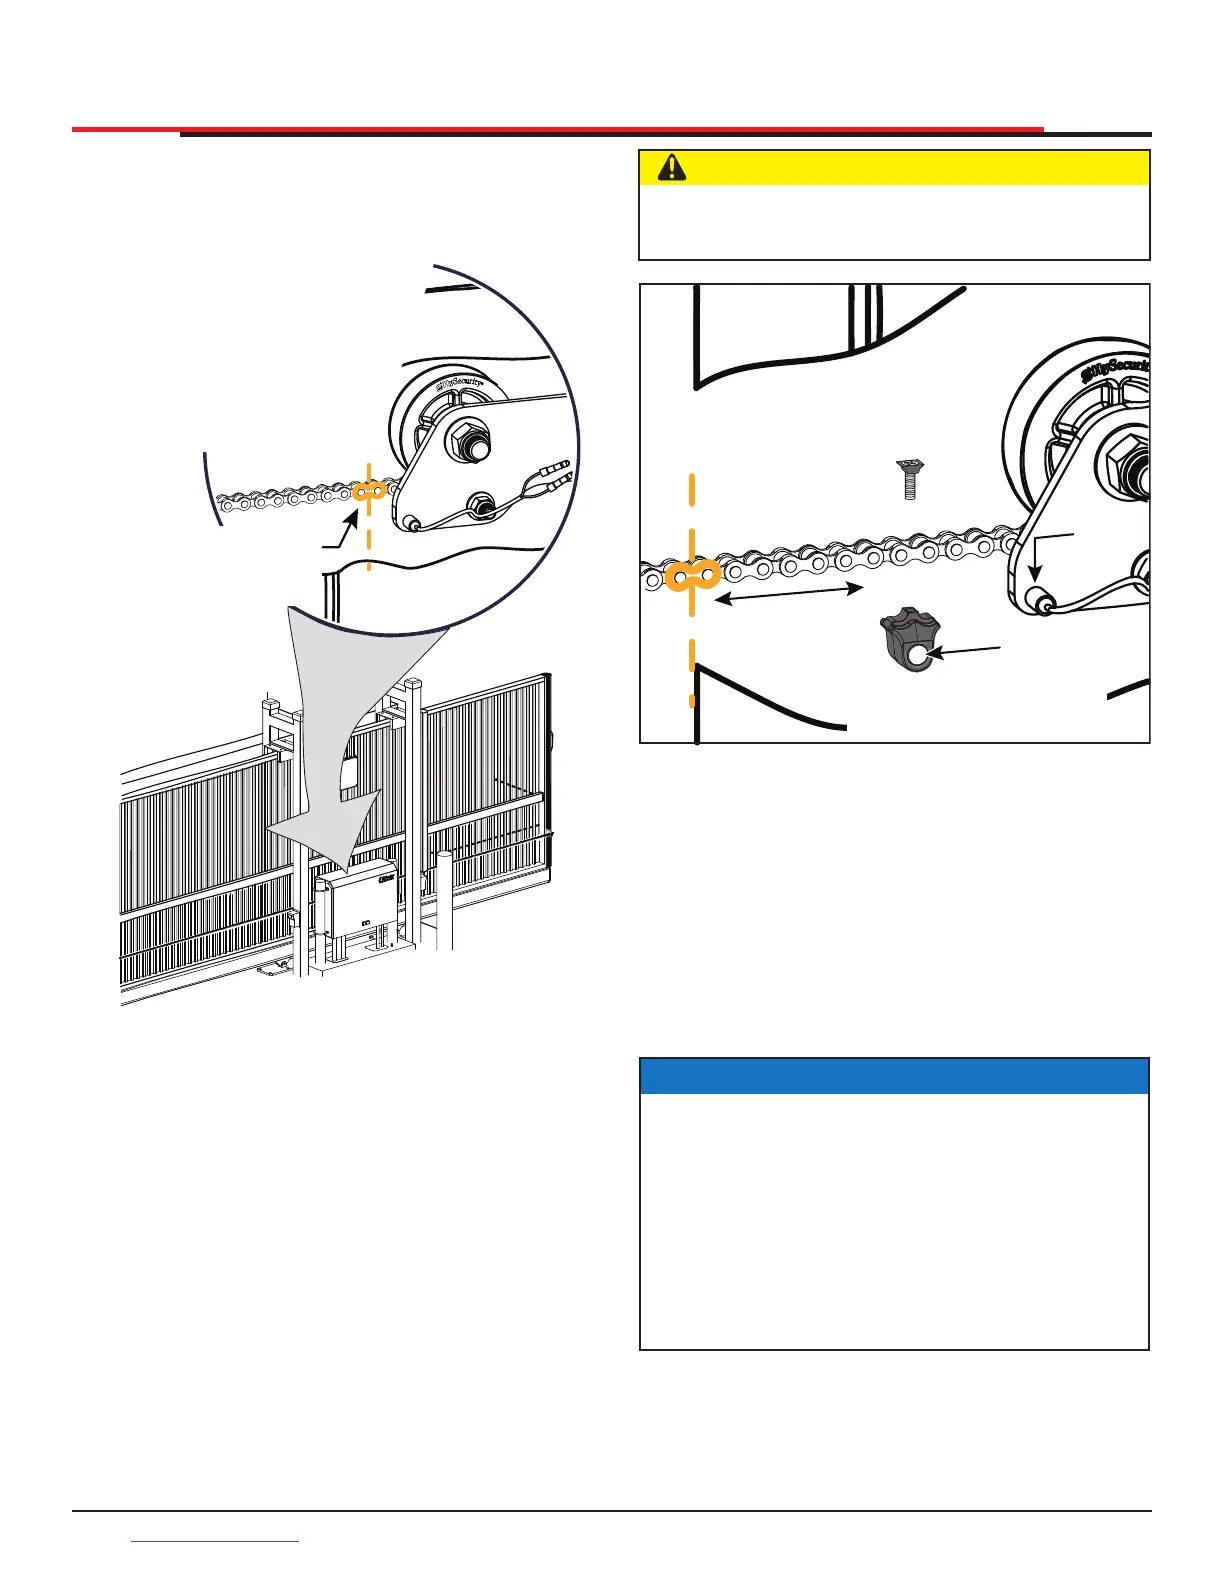
INSTALLING THE TARGET MAGNET
1. With gate CLOSED, mark chain link directly in
front of target sensor. See Figure 17.
Figure 17. Marking Chain Link for Target Sensor
2. Press the OPEN button to move the gate a few
feet and then press STOP.
3. Find the mark on the chain link and count
about 4 fixed links toward the operator
(approximately 3 inches, 76mm).
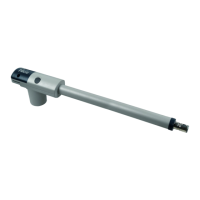
4. Remove the screw from the Target Magnet.
5. Fasten the target magnet to the chain link as
shown in Figure 18. Make sure the large white
centerpiece is facing toward the operator.
Insert the screw and tighten it securely.
NOTE: Only one magnet
is required. Two
target sensors
are provided for
LH & RH gate
applications,
but only one
sensor is used.
Mark chain near sensor
closest to rear end of
gate
INSTALLATION
Figure 18. Installing Target Magnet
6. Press OPEN and wait for the gate to travel and
stop at its full open position.
7. Press CLOSE. As the gate approaches the full
close position, the target magnet passes the
target sensor and an audible beep is heard.
Read the NOTE below, and then proceed to
step 8 to verify that the operator has learned
its limits.
CAUTION
To avoid damage to the idler wheel, the head
of the screw must be ush with the chain rollers.
Magnet
Large White
Centerpiece
3” (76mm)
4 Links
Install one
target magnet
Sensor
NOTICE
If “ALERT 15 - NO TARGET” appears on the
display after the target magnet has been
installed and a full gate cycle completed (steps
6 & 7), it means that the target magnet has not
been detected by the operator. Check chain
alignment and make sure the target magnet
is positioned properly and passes across the
face of the sensor. See Figure 18. Repeat steps
6 and 7.
SlideSmart HD Programming and Operations
2626
support.hysecurity.com