Chapter 7 Assembly of the Devices
163
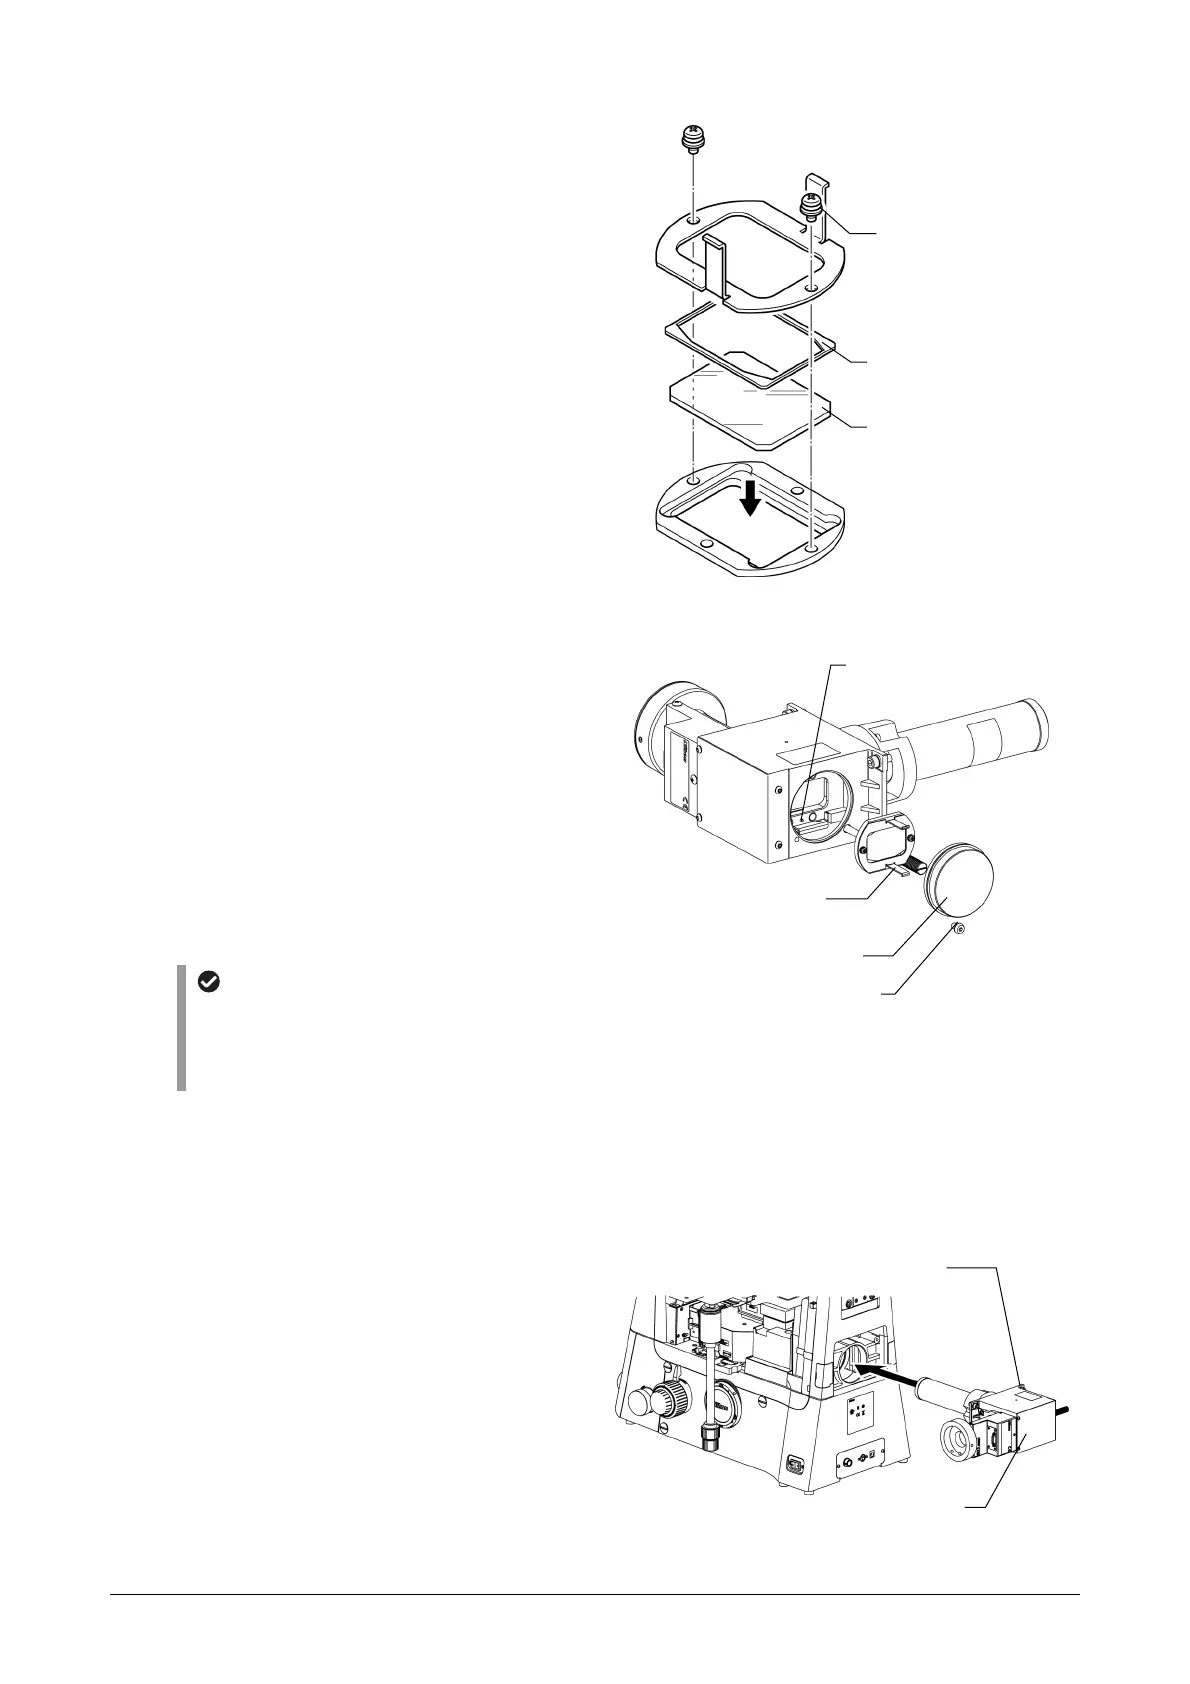
(2) Mount a switching mirror on the main branch.
Mount the mirror (or dichroic mirror) to be
used in the mirror unit provided, and then
mount the mirror unit on the branch body.
(Tool: 2.5 mm hex wrench, supplied with the
main branch)
1) Remove the two retaining plate fixing
screws with a Phillips head screwdriver,
and then remove the retaining plate and the
flat spring.
2) Mount the mirror with the reflecting film
surface facing down.
(Mirror size: 36 x 25.7 x 2)
Note that the thickness is only 2 mm.
3) Mount the flat spring and the retaining
plate, and firmly secure them with two re-
taining plate fixing screws.
Take care not to pinch the flat spring.
4) Remove the screw fixing the mirror re-
placement window cap by using a hex
wrench, and then remove the cap by turn-
ing it counterclockwise.
5) Positioning pin holes are located in the
mirror unit. When mounting the mirror unit
on the branch body, correctly align the pin
holes with the pins on the branch body. Be
sure to orientate the mirror unit as shown
in the figure when mounting it. If the mirror
unit is not orientated correctly when
mounted, the stoppers on the mirror unit
will interfere with the parts when the mirror
is switched.
Attaching a mirror unit
The stoppers in the mirror unit are slightly
deviated from the center of the unit. Be sure t
mount the mirror unit with its shorter side
facing the microscope side.
6) Screw the mirror replacement window cap
into the mirror replacement window.
7) Tighten the fixing screws using a hex
wrench to secure the mirror replacement
window cap.
Mounting a mirror
Mounting the switching mirror
(3) Insert a fixed main branch into the back port
mount (guide section) on the rear of the mi-
croscope main body, and tighten the four hex
socket head cap screws (M5) using a hex
wrench.
(Tool: 4 mm hex wrench, supplied with the
microscope main body)
Attaching the main branch
Stopper in the mirror uni
Positioning pin (x 2)
Mirror replacement window cap
Fixing screw
Flat spring
Retaining plate fixing screw
Mirro
(with the reflecting film
surface facing down)
Main branch
Hex socket head cap screws (M5, x 4)