Defining Objects
Designing a Form 17
2 Click the Object Definition button in the standard toolbar or
choose
Object Definition...
in the Format menu.
To open a shortcut menu, click the right mouse button over the
selected object. Choose
Object Definition...
in this menu.
The dialog box that appears varies depending on the selected object. See
the following sections for descriptions of the definition options available
for each type of fillable object in a form.
Defining a Graphic Object
Click the Object Definition button in the standard toolbar (or choose
Object Definition...
in the Format menu) to open the Graphic Definition
Dialog box when a graphic object is selected. This dialog box lets you
select how you want the graphic object to appear in the fill graphic field.
See “Creating a Graphic Object” on page 5-9 for detailed information.
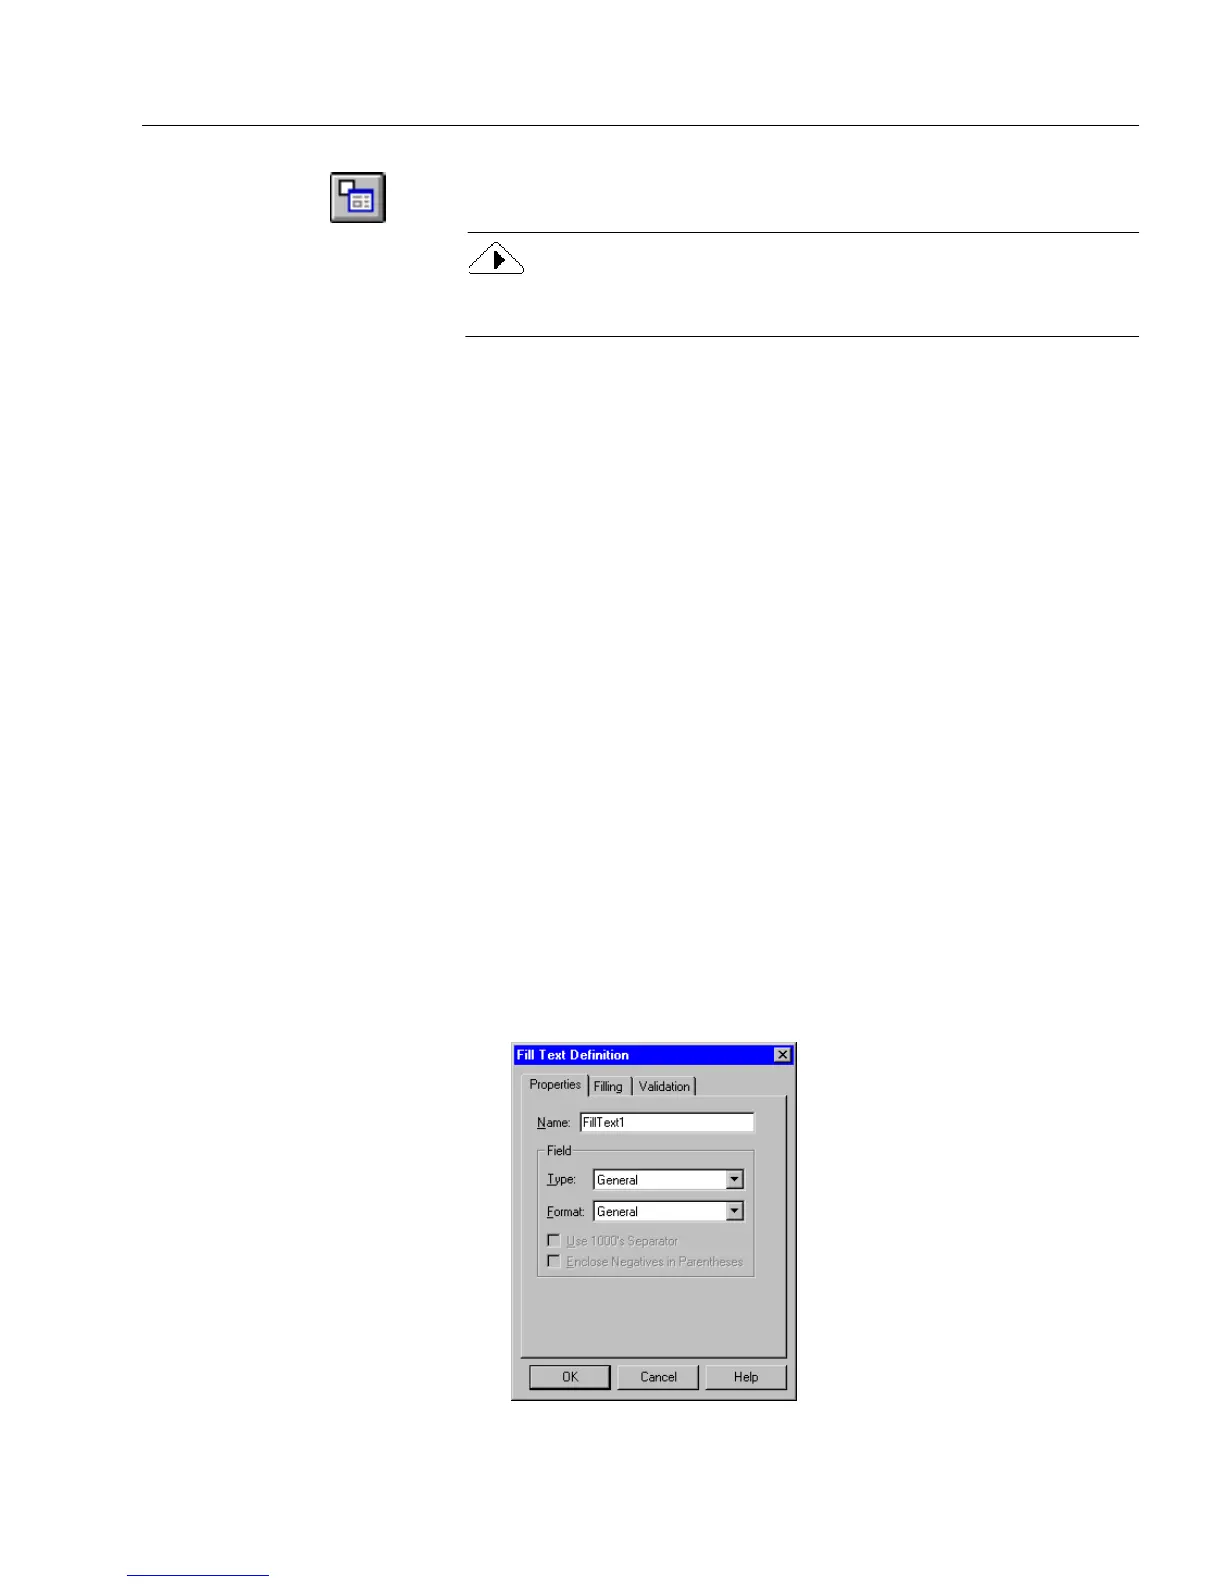
Defining a Fill Text Object
Click the Object Definition button in the standard toolbar (or choose
Object Definition...
in the Format menu) to open the Fill Text Definition
dialog box when a fill text object is selected. This dialog box allows you
to set property, filling, and validation options. The properties tab allows
you to:
• Provide a name for your field.
• Select a field type.
• Select a data format and define the format further.
Set Property Options
1 Click the
Properties
tab.