Using Objet Studio
5–4
DOC-00500 Rev. F
IfthePreviewcheckboxisselected,theobjectisdisplayedinthedialog
box,asshowninfigure 5‐4.
5. Selectanyofthefollowingoptions,asrequired:
• Units—Choosemillimetersorinchesfortheobject’sunitsofmeasure.
• Number of copies—Choosehowmanycopiesofthisobjecttoplace
onthebuildtray.
• Arrange models—Selectthischeckboxtoautomaticallyposition
objectsonthebuildtrayforefficientmodelbuilding.
Note: The 3-D file contains the object's proportions, but not its units of
measure. Therefore, make sure to correctly select either millimeters or
inches when inserting an object. Otherwise, the size of the object on the
build tray will be either much too large or much too small.
6. ClickOpen.
ObjetStudioplacestheobjectonthebuildtray,andinthelistinthe
hierarchypane.
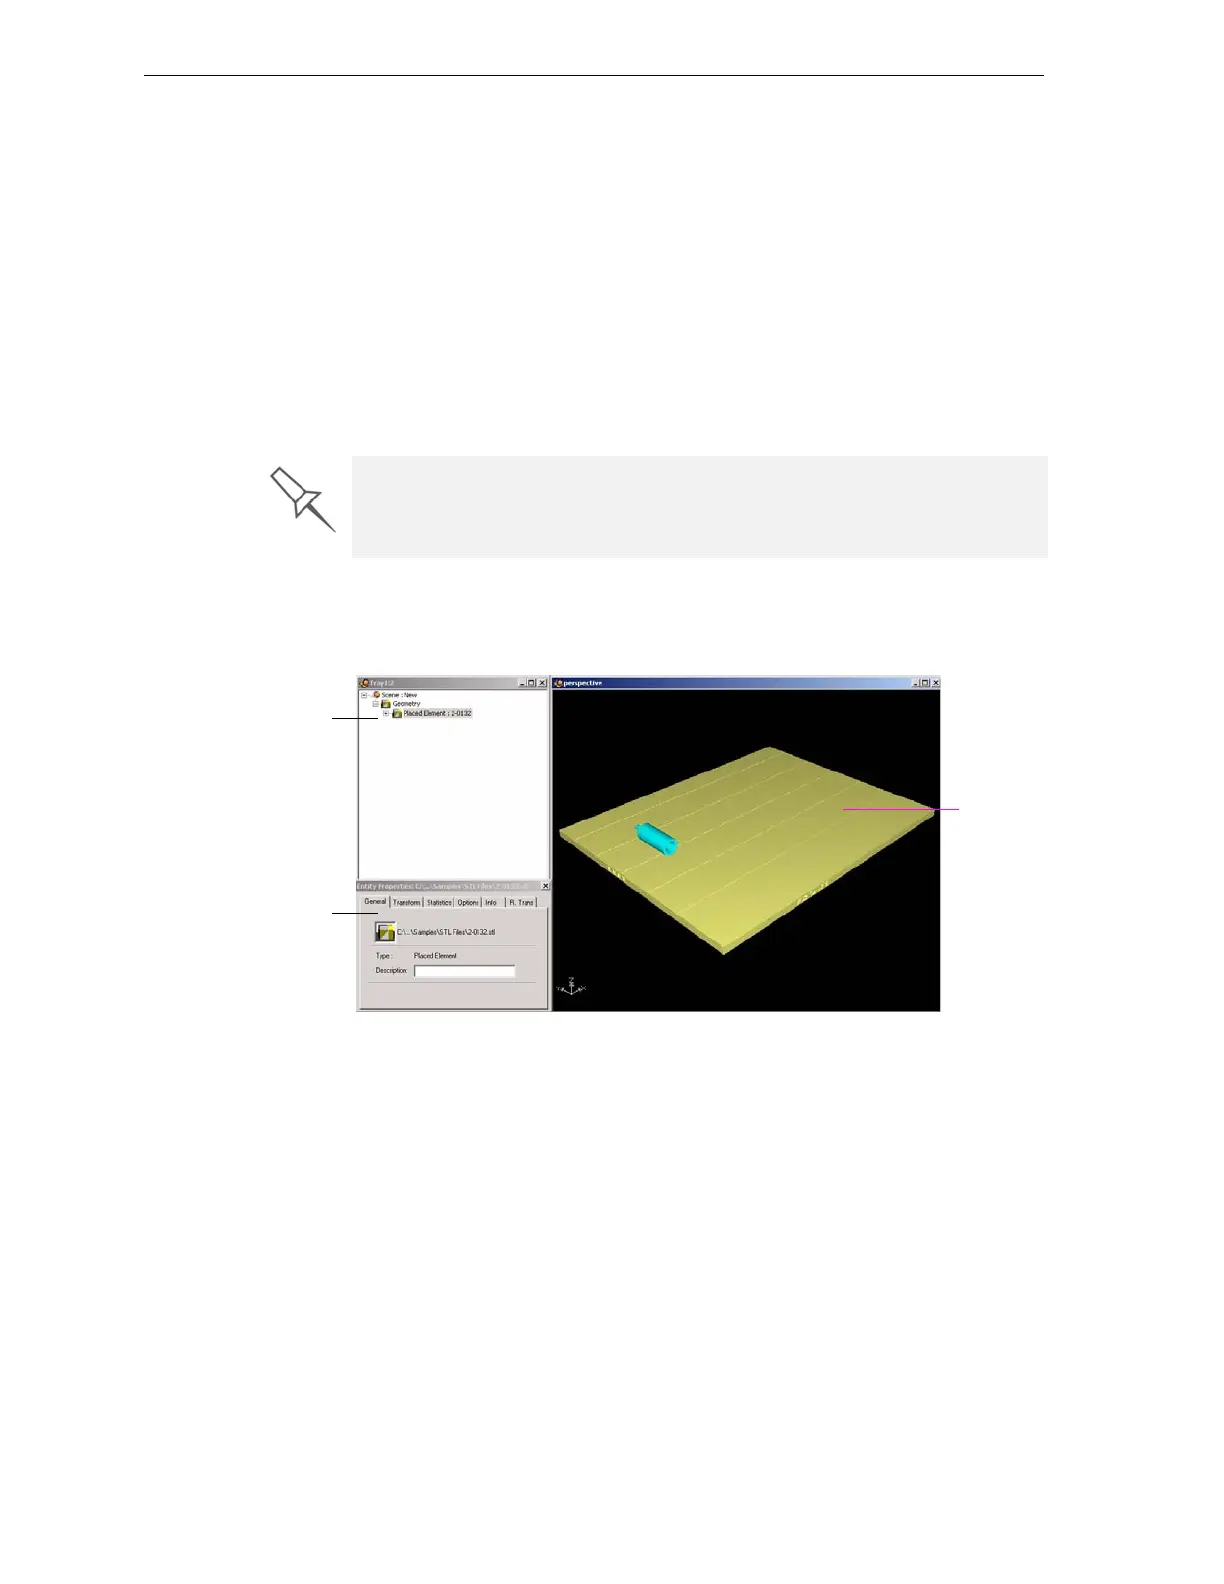
Figure 5-5: Default screen layout
Youcanplaceadditionalobjectsonthebuildtraybyrepeatingthis
procedure.
The Extents values displayed at the bottom of the dialog box represent the
maximum dimensions of the object on each axis. These dimensions
correspond to the virtual “bounding box” surrounding the object (see
figure 5-24 on page 18).
Hierarchy
pane
Build tray
Object
properties