42615101TH Rev.8 82 /
Oki Data CONFIDENTIAL
C5510
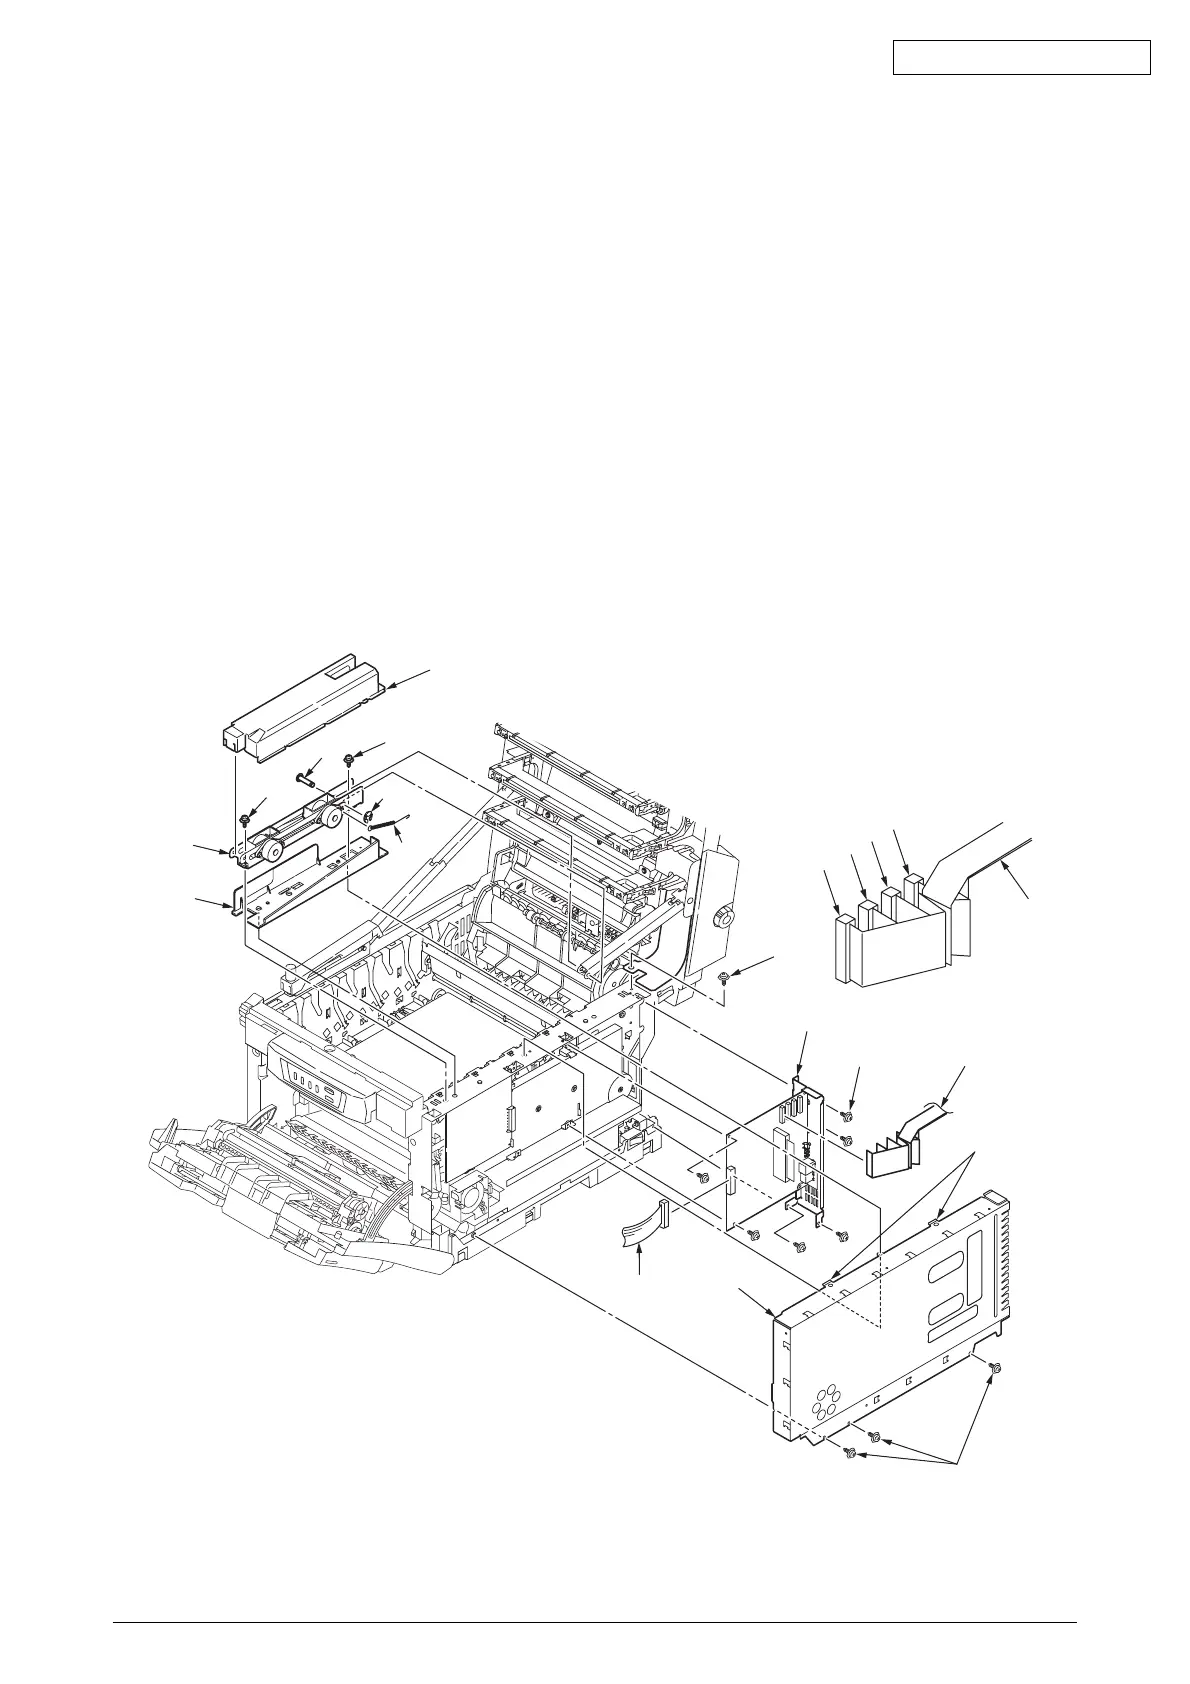
(1) Open the top cover.
(2) Remove the right side cover (see section 4.2.2).
(3) Remove the stay-cover-R 1. (Tool No.2)
(4) Remove the E-ring 2. (Tool No.2)
(5) Remove the shaft 3.
(6) Remove the two screws (golden) 4 and then the Lower-Assy-R 5 and spring 6.
(7) Remove the spacer-lower-R 7.
(8) Unscrew the three screws (golden) 8, disengage the claws A and remove
the plate-shield assy (GDI) 9.(Tool No.1)
(9) Remove the screw (golden) 0 and then the head cable A.(Tool No.1)
(10) Remove the six screws (golden) B and the cable C, then detach the controller PCB D.
(Tool No.1)
C5510 :SPY-2 PCB
B
× 6
Claws A
C
A
M
Y
K
1
3
4
5
7
2
6
4
Figure 4-2-6-4 Controller PCB (C5510)