113
Chapter 6 Measurement procedures
Notes for capturing measurement images
(1) The highlighted part of bright images tend to look textureless. As
matching is difficult with these kinds of images, adjust the
BRIGHTNESS level to darken the image (see “Adjusting the
brightness” (page 56)).
(2) As the illumination comes from one side of the field of view, some
objects produce shadows depending on their shapes. Since
measurement of shadow tends to result in errors, rotate the insertion
tube to remove the shadow before capturing and measuring images.
(3) In the case that a white reflecting part exists in the measuring area,
rotate the insertion tube to remove it, capture and measure images.
(4) Utilize spot ranging for measuring object distance, capturing the
image close to an object and gaining high measurement accuracy (see
“Spot ranging” (page 124)). Generally the closer object distance is, the
more accurate measurement becomes.
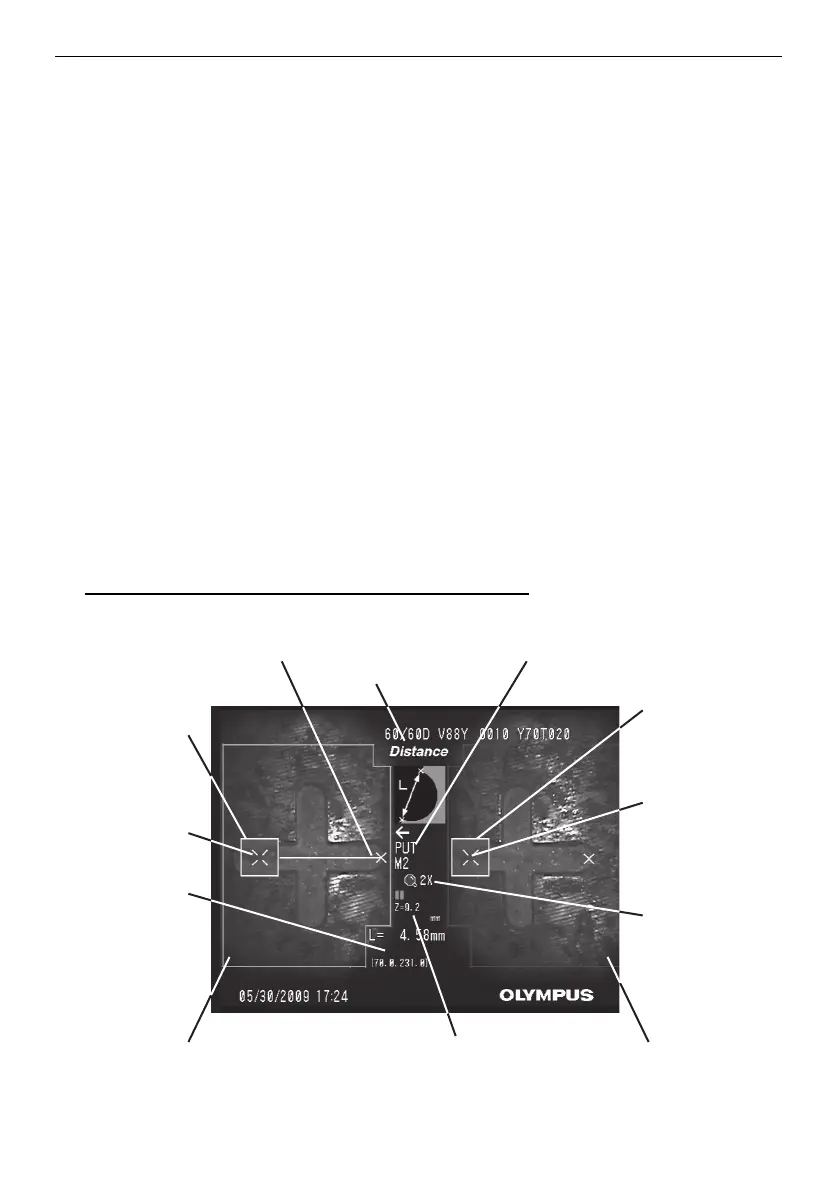
Stereo measurement screen
Explanation of the stereo measurement screen
Point
Indicates a specified measurement
point or reference point.
Input region in right image
Zoom magnification
indicator
Indicates magnification.
Input region in left image
Corresponding point
zoom window
Displays zoomed image
around corresponding
point.
Stereo measurement
message box
Shows measurement
results, etc.
Cursor zoom window
Displays zoomed image
around a specified
point.
Cursor
Specifies a measurement
point or reference point.
Measurement mode indicator
Object distance
Displays object distance at
cursor position.
Corresponding point
Instruction message box
Shows instructions, conditions, etc.