182 LD-250 Platform User's Guide 20472-000 Rev B
8.10 Replacing Non-Periodic Parts
1.
From the bottom screw up, use the supplied Torx driver to unfasten the two right side
captive Torx screws (A).
2.
From the bottom screw up, use the Torx driver to unfasten the two left side captive Torx
screws (B).
3. From the bottom screw up, use the Torx driver to unfasten the four front Torx screws
(C). Retain the screws to re-attach the skin.
4.
Lift the pins (D) out of the cutouts in the chassis (E).
Reverse these steps to replace the upper front skin.
Release the E-Stop button to return the LD-250 to service. See: Releasing an E-Stop on page 31.
Remove and Replace the Lower Front Skin
The lower front skin covers the low (toe) laser and front casters. Take care that you do not
scratch the laser lens or damage the Low Front Laser when removing the skin.
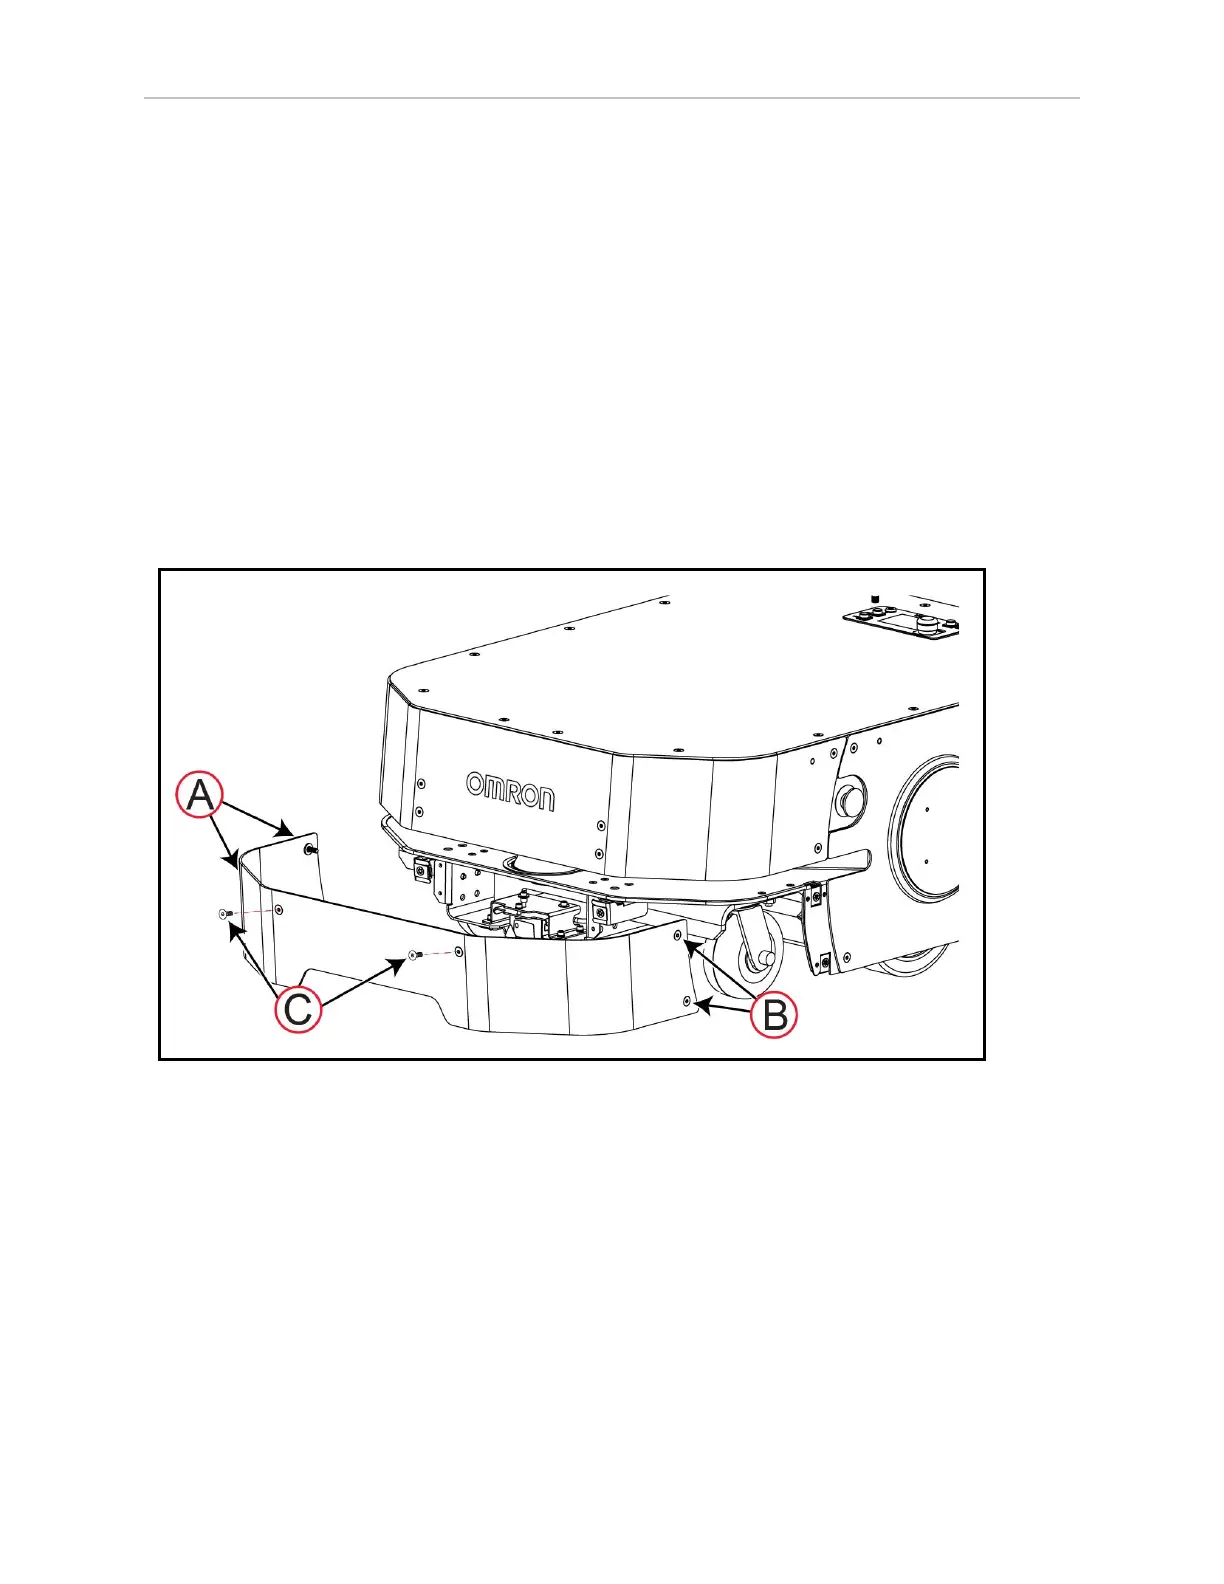
Figure 8-25 Remove the Lower Front Skin
Before you begin, press an E-Stop button to put the LD-250 into a safe state for maintenance
work.
Use the supplied Torx driver to remove the lower front skin:
1.
From the bottom screw up, use the Torx driver to unfasten the two left side captive Torx
screws (A).
2.
From the bottom screw up, use the Torx driver to unfasten the two right side captive
Torx screws (B).
3. While holding the bottom of the skin to prevent it from falling, unfasten the two front
Torx screws (C). Retain the screws for reattaching the skin.