184 LD-250 Platform User's Guide 20472-000 Rev B
8.10 Replacing Non-Periodic Parts
1.
Move the skin close to the LD-250 and connect the Light Discs cable (C).
2.
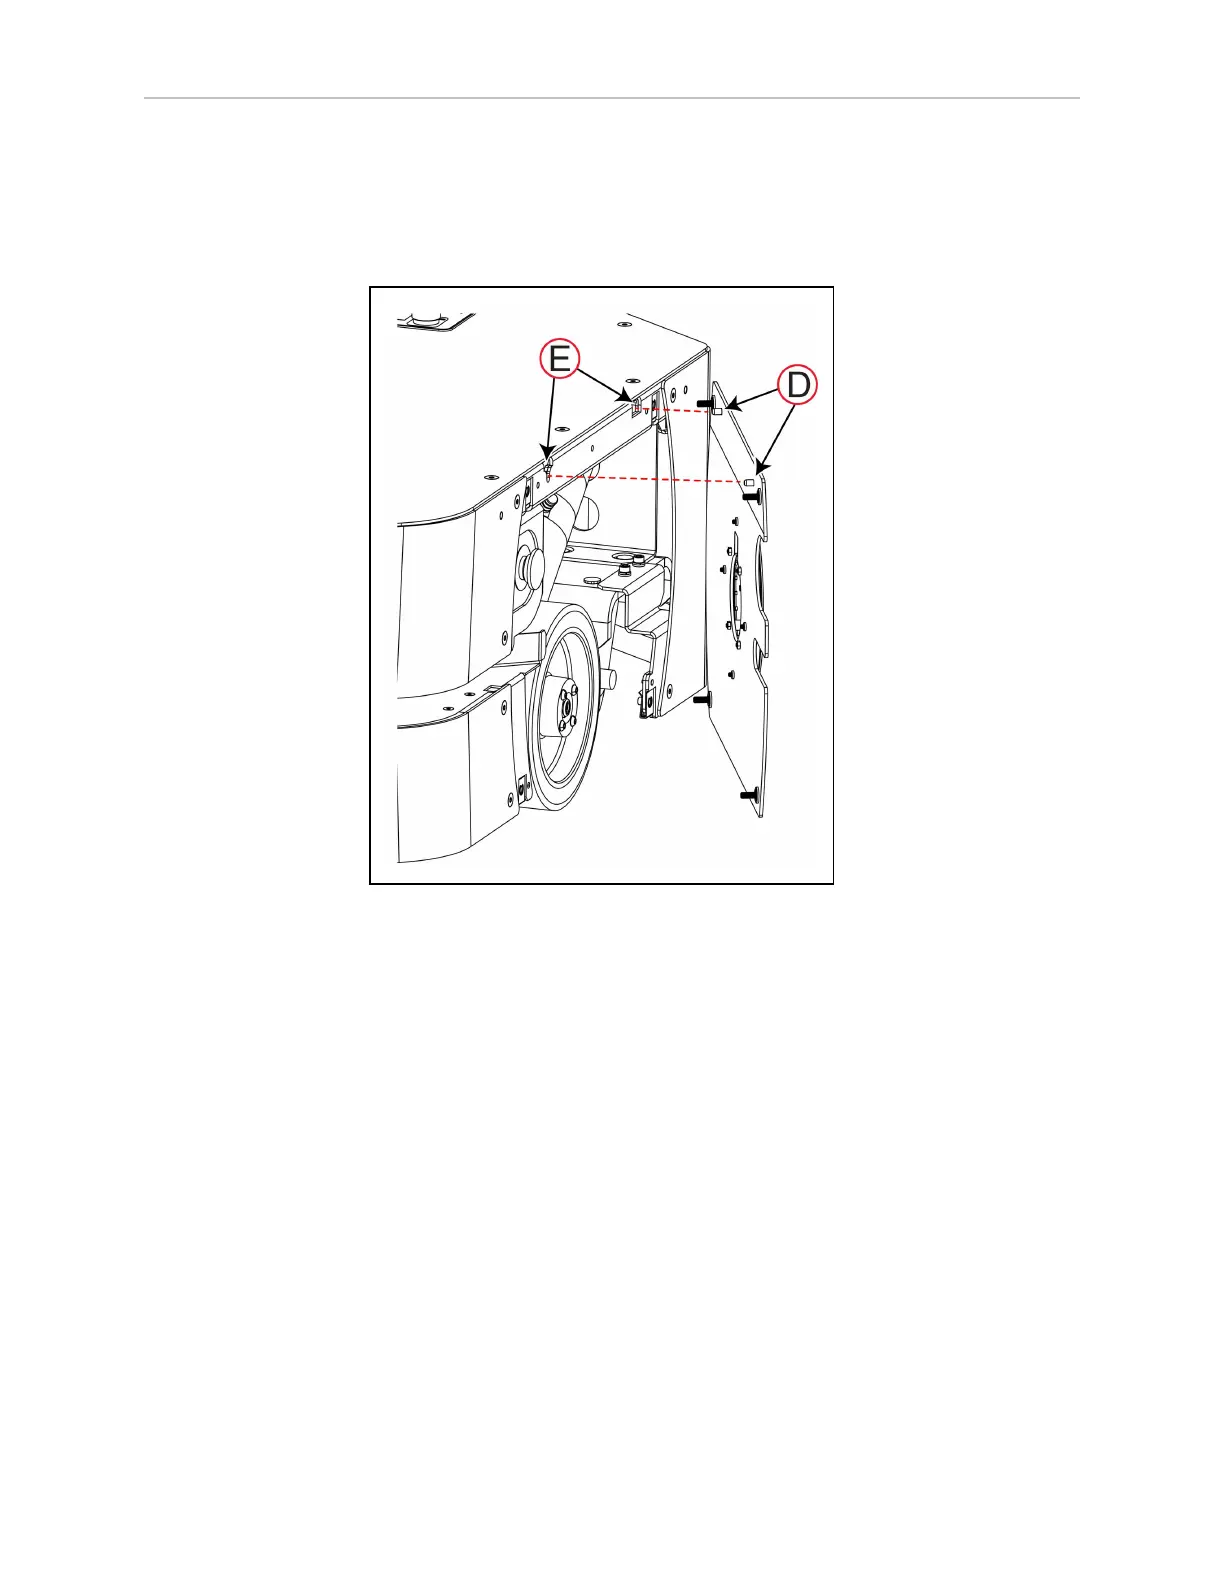
Lift the skin's alignment pins (D) onto the receivers in the chassis (E) as shown in the
following figure:
3.
Use the Torx driver to fasten the two top Torx screws (B).
4.
Use the Torx driver to fasten the two bottom Torx screws (A).
Release the E-Stop button to return the LD-250 to service. See: Releasing an E-Stop on page 31.
Remove and Replace the Rear Skins
The rear skins provide access to the rear sensors, rear casters and drive train components. The
skins are symmetric. Use the same procedure to remove either a right-side or a left-side skin.
 Loading...


