Chapter 8: Maintenance
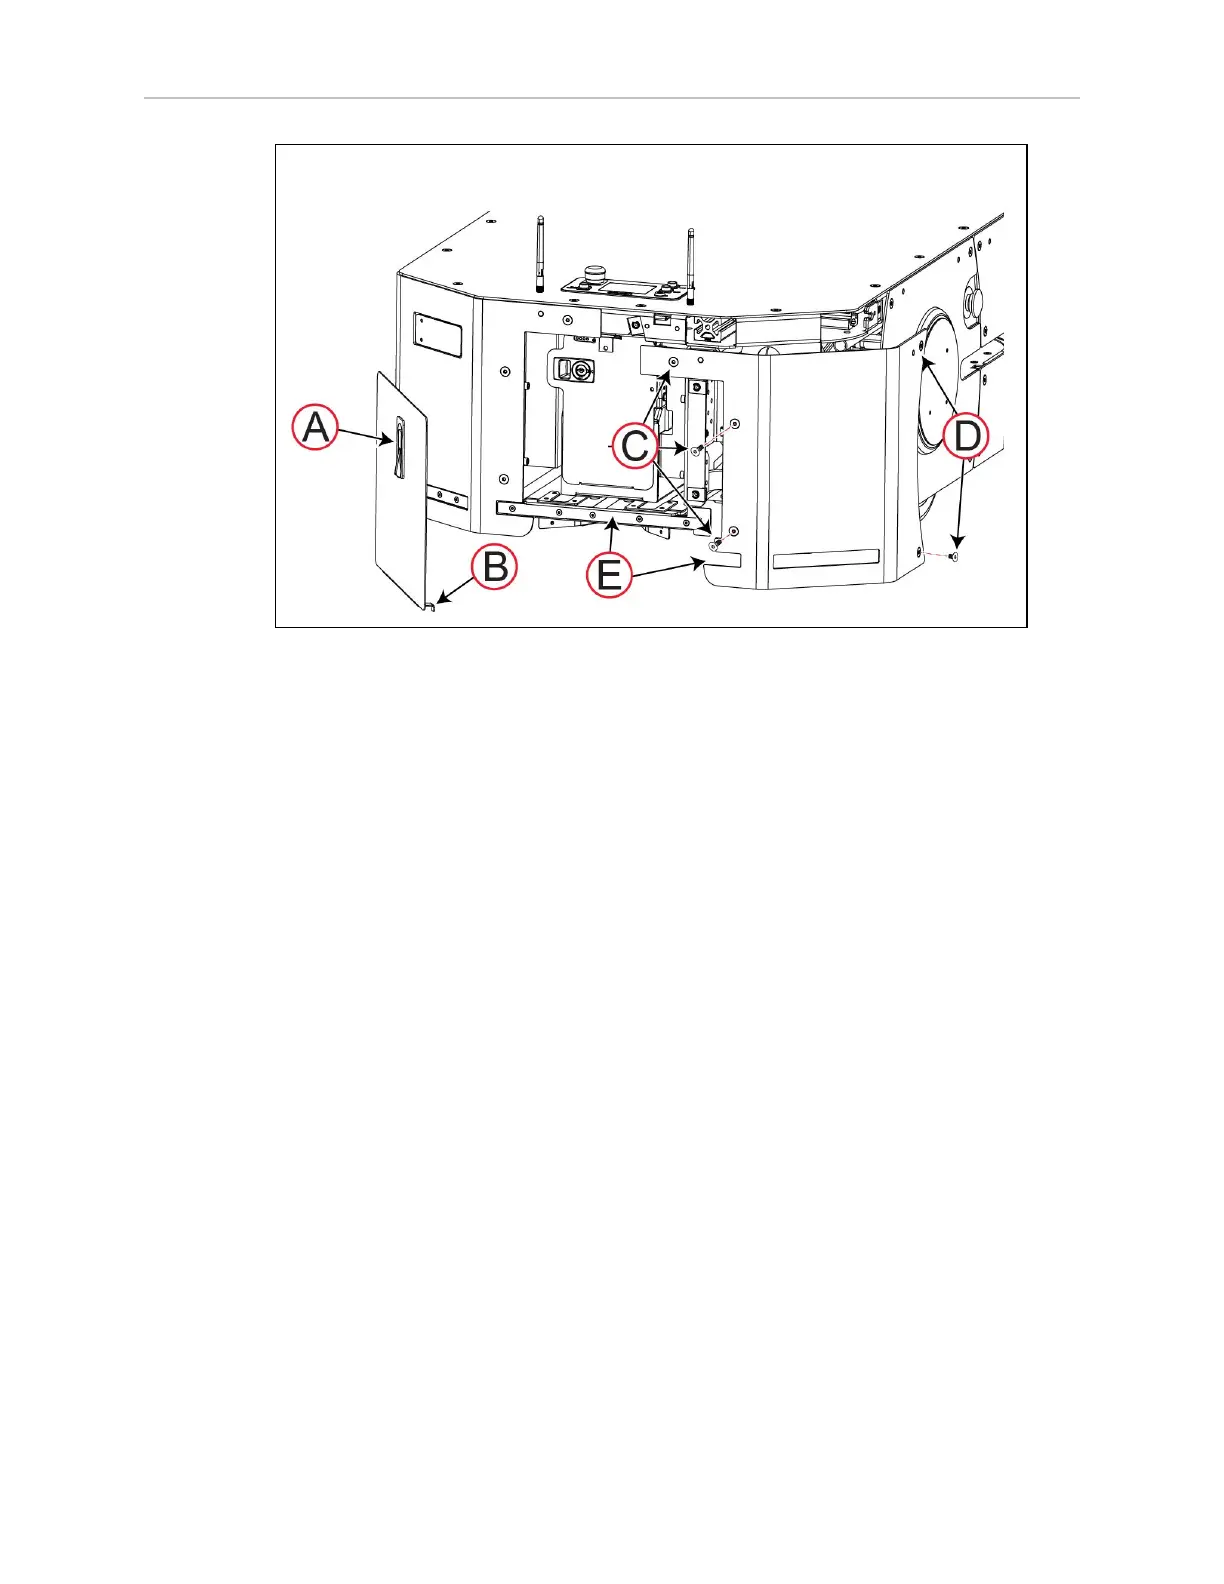
Figure 8-27 Remove the Rear Skins
Before you begin, press and E-Stop button to put the LD-250 into a safe state for maintenance
work.
IMPORTANT: During this procedure, take care that you do not scratch or dam-
age the rear sensor array.
To remove either rear skin:
1.
Open the battery skin (A) by lifting and rotating the latch.
2. Carefully lift the battery door tabs (B) over the rear sensor.
3.
Use the supplied Torx driver to unfasten the two bottom Torx screws (C). Retain the
screws for reattaching the skin.
4. Use the Torx driver to unfasten the top captive screw (C).
5.
Use the Torx driver to unfasten the bottom side Torx screw (D), and then the top captive
screw (D).
6.
Carefully lift the skin outward and away from the sensor (E).
To replace either rear skin:
1.
Insert the skin's alignment pins at the top and carefully press the skin over the sensor
(E) at the bottom.
2.
From the top (captive) screw down, use the Torx driver to fasten the three Torx screws
(C).
3.
From the top (captive) screw down the Torx driver to fasten the two side Torx screws
(D).
4.
Insert the battery skin (A) and close it by rotating and pressing down the latch.
20472-000 Rev B LD-250 Platform User's Guide 185