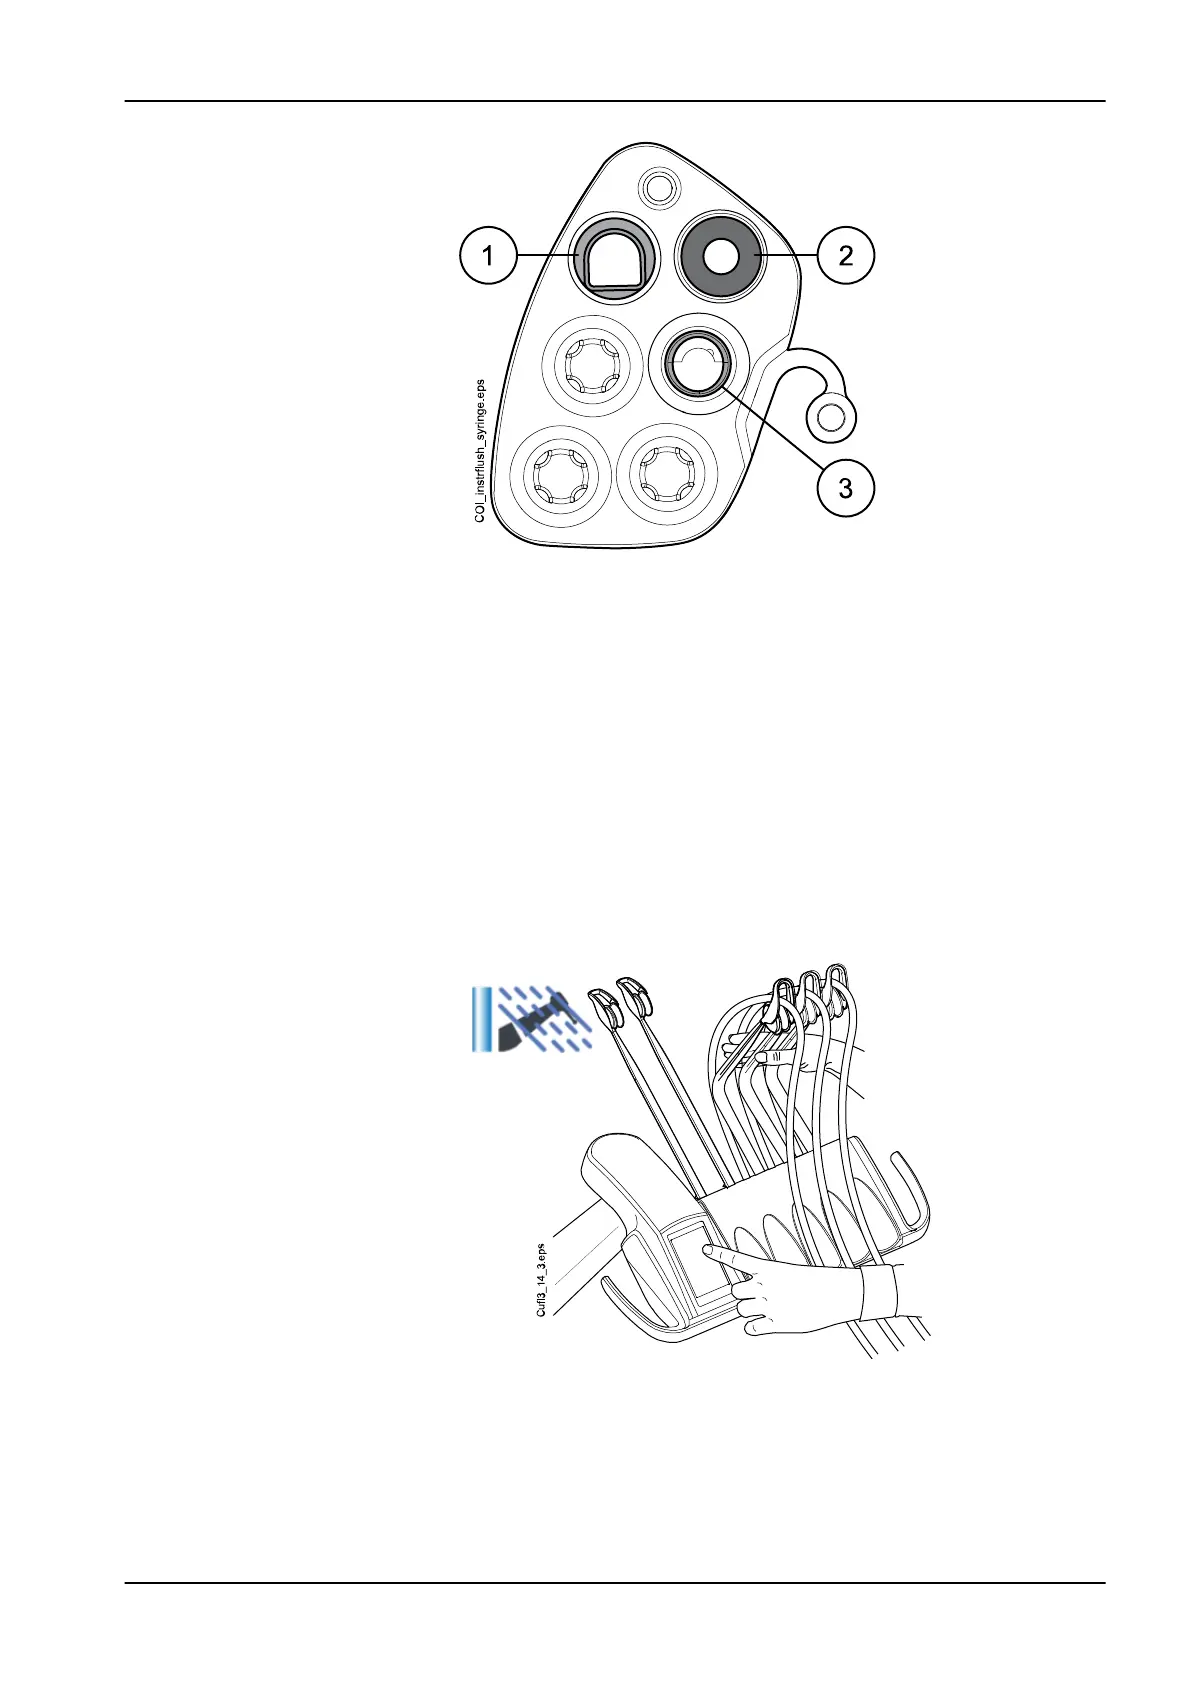
1 Luzzani Ergo syringe
Remove the metallic syringe cover and place the syringe in the
flushing holder. Make sure you insert the syringe the right way so
that it fits into the holder.
2 DCI syringe
Remove the syringe cover and place the syringe in the flushing
holder. Lock the syringe into place with a rotating movement when
the syringe is in the holder.
3 Luzzani Minibright syringe
Remove the metallic syringe cover and place the syringe in the
flushing holder. Lock the syringe into place by pushing it
downwards until you hear a click.
5. Start the long flushing cycle.
Balanced instrument arms: Start the flushing cycle by bending the
instrument arms of those instruments (including syringe) that are to be
flushed to an angle of at least 90° and simultaneously selecting Long
flushing on the control panel.
Hanging-tube instruments: Start the flushing cycle by selecting Long
flushing on the control panel.
28 Flushing and cleaning programs
User's manual Planmeca Compact i 217