Defining buffer detection
There are 2 buffer detection options
with 2-point calibration.
[Presetting]: select 2 buffers from the 4
possible buffer sets. During calibration,
adhere to the selected order e.g. Buffer
value 1: pH 7 and Buffer value 2: pH 4:
–
ProMinent
®
(pH 4; 7; 9; 10).
(default setting)
–
NBS/DIN 19266 (pH 1; 4; 7, ; 9).
–
DIN 19267 (pH 1;4; 7; 9; 13).
–
Merck + Riedel
®
(pH 2; 4; 7; 9;
12).
The buffer sets differ in their pH values
and temperature dependencies set in
the controller. The pH values at the dif‐
ferent temperatures are also printed on
the buffer containers.
[Manual]: enter the buffer value with the
associated temperature into the con‐
troller.
–
The pH values of the buffer solu‐
tion, at temperatures other than
25°C, are printed in a table on the
label of the buffer bottle.
Select the available buffer.
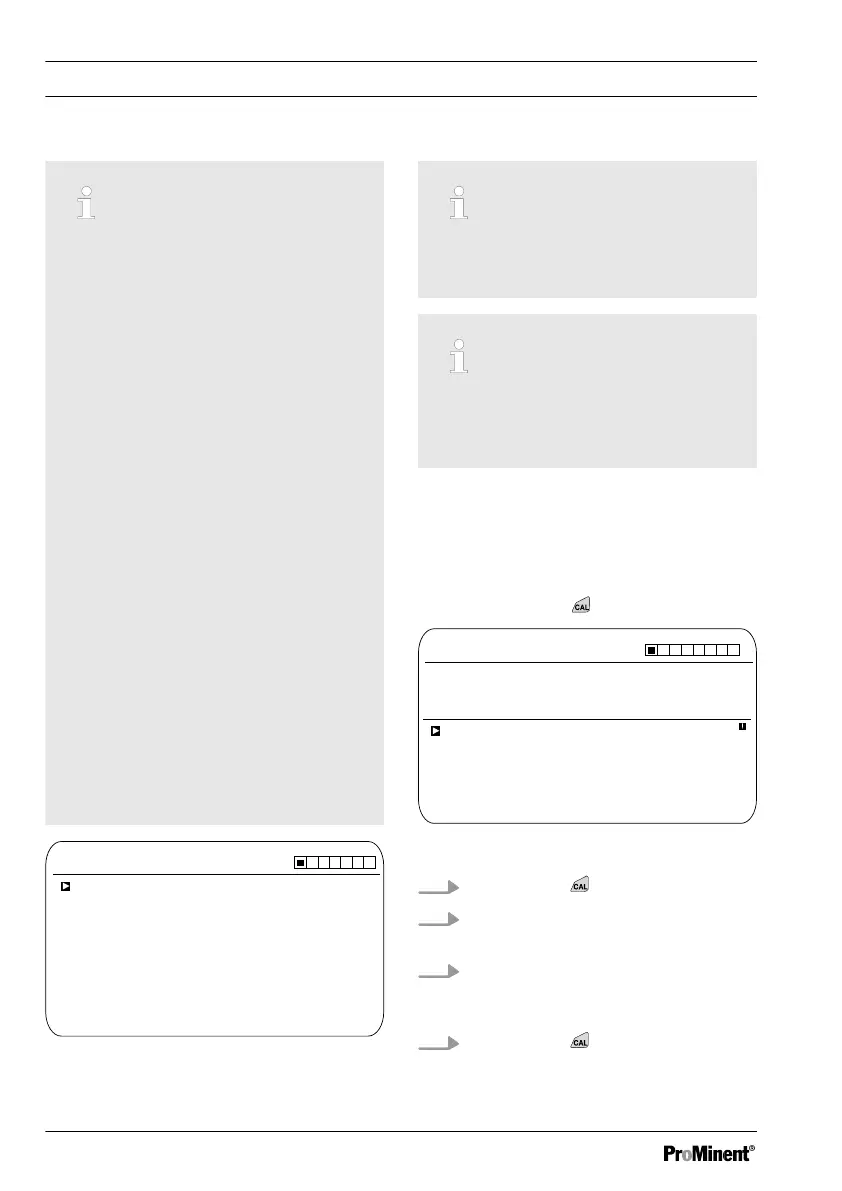
CAL pH
Buffer manufacturer
Calibration process
A1512
Manual
Buffer detection
2 point
Manual
Buffer value 1
Buffer value 2
Buffer temperature
ProMinent
pH 7
pH 4
Buffer temperature 25.0 °C
Fig. 38: Example: Display in [CAL-Setup]]
Used buffer
Dispose of the used buffer solution. For
more information: refer to the material
safety data sheet for the buffer solution.
Valid calibration values
Valid calibration:
–
Zero point -60mV…+60 mV
–
Slope 55 mV/pH…62 mV/pH
Two test containers with a buffer solution are
required for calibration. The pH values of the
buffer solutions must be at least 2 pH values
apart. Thoroughly rinse the sensor with water
when changing the buffer solution.
Continuous display ➨ .
CAL pH
Last calibration
A1016
Zero point
Slope
Calibration process
CAL setup
continue with <CAL>
14:26:07
7,00 pH
2 point
56.64mV/pH
06/04/2013
Fig. 39: pH sensor calibration (CAL)
1. Continue with .
2. Rinse the sensor thoroughly with water
and dry with a cloth (pat dry, don't rub).
3. Immerse the sensor in test container 1
which contains the buffer solution (e.g.
pH 7). Gently move the sensor.
4. Continue with .
Calibration
86