EasyManua.ls Logo

Raven Viper Pro - User Manual

Raven Viper Pro
300 pages
Print Icon
To Next Page IconTo Next Page
Loading...
(Software Version 3.10)
Viper Pro™
Installation & Operation Manual

Table of Contents

Other manuals for Raven Viper Pro

Questions and Answers

  • C
    Connie HoweAug 30, 2025
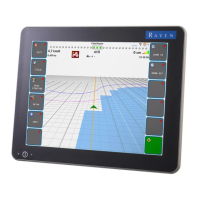
    Why doesn't the boom number turn green when turned on in Raven Viper Pro?
    • D
      davisheatherAug 30, 2025
      If the boom number does not turn green when turned on, it could be because the boom is not set up properly, nodes are not completely programmed, or the boom is disconnected. Check the boom setup from the Setup menu. Check node calibration and ensure all calibration is completed. Check the connection and wiring to the boom.
  • M
    marie78Aug 30, 2025
    Why are boom numbers gray on my Raven Viper Pro?
    • L
      laurenfergusonAug 30, 2025
      If the boom numbers are gray, it could be because the boom switches are turned off, AccuBoom is enabled but the machine is not moving, or the CAN is disconnected. Turn the boom and master switch on. Move the machine out of the applied zone. See the CAN Troubleshooting section on page 212.
  • T
    Todd RobertsAug 29, 2025
    Why will streetmaps not load on my Raven Viper Pro Control Systems?
    • C
      christopher47Aug 29, 2025
      If streetmaps will not load, it could be due to several reasons: * The streetmaps files are not located in the streetmaps folder. * Streetmaps are located in a sub-folder in the Streetmaps folder. * Streetmaps are not in the correct format. * Too many streetmaps files in the Streetmaps folder. Move the streetmaps files to the Streetmaps folder on the disk. Move the streetmaps to the Streetmaps root folder. Save the streetmap files in the shapefile format. Limit the number of county streetmap files in the Streetmap folder.
  • G
    Gail MitchellSep 12, 2025
    What does You must set up the section information in the Setup menu mean in Raven Viper Pro?
    • D
      Danielle BeltranSep 12, 2025
      This message displays when starting a job if the sections have not been set up. Configure the section information in the Setup menu.
  • K
    krista41Sep 15, 2025
    What does No Rx file chosen for this product mean in Raven Viper Pro?
    • R
      randersonSep 16, 2025
      This message indicates that VRC was selected for the product during the product setup, but no Rx map was loaded. Un-select the VRC selection or load an Rx map for the product.
  • P
    Pamela CampbellSep 23, 2025
    What does No GPS mean in Raven Control Systems?
    • E
      Eric MasseySep 23, 2025
      This message indicates that Viper does not detect a GPS signal. Make sure that the GPS receiver is turned on and receiving a signal. Ensure that the port setting for Viper and the GPS receiver match. Also, make sure that the required NMEA messages are turned on in the GPS receiver.
  • J
    Jessica FletcherAug 27, 2025
    Why does my Raven Viper not completely power down?
    • B
      bmeyerAug 27, 2025
      If your Viper unit does not completely power down, it's likely because the orange wire is connected directly to a 12V power source. Do not connect the orange wire to a source of +12VDC.
  • W
    william42Aug 27, 2025
    How to resolve a red DGPS status indicator on Raven Control Systems?
    • J
      Jack JonesAug 27, 2025
      A red DGPS status indicator on the Main Screen can be caused by: * A disconnected GPS cable. * No power to the GPS receiver. * Incorrect port settings. Check the cable between the GPS receiver and the Viper Pro. Verify that the GPS receiver has power and ensure that the port settings on the Viper Pro and the GPS receiver are the same.
  • A
    Alexis MitchellAug 26, 2025
    What to do if the Raven Control Systems touch screen does not respond to touch?
    • C
      cliffordlopezAug 27, 2025
      If the touch screen is unresponsive, it might be because the area you're touching doesn't include a selectable function, or the system is busy processing a previous request. Touch an area of the screen that contains a selectable function. Wait for the system to finish processing previous requests.
  • K
    kellicooperAug 26, 2025
    Why are CAN nodes not detected in my Raven Control Systems?
    • C
      christopherhortonAug 26, 2025
      If CAN nodes are not being detected, the possible causes are: * No power to CAN nodes. * Weak or dirty power to the CAN nodes. * Water in CAN nodes. * Corrosion in CAN connections. * Broken cable to node. * Low power voltage. Verify that there is 12 volt power and ground to the CAN node's logic power. Make sure that the 12 volt power to the CAN node is coming from the switch relay that is connected to the battery. Prevent water and moisture from building up in the nodes. Disconnect and clean the CAN connections. Repair or replace the cable and verify at least +10VDC at the node.

Summary

Chapter 1 Important Safety Information

Chapter 3 Installation, Start Up and Registration

Overview of the Installation Process

Provides a step-by-step overview of the Viper Pro installation procedure.

Mounting the Field Computer

Instructions and requirements for selecting a mounting location for the Viper Pro.

Cable Platforms and Connections

Details on the two available cable platform options for the Viper Pro field computer.

Generation 1 Cable Connections

Diagram and instructions for connecting the Generation 1 cable platform.

Generation 2 Cable Connections

Diagram and instructions for connecting the Generation 2 cable platform.

Start Up

Procedures for powering up and initiating the Viper Pro field computer.

Chapter 4 Initial Set Up and Navigation

Detecting CANbus Nodes

Ensuring proper communication with CANbus nodes for accurate product application.

Initial Set Up

Configuring essential system settings like language, time zone, and display units.

Product Control Type

Selecting the appropriate controller setting for CANbus or serial console operation.

Speed Sensor Type and Cal

Configuring speed sensor settings and calibration for accurate rate adjustments.

Application and Control Valve Type(s)

Configuring valve settings based on product type and machine application.

Rate Cal(s)

Setting the target rate for product application for each control channel.

Meter Cal(s)

Entering the meter calibration number for liquid product flow measurement.

Spreader Constant and Product Density

Calibrating dry/granular application systems using spreader constant and product density.

Valve Cal(s)

Programming calibration values for control valves to adjust response time.

Boom or Section Cal

Configuring boom and section widths for guidance and product control.

Chapter 5 Using the Viper Pro System

AccuBoom Control

Automatic control of boom sections based on coverage or spray/no-spray zone maps.

Starting a New AgX Job

Procedure for starting a job using AgX recommendations and pre-populated data.

Machine Control Settings

Configuring job name, guidance pattern, and AccuBoom mapping modes.

Starting a Standard Job

Steps to begin a standard job and enter all product and job information.

Prescription Rate Conversions and Default Rates

Calibrating prescription maps and setting default application rates.

Alarms

Information on how the Viper Pro displays and handles configured alarm conditions.

Addressing Alarm Conditions

Procedures for viewing and resolving detected alarm conditions.

Chapter 6 Viper Pro Guidance

Swath Guidance Patterns

Selecting and using various swath patterns for guidance during a job.

Chapter 7 Product Chaining

Using Product Chaining

Linking product tanks or bins to automatically switch for continuous application.

Chapter 8 Advanced Settings and Features

Advanced Product Control Settings and Features

Configurable settings for monitoring and controlling product application via CANbus.

Section Assignments

Configuring hardware control based on specific product nodes or booms.

Serial Communication Port Setup

Configuring communication ports for GPS, console, and auxiliary devices.

Boom and Implement Setup

Configuring applicator boom or implement sections for monitoring or control.

Chapter 9 Using AccuBoom

AccuBoom Control Setup

Configuring AccuBoom functionality for automatic boom section control.

AccuBoom Spray;No-Spray Mapping

Setting up AccuBoom operation using spray and no-spray zones.

Chapter 10 Using AutoBoom

AutoBoom Status Display

Determining the current status of the AutoBoom system via the Viper main screen.

Chapter 11 File Maintenance and Editing Reports

File Maintenance

Process of archiving and deleting files to maintain Viper Pro system efficiency.

Preparing a USB Flash Drive for File Maintenance

Steps to prepare a USB flash drive with necessary file folders for maintenance.

Performing File Maintenance

Accessing flexible options for managing and maintaining files on the Viper Pro.

Uploading Prescription Maps from a USB Flash Drive

Uploading prescription maps from a USB flash drive via the File Maintenance screen.

USB File Transfer and Advanced File Maintenance

Copying, moving, or deleting files from USB drives or internal memory.

Automatic File Maintenance

Automatic process for moving report files and deleting job files from Viper Pro storage.

AgX File Maintenance

Transferring or deleting AgX recommendations to/from the Viper Pro.

Chapter 12 Troubleshooting the Viper Pro System

Viper Pro Troubleshooting Information

Information on troubleshooting common issues and solutions for the Viper Pro system.

General Issues

Troubleshooting common problems like power, CAN node detection, and touch screen.

Setup Issues

Resolving issues related to lost settings, default profiles, and CAN connections.

Job Issues

Troubleshooting problems with streetmaps, boom display, product functions, and dates.

Rx Map Issues

Resolving issues related to loading and displaying prescription (Rx) maps.

Appendix B Calculating the Calibration Values

Appendix C Testing Extension Cables

Appendix D Updating CAN Nodes via the Viper Pro

Appendix H External Serial Rate Control

Appendix J Wireless Communications and Remote Service

Raven Viper Pro Specifications

General IconGeneral
BrandRaven
ModelViper Pro
CategoryControl Systems
LanguageEnglish

Related product manuals