OPTIONAL UNIT INSTALLATION 17 January, 2003
1-20
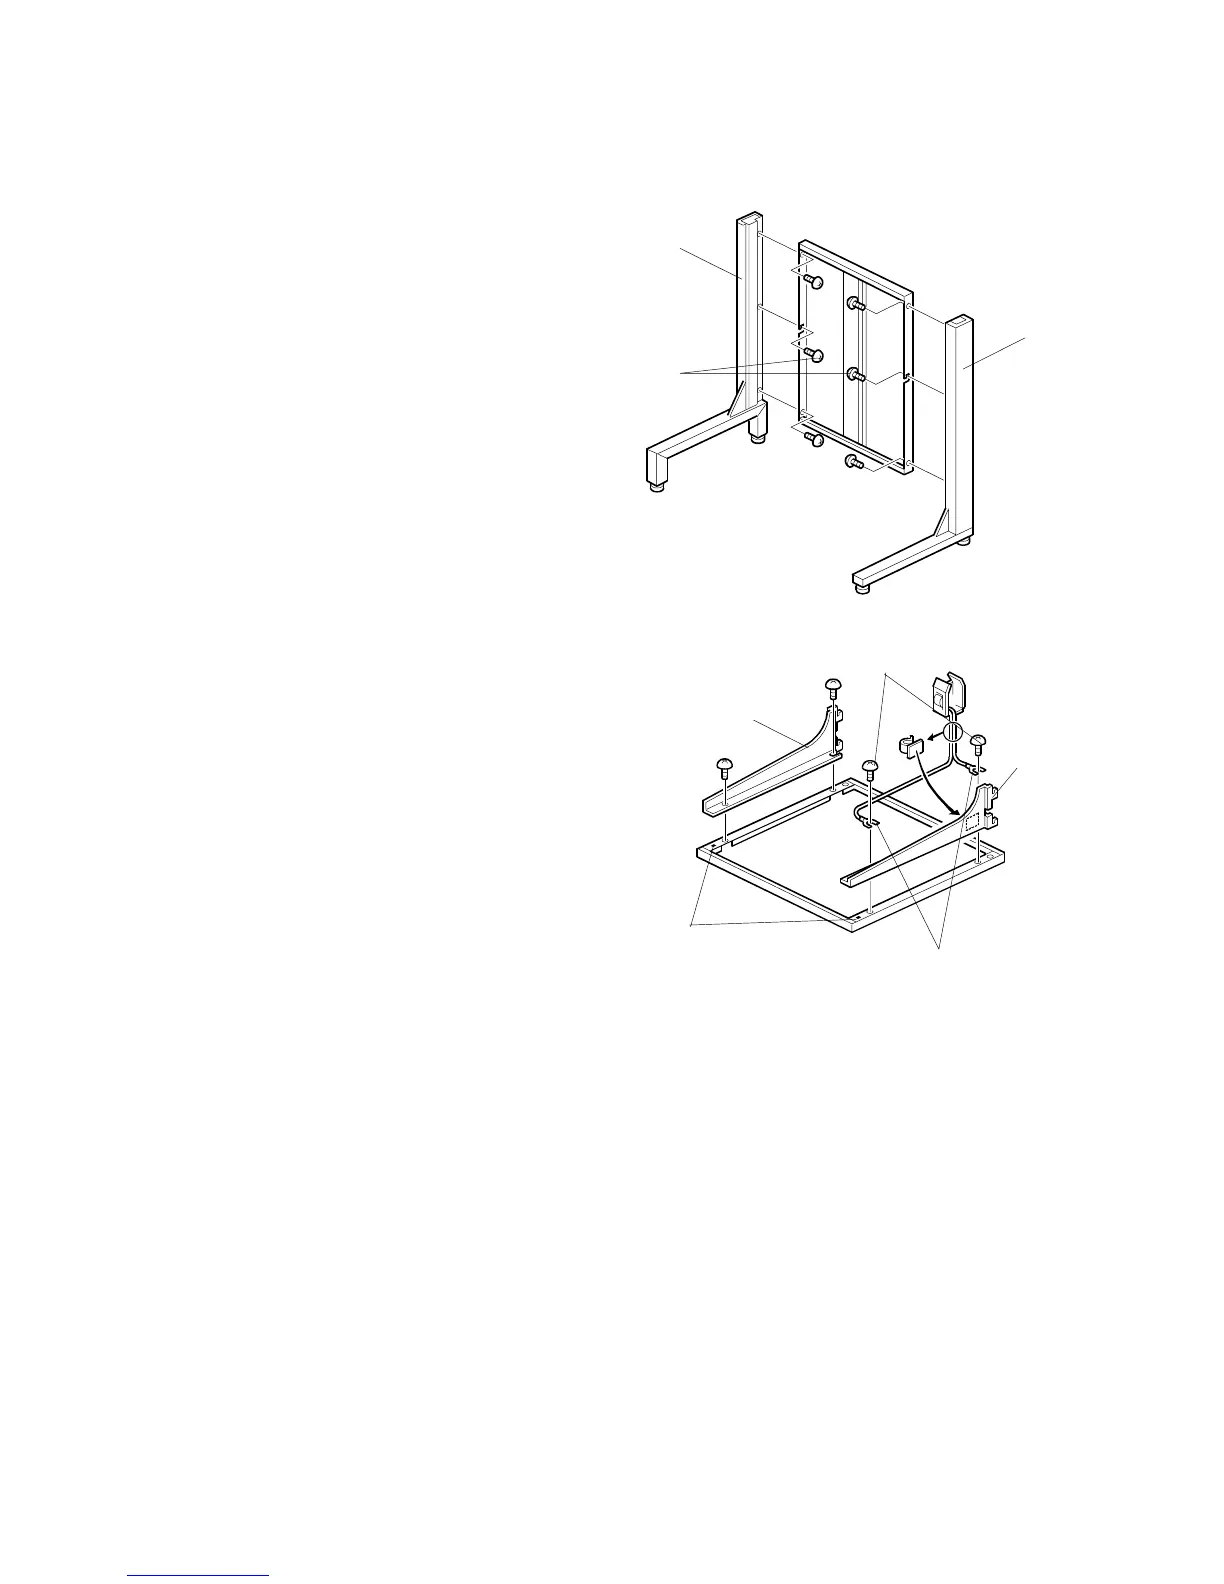
Assembling the Rack
1. Insert a screw [A] about half way into
the center holes of both the left [B]
and right [C] side stands.
2. Hook the center part of the
backboard onto the 2 screws.
3. Making sure that the two side stands
are parallel, insert the remaining
screws, then tighten all 6 screws.
4. With the 2 square holes [D] in the table
board in front of you as shown, attach the
left [E] and right [F] arms. When attaching
the right arm, secure the ground wires [G]
with screws [H] as shown.
NOTE: Please make sure to orient the
table with the square holes toward
you.
G367I101.WMF
G367I102.WMF
[B]
[A]
[C]
[H]
[E]
[F]
[G]
[D]