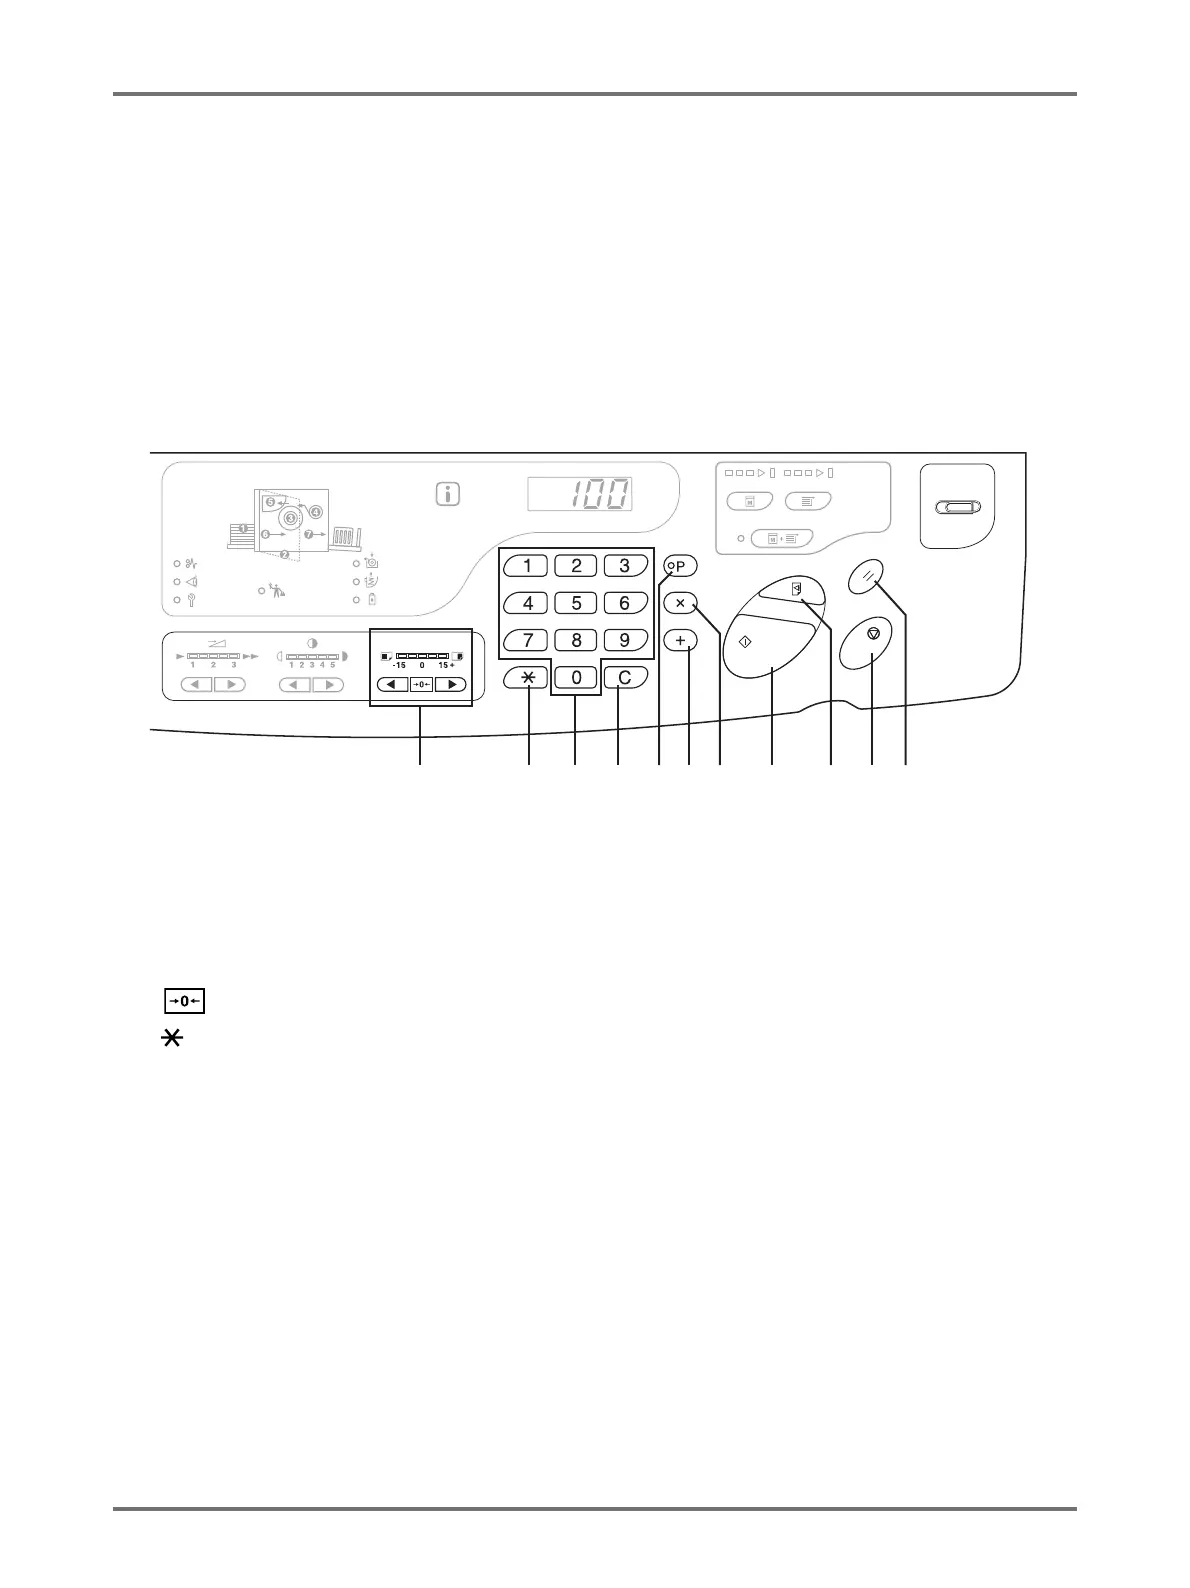
Control Panels
21
(10) Vertical Print Position Adjustment Keys/Indicator
(p.74)
Adjusts the print position in the vertical direction (within
±15 mm) after making a master.
The indicator above the keys shows the offset amount
from the center.
To clear the offset amount, press this key.
(11) Key
Use when setting up for programmed printing.
(12) Print Quantity Keys (0 to 9 keys)
Use to enter the number of copies to be printed or to
enter other numeric values.
(13) C Key
Cancels entered numeric values or resets the counter to
zero.
(14) P Key/Indicator (p.81)
Allows the machine to print and group copies as
specified.
When activated, the indicator above the key lights.
(15) + Key (p.80, p.93)
Use when setting up for programmed printing or when
changing the initial settings.
(16) × Key (p.80, p.93)
Use when setting up for programmed printing or when
changing the initial settings.
(17) Start Key/Indicator
Starts master-making or printing process or executes
specified operations.
ON: Ready to function.
Flashing: There are jobs waiting for master-making.
OFF: Not ready to function.
(18) Proof Key (p.72)
Use to check print results after adjusting the print
position, for example.
This allows you to print proof copies without affecting
the value on the Print Quantity Display.
(19) Stop Key
Stops the operation in progress.
(20) Reset Key
Returns all settings to the initial settings.
(10) (11) (12) (13) (15) (17) (19) (20)(14) (16) (18)