Control Panels
20
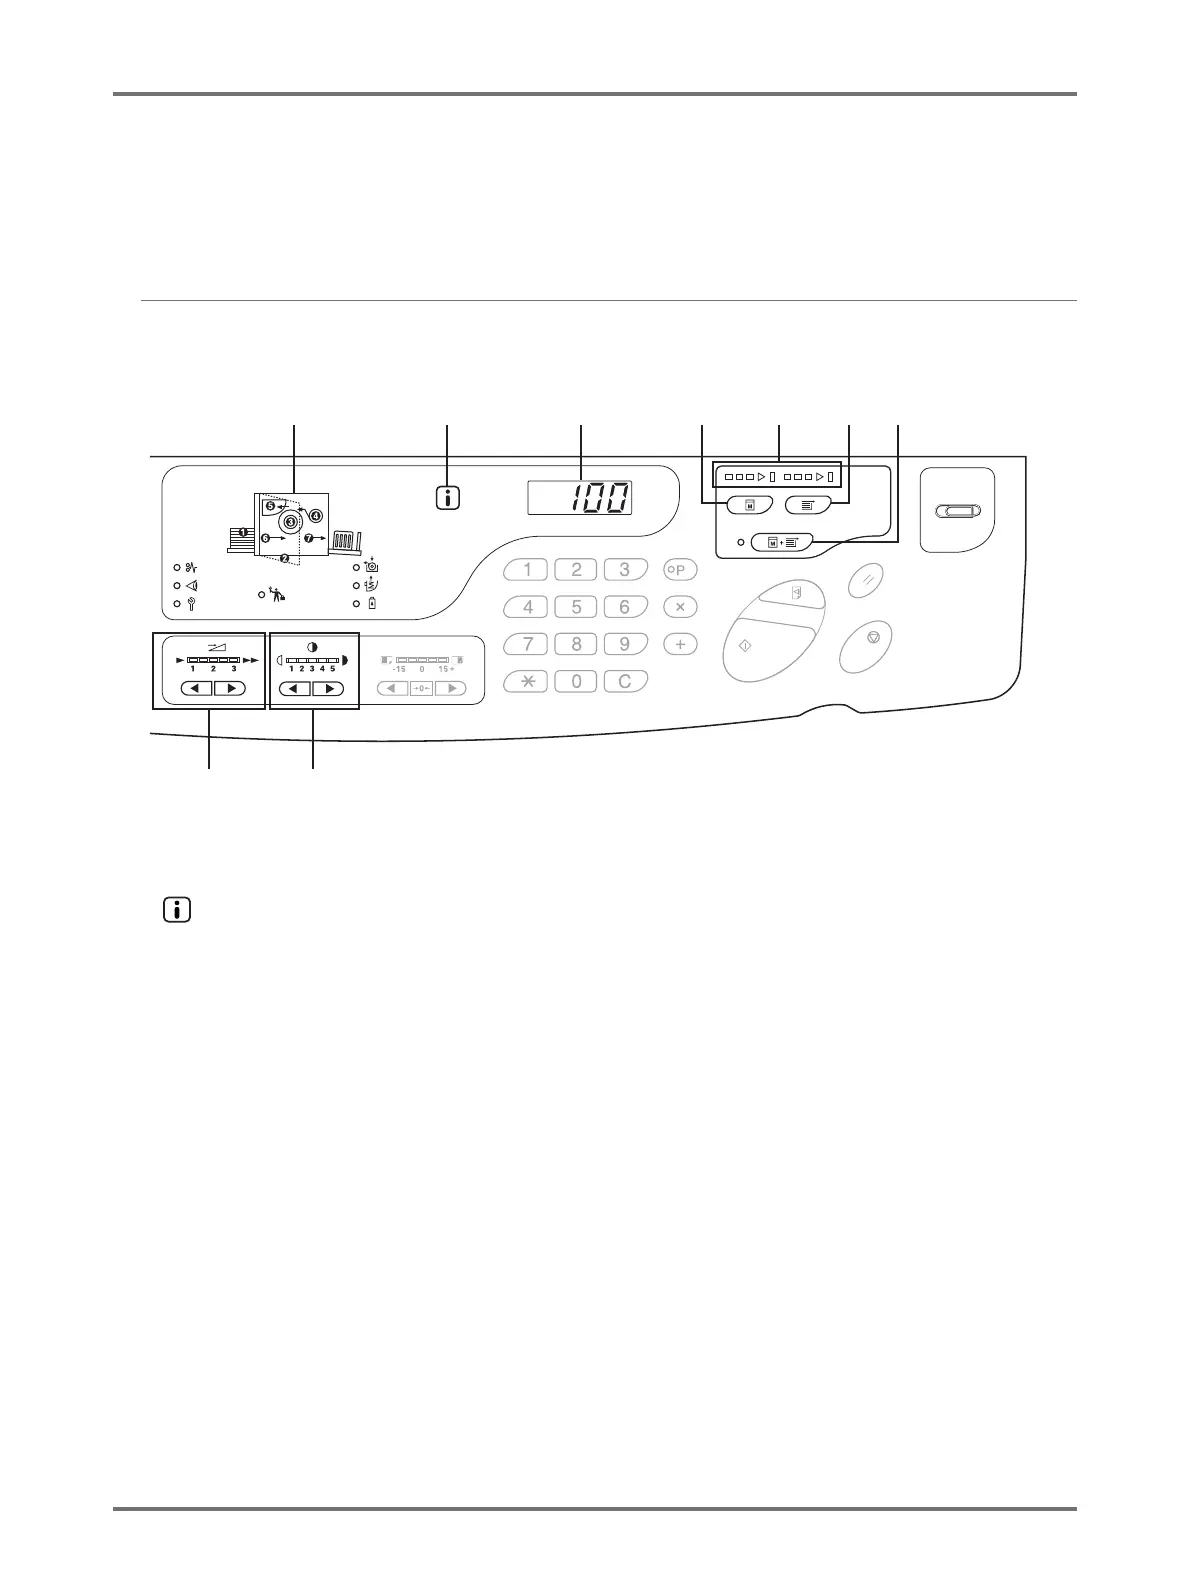
Control Panels
Main Control Panel
(1) Check & Error Display (p.124)
Indicates error locations and status.
(2) Indicator (p.124)
(3) Print Quantity Display (Error Number Display)
Shows the number of printed copies, numeric values entered
for various settings, and error numbers.
(4) Master-Making Key
Prepares the machine for making masters.
When there is a next page or multiple jobs, press the
<Start> key to carry out master-making of the next
page.
(5) Progress Arrows (p.23)
Indicates master-making and printing progress status.
When making masters is ready, all the indicators above the
Master-Making Key light.
When printing is ready, all the indicators above the Print Key
light.
(6) Print Key
Prepares the machine for printing.
When you turn the power on, the machine is in the Print
mode. You can print additionally using the master
attached to the drum at the moment.
(7) Auto-process Key/Indicator (p.68)
Performs non-stop operation from master-making
through printing.
When activated, the indicator on the left side of the key
lights.
You can check the progress status of the master-
making/printing using the Progress Arrows.
(8) Print Speed Adjustment Keys/Indicator (p.76)
Selects the print speed from three levels.
The indicator above the keys shows the current speed
level.
(9) Print Density Adjustment Keys/Indicator (p.73)
Selects the print density from five levels.
The indicator above the keys shows the current density
level.
(1)
(8) (9)
(2) (3) (4) (5) (6) (7)