1. Daily Care, Inspection and Cleaning
7-3
6) Cleaning of the Reagent bottles
Check the reagent bottles for dirt periodically. Also clean each reagent bottle at the time of solution exchange.
1. Open the door for the reagent bottle rack and remove the reagent bottle to be cleaned.
Locate the blue part at the connection port (coupler) on the instrument side and push this part toward the back of
the instrument to unlock and remove the reagent bottle.
2. Turn the bottle cap, discard the solution, and put the bottle cap back in position.
Refer to p. 7-3 for information on removing and installing the bottle cap.
3. Fill the reagent bottle with warm water of 50 to 60C in which liquid neutral detergent has been dissolved, attach
the plug and bottle cap, and shake the bottle well.
4. Remove the bottle cap and discard the detergent in the reagent bottle, and then put warm water not hotter than
60C to rinse the bottle.
5. Remove the plug and bottle cap and dry the reagent bottle, plug and bottle cap.
6. Install the plug and bottle cap on the reagent bottle.
7. Return the reagent bottle in its original position, and close the reagent bottle rack door.
Rinse the bottle thoroughly to remove all detergent before use. If detergent remains,
the tissue processing may be impaired.
When cleaning the reagent bottle, do not use a brush or any other tool that may
scratch the surface of the bottle. The chemical resistant surface treatment of the
reagent bottle may lose its intended effect.
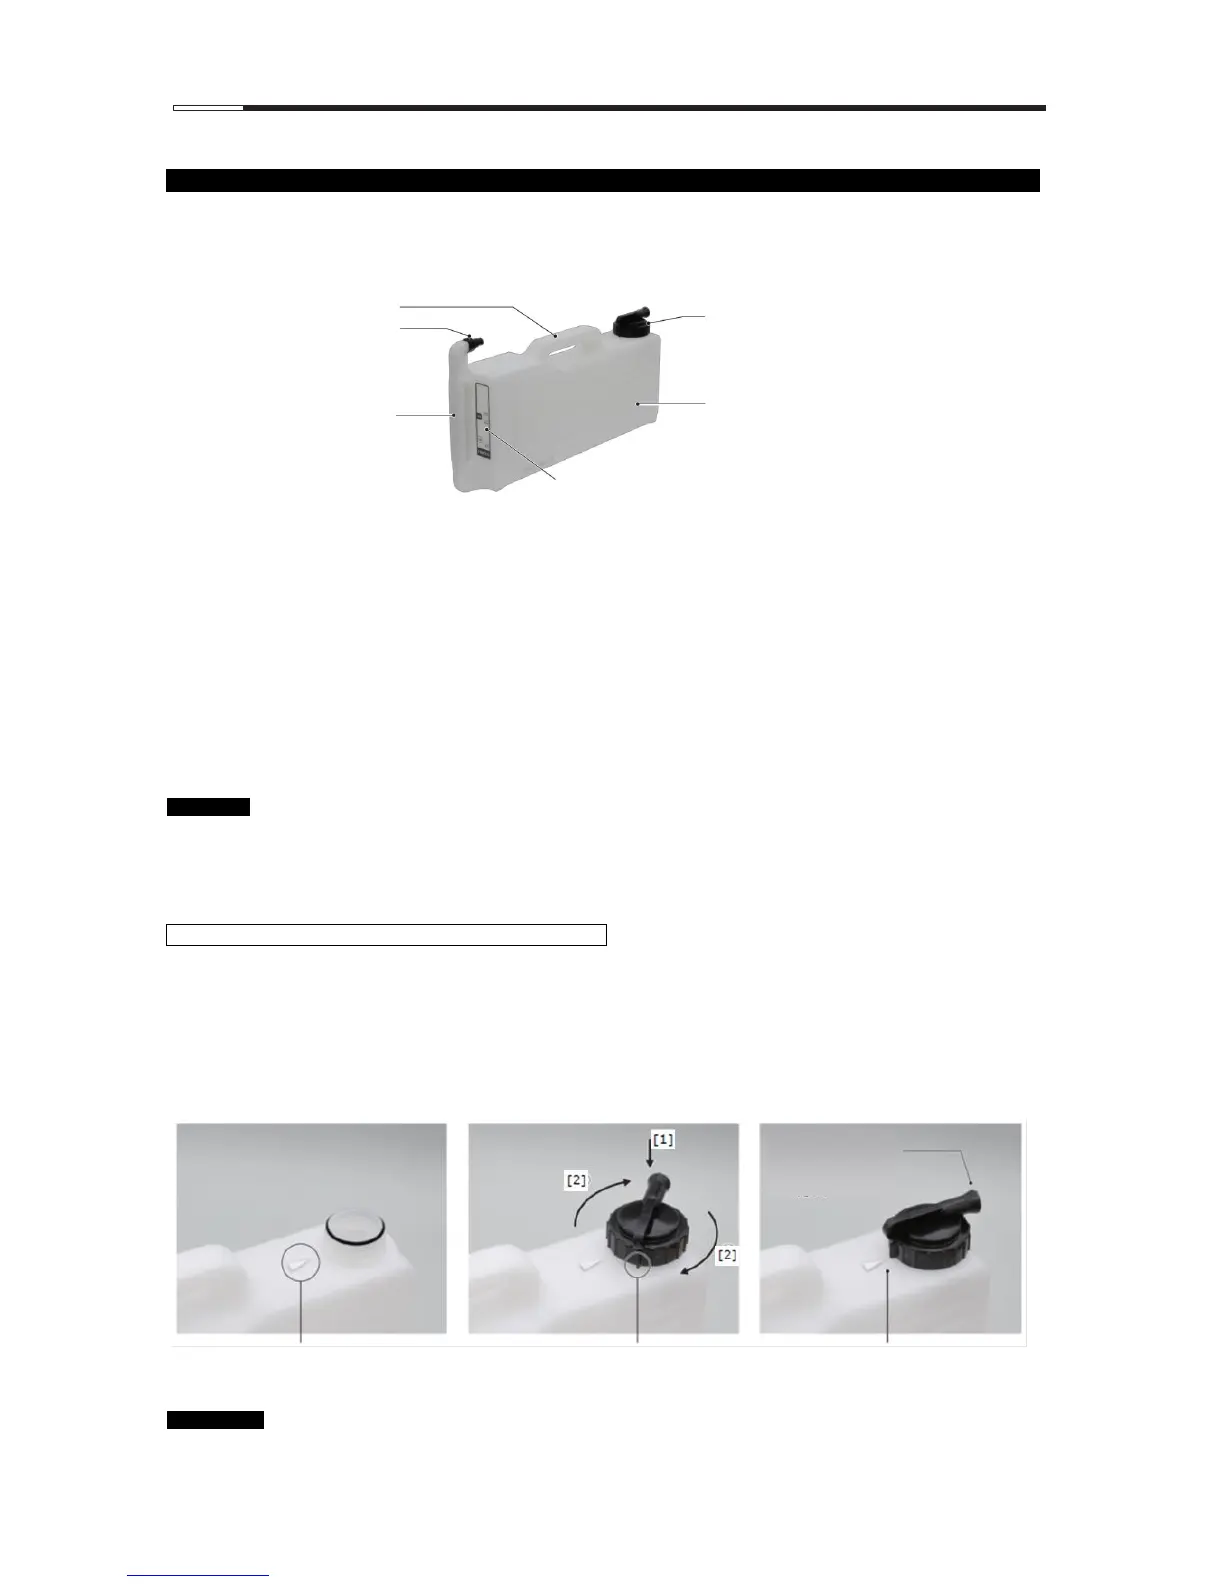
1] Removing and installing a bottle cap
Removing the bottle cap
Turn the bottle cap counterclockwise to remove the cap.
Installing the bottle cap
Install the bottle cap on the reagent bottle [1], and tighten the cap clockwise while the cap is lightly pressed down
from the top [2]. Make sure the mark on the reagent bottle aligns with the most pointed part along the
circumference of the bottle cap. When the bottle cap is installed correctly, the connection port of the bottle cap
faces outward.
Make sure that the gap between the cap and the solution reservoir is 0 – 1mm and is also
parallel in position between the cap and the solution reservoir when the cap is placed.
If the cap is not installed horizontally, it may cause a fluid leak from the cap when drained.
<Front side of instrument>
<Back side of instrument>
Handle on the
top of the bottle
Handle on the
front of the bottle
When the bottle cap
is set correctly, its
connection port faces
outward.
The mark on the solution bottle side
Pointed part of the bottle cap
Set the bottle cap so that the mark
aligns with the pointed part of the bottle
cap.
 Loading...