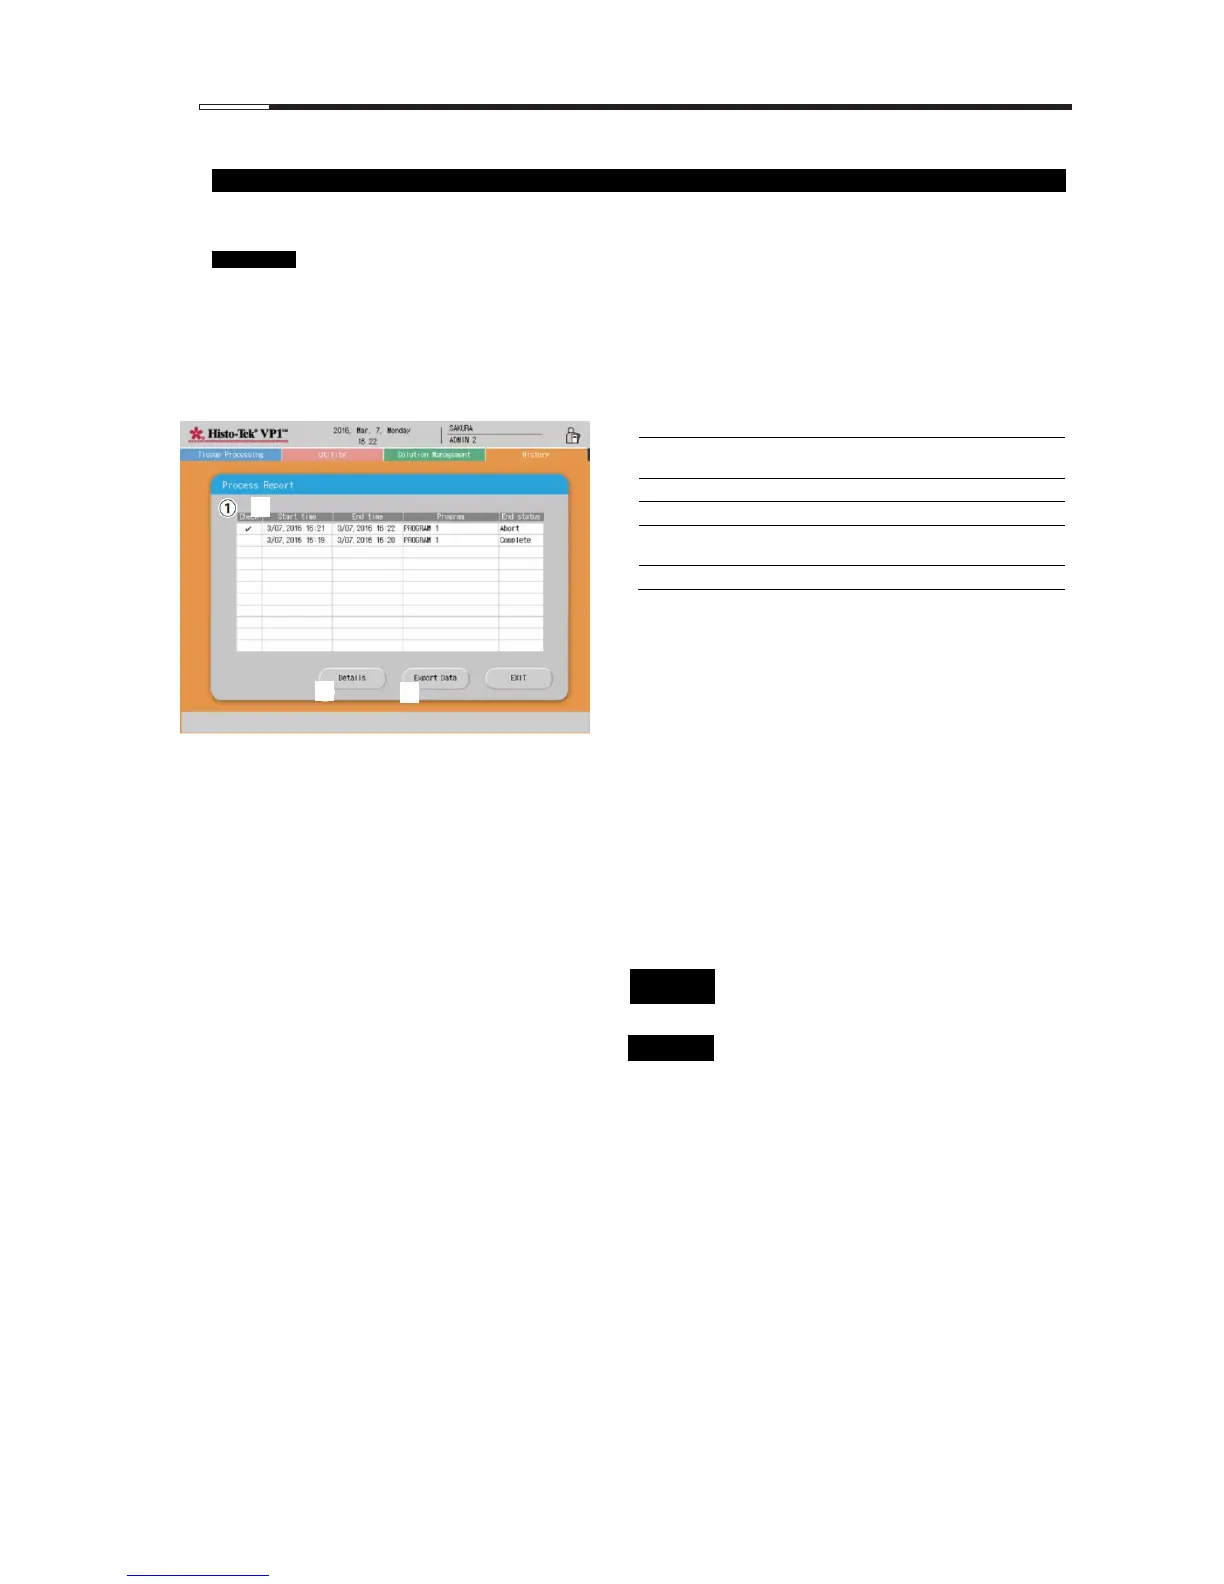
On the History tab screen, touch the Process Report icon to display the Process Report screen.
On the Process Report screen, you can check and output the tissue processing history.
If there are 12 or more results, a slide bar appears on the right side of the End status display field. You can
move the slide bar to show more results.
Up to 30 results are displayed, starting from the latest one. If 30 results are already saved, the oldest result
will be deleted the next time a new result is added.
[1] Process report display field
Add a "" mark if you want to check the
details of, or output, the process report.
Date/time the tissue processing started.
Date/time the tissue processing ended.
Name of the program used for the tissue
processing.
Result of tissue processing.
[2] Details button
Touch this button to display the details of the
processing result whose Check field is selected.
Touch the Check field of the tissue processing whose
details you want to display, to add a check mark.
Touching Details will display the Details window. If
two or more check marks are added, the details of the
latest result will be displayed.
[3] Export Data button
Touch this button to export the processing result
whose Check field is selected.
Touch the Check field of the tissue processing whose
details you want to output, to add a check mark.
Touching Export Data outputs the details of the
tissue processing result to the USB flash drive. If two
or more check marks are added, the details of all
selected results will be output.
Please connect the USB flash drive after
touching the Export Data button.
Use an optional USB flash drive.
 Loading...