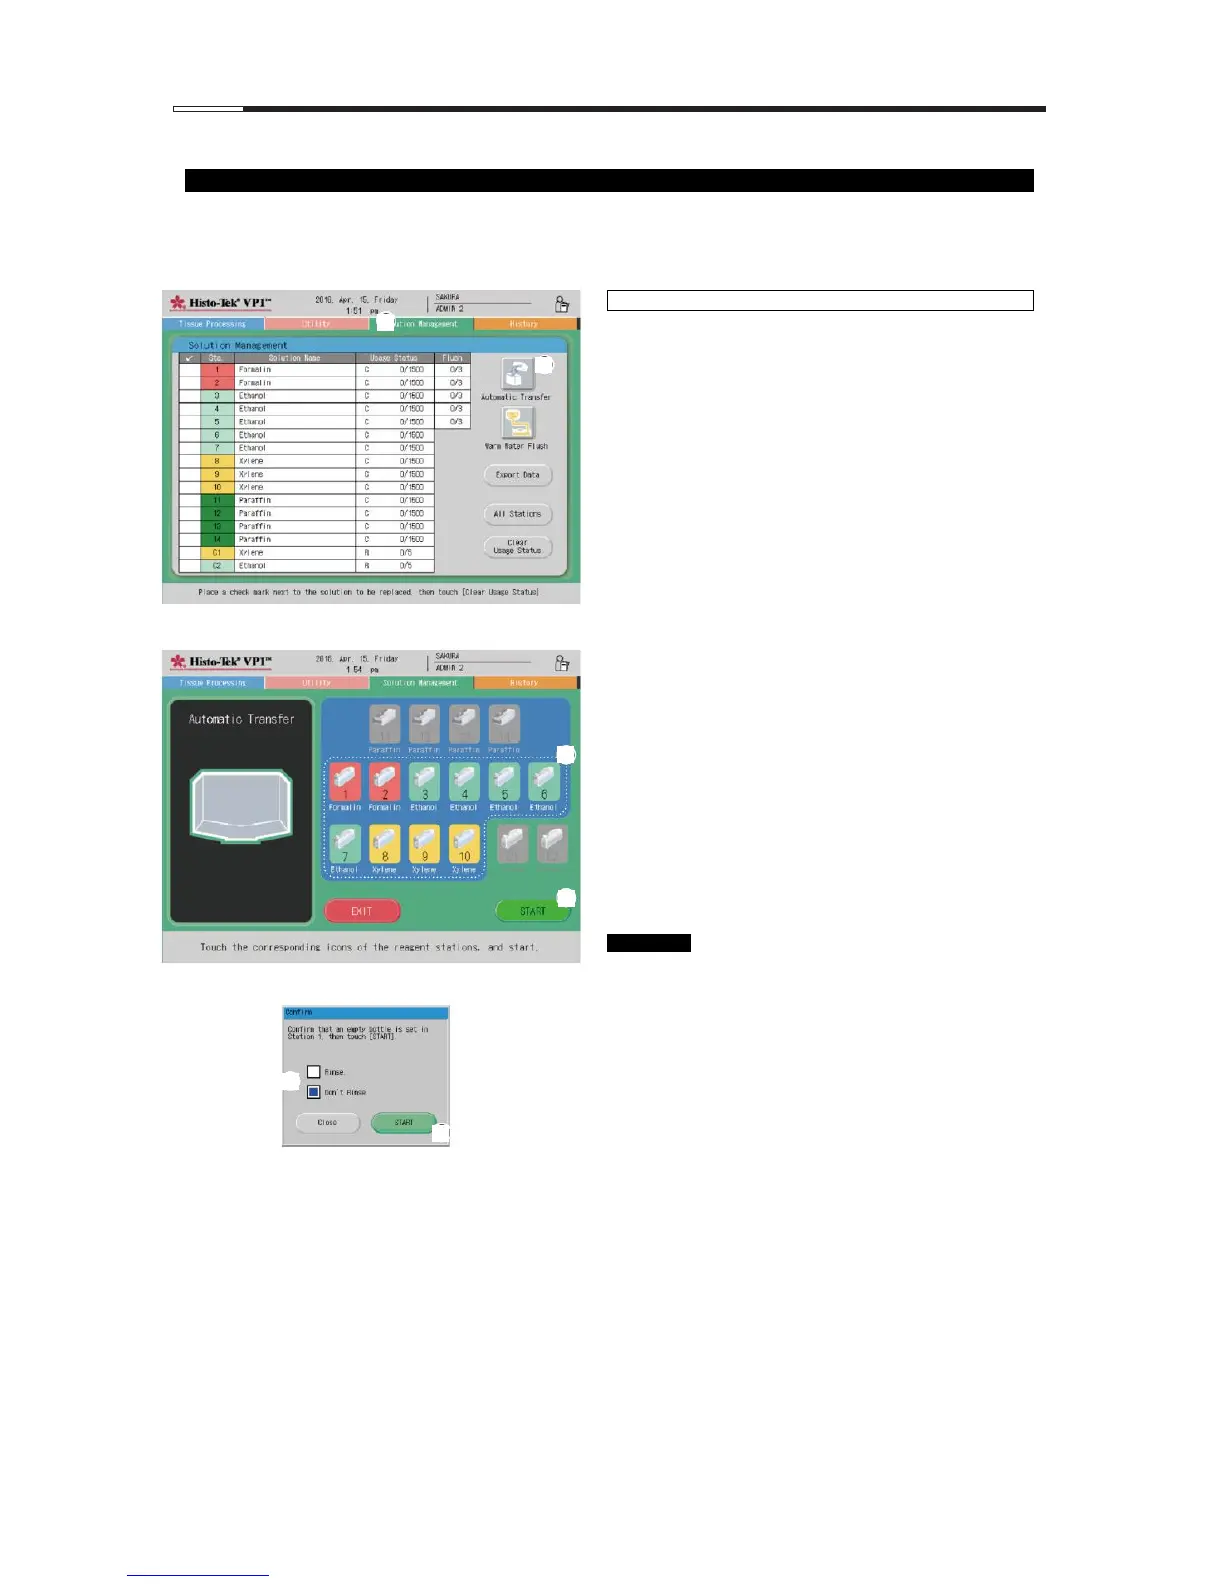
1. Touch the Solution Management tab [1] to move to
the Solution Management screen.
2. Touch the Automatic Transfer icon [2]. The automatic
transfer start screen appears.
3. Select the solution group to perform automatic
transfer for.
Select the solution group to perform automatic
transfer for, by touching one of Sta. 1 to Sta. 10 in
that group in the solution configuration diagram [3].
The stations belonging to the same solution group as
the touched station blink. Similarly, to select another
solution group, touch any of the stations in that
solution group. The stations in the newly selected
solution group blink and the stations that were
blinking before return to steady illumination.
4. Select a solution group and touch START [4].
The Confirm window appears.
5. Select whether to perform rinsing after automatic
transfer [5].
To perform rinsing, select the Rinse (C2) check box.
To not perform rinsing, select the Don't Rinse check
box. When Rinse is selected, the instrument will
move to Sta. C2 (cleaning alcohol) and fill and drain it
once, following the automatic transfer at the last
station.
6. Set an empty bottle in the station specified by the
message (loading station), and touch START [6].
Automatic transfer will start.
7. When the automatic transfer is complete, add new
solution manually to the station specified by the
message (last station).
Multiple solution groups cannot be specified.
A solution group to which only one station
belongs cannot be specified.
In the selected solution group, the station of
the smallest station number is decided as the
loading station, and the station of the largest
station number is decided as the last station.
 Loading...