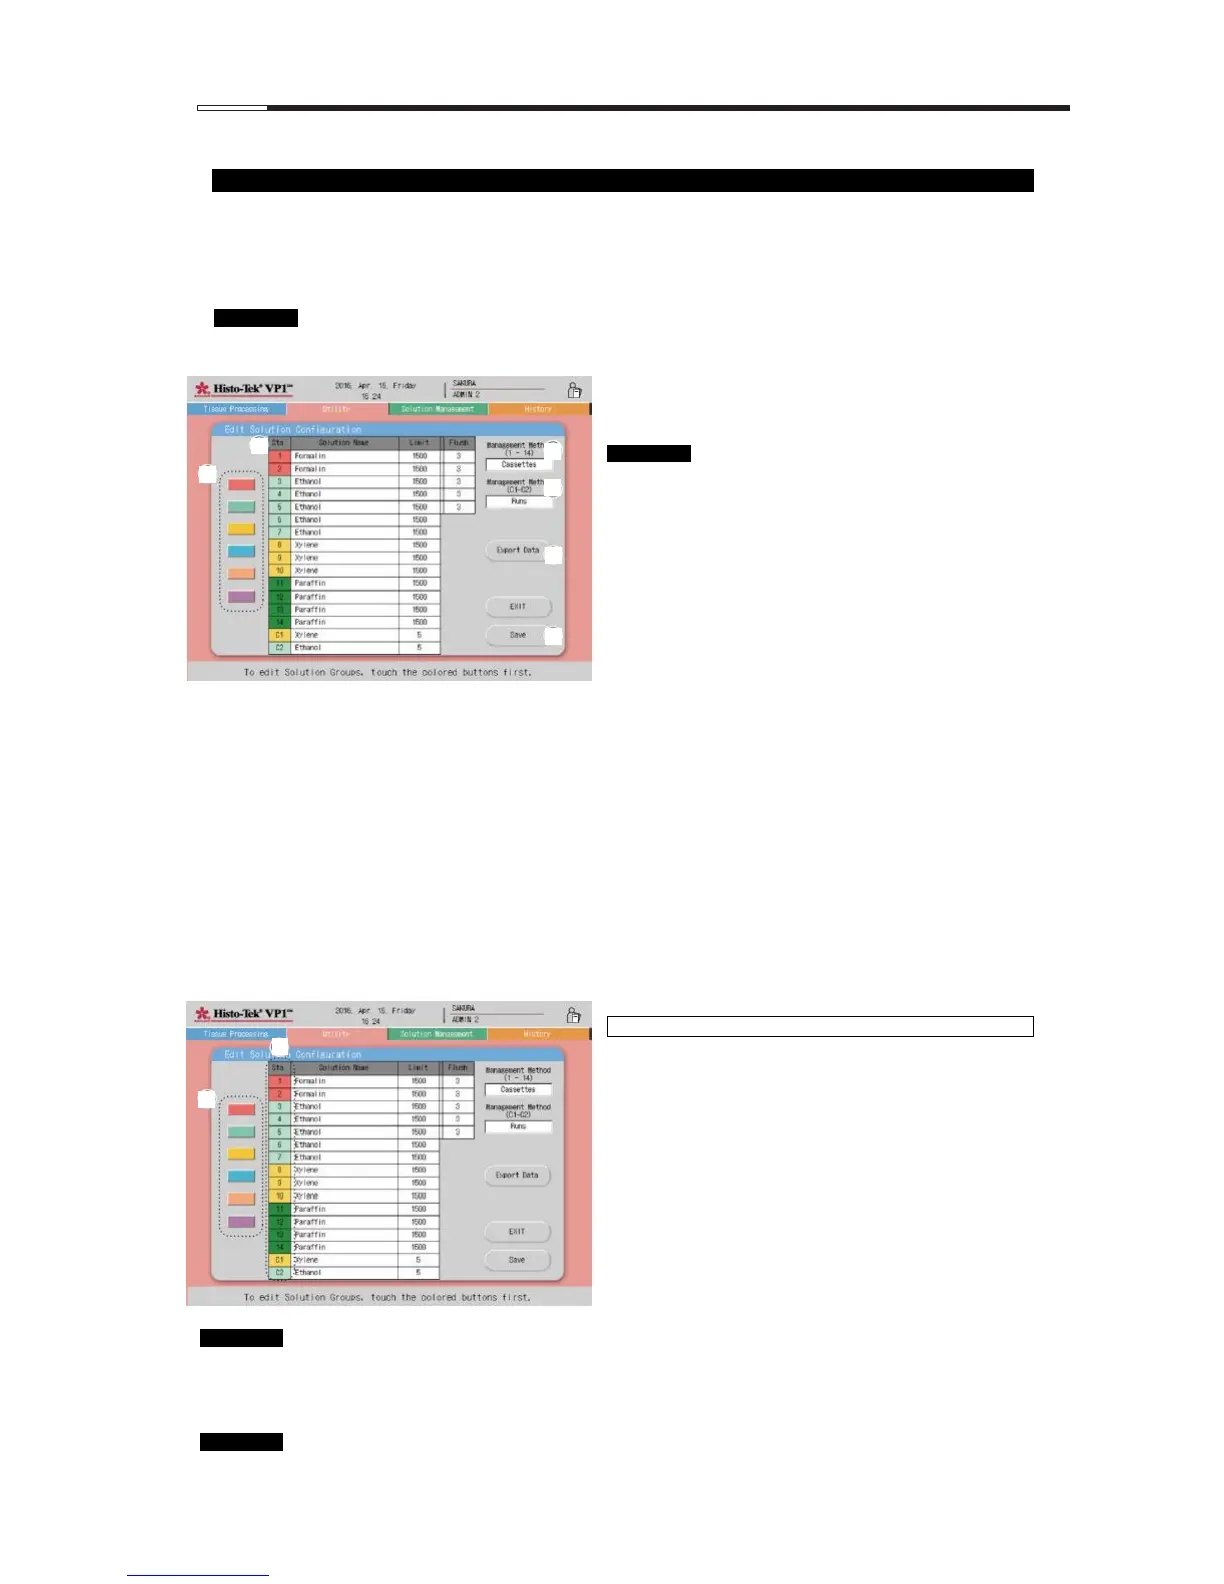
2) Edit Solution Configuration
On the Utility tab screen, touch the Edit Solution Configuration icon to open the Edit Solution Configuration
screen.
A solution group can be set for Sta. 1 to Sta. 10 on the Edit Solution Configuration screen. Up to six solution
groups can be set. Sta. 11 to Sta. 14 are fixed as a paraffin group. Sta. C1 and Sta. C2 are fixed as a cleaning
solution group.
The solution configuration cannot be edited during automatic operation (tissue processing, each
cleaning operation or solution exchange).
[1] Solution group color icon buttons
A solution group can be set by touching a color
button.
There are buttons of six colors, corresponding
to the color labels attached to the reagent
bottles. To prevent putting solutions in wrong
bottles, make sure the solution group colors
match the color labels attached to the reagent
bottles.
[2] Solution configuration display field
The solution configuration is displayed.
You can change the "Solution name," "Limit value"
and "Flush count" by touching the respective fields.
[3] Usage management (Sta. 1 - Sta. 14) display field
The usage management method for Sta. 1 to Sta. 14
is displayed. A desired usage management method
can be set from among "Days," "Runs," "Cassettes"
and "NONE," by touching the display field.
[4] Usage management (C1 - C2) display field
The usage management method for C1 and C2 is
displayed. A desired usage management method can
be set from among "Days," "Runs," and "NONE," by
touching the display field.
[5] Export Data button
Use this button to export the solution configuration.
[6] Save button
Use this button to save the settings.
[1] Setting a solution group
1. Among the "Solution group color icon" buttons [1],
touch the button of the color you want to set.
2. In the "Sta." column [2] in the solution configuration
display field, touch the first station number of the
solution group you want to set. Next, touch the last
station number, and a solution group will be set.
To set a solution group that includes only one station,
touch the same station number twice.
3. To set another solution group, repeat the operations
in 1 and 2.
Touching Save saves the settings, after which the
Utility screen will be displayed.
A solution group that includes stations between Sta. 1 and Sta. 10 can be set. C1 and C2 can be set to
the same color as the color of a solution group that includes stations between Sta. 1 and Sta. 10, but C1
and C2 will not belong to the same solution group because they constitute an independent cleaning
solution group.
The solution group is determined by the background color of the station number, not by the solution
name. Check if the background color of the station number matches the solution name.
Only the EXIT button and Export Data button can be operated while a solution group is being set.
An explanation window appears every time Save is touched.
 Loading...