1. Operating Procedure
2-4
Work on a flat table.
Exercise due caution when handling solutions. Follow the relevant regulations and guidelines in your
country or region and take proper measures to protect the operator, such as wearing gloves, mask and/or
safety goggles.
1. Remove the reagent bottle.
2. Remove the bottle cap by turning it counterclockwise.
3. Add solution to the level on the scale corresponding to the required volume. Refer to the table below for the
volumes.
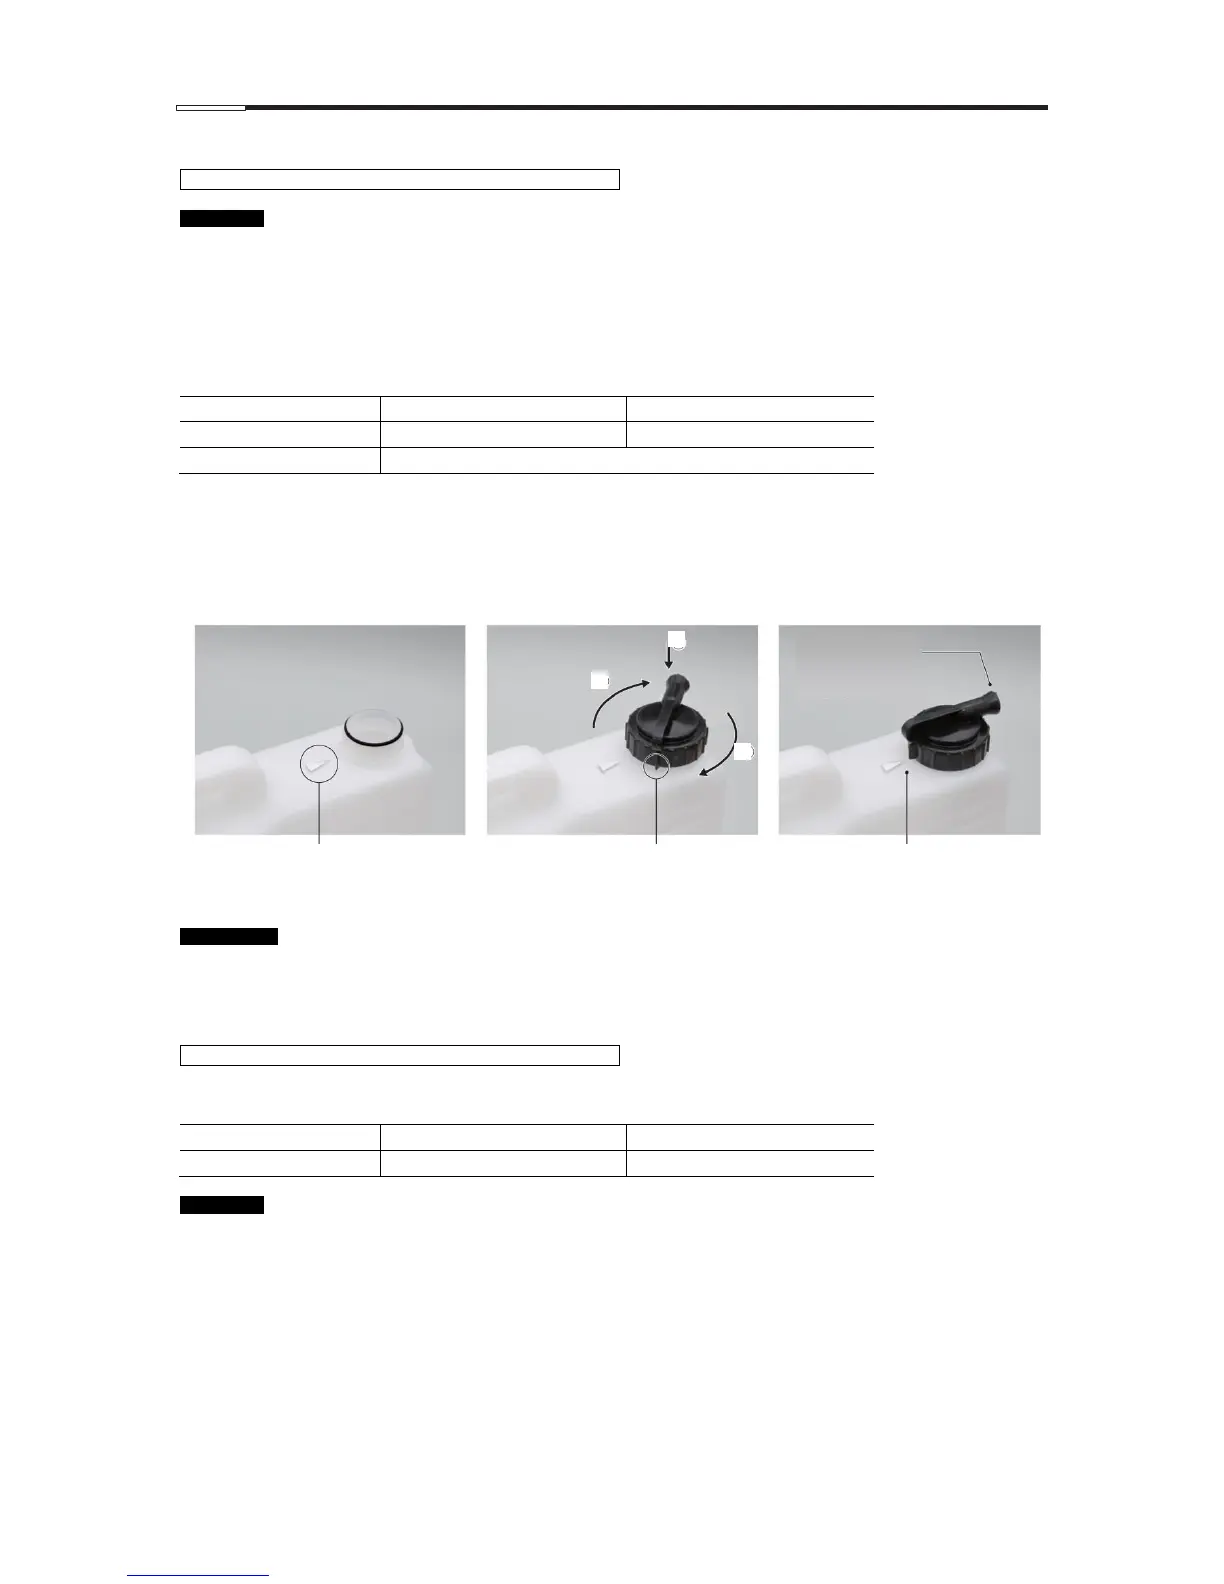
4. Install the bottle cap.
Install the bottle cap on the reagent bottle [1], and tighten the cap clockwise while the cap is lightly pressed
down from the top [2]. Make sure the mark on the reagent bottle side aligns with the most pointed part along
the circumference of the bottle cap. When the bottle cap is installed correctly, the connection port of the bottle
cap faces outward.
5. Install the reagent bottle.
Add paraffin to the level on the scale corresponding to the required volume. Refer to the table below for the
volumes.
Work on a flat table.
Add molten paraffin.
Make sure that the gap between the cap and the solution reservoir is 0 – 1mm and is also
parallel in position between the cap and the solution reservoir when the cap is placed.
If the cap is not installed horizontally, it may cause a fluid leak from the cap when drained.
Pointed part of the bottle cap
Set the bottle cap so that the mark
aligns with the pointed part of the bottle
cap.
When the bottle cap
is set correctly, its
connection port
faces outward.
The mark on the reagent bottle side
 Loading...