1. Safety Precautions (e)
Chapter 1 Basic Knowledge of the Instrument
1. Installation Method 1-1
1) Installation of the Instrument 1-1
[1] Flow of installation 1-1
[2] Required tools 1-1
[3] Installation Environment 1-1
2) Checking the Installation Conditions 1-2
3) Checking the Work Area 1-3
4) Transporting the Instrument 1-3
5) Unpacking Procedure 1-4
[1] Unpacking the instrument 1-4
[2] Removing the fixing members inside the instrument 1-5
[3] How to operate the retort lid 1-6
[4] How to operate the fume control unit door 1-7
[5] How to operate the paraffin oven door 1-7
[6] How to operate the reagent bottle rack door 1-7
6) Switching the Power-supply Voltage Setting 1-8
7) Checking the Accessories 1-8
8) Checking the Installation (Securing the Instrument) 1-9
9) Installation check (Installing the accessories) 1-9
[1] Installing the spill tray (for paraffin oven) 1-9
[2] Installing the spill tray (for reagent bottle rack) 1-9
[3] Installing the activated carbon filter base and activated carbon filters 1-10
[4] How to set the reagent bottle 1-11
[5] How to attach labels 1-12
[6] How to set the paraffin container 1-13
10) Turning on the Power 1-13
2. Explanation of the Instrument 1-14
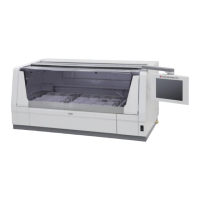
1) Overview of the Instrument 1-14
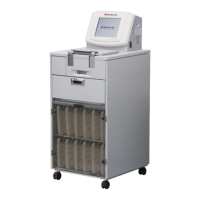
3. Name of Each Part 1-15
4. Standard Accessories/Options 1-17
5. Basic Knowledge 1-19
1) Specification 1-19
2) Input Method 1-20
[1] Using the touch keyboard 1-20
[2] Using the ten-key keypad 1-20
3) Log On/Log Off Function and Password Function 1-21
[1] Default passwords 1-21
[2] List of operations permitted to managers and users 1-21
4) Mixing During Tissue Processing 1-21
5) Automatic Transfer 1-22
6) Solution Station and Solution Group 1-22
7) Explanation of Screens 1-23
[1] Header 1-24
[2] Menu tab 1-24
[3] Main screen 1-24
[4] Screen footer 1-24
8) Explanation of the Stand-by Screen 1-25
9) Explanation of Tissue Processing Screen 1-27
10) Utility Screen 1-29
11) Solution Management Screen 1-30
12) History Screen 1-31
 Loading...