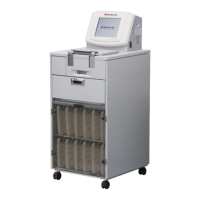
How to attach processing labels and cleaning labels
Processing/cleaning labels provide important information for checking the solution level (p. 2-3), so attach them
correctly. Find a concaved part with flat surface where the handle is on the front face of the bottle. Attach a label
there. Flat surface is found on the left and right of the handle. Attach a label on one side. When attaching the
label, make sure it perfectly fits the concave and runs vertically to the bottle. If the label deviates from the
concave or is attached at an angle, the solution level can no longer be checked properly.
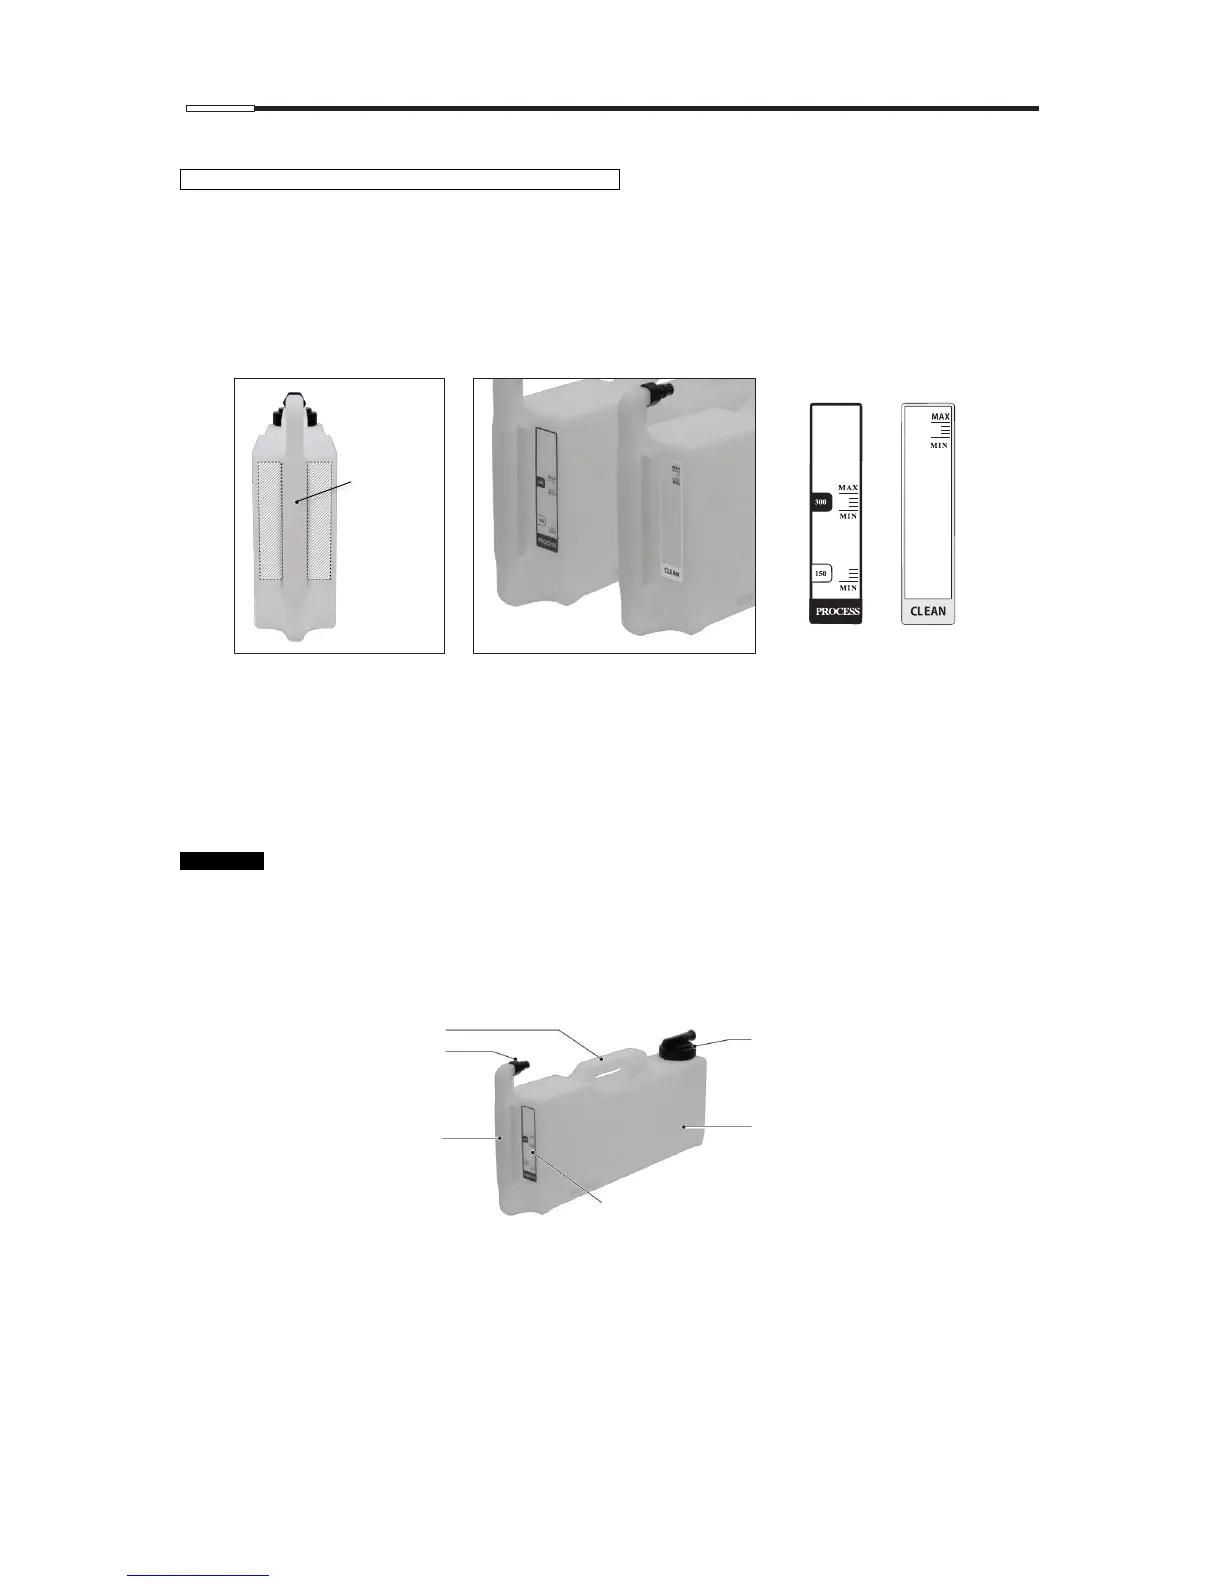
How to attach color labels
Labels in six colors (total eight labels) are provided to identify individual solutions. Write down the solution
names on the labels and attach them on the front face of the Reagent bottles.
Do not attach the color labels around the bottle caps or plugs where they peel off easily or the scale is not
clearly visible.
Make sure the color labels correspond to the color settings of the solution configuration.
 Loading...