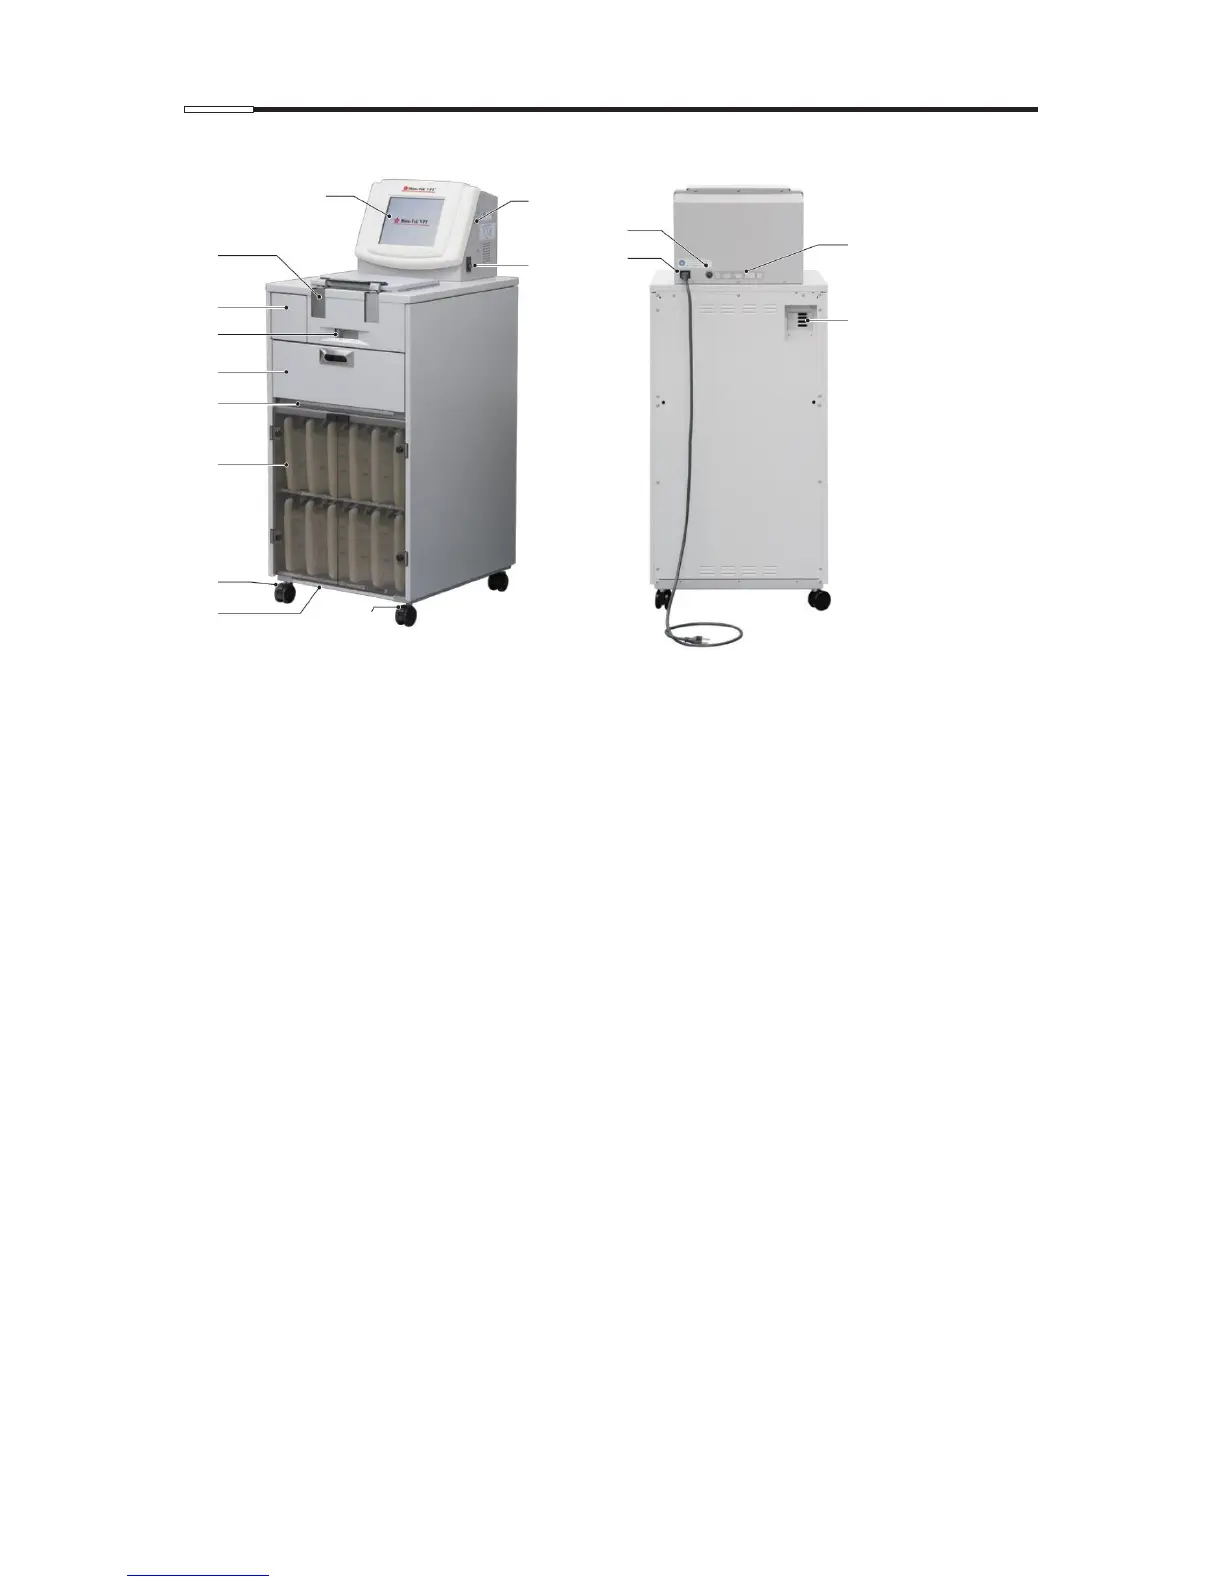
3. Name of Each Part
1-15
[1] Monitor screen (screen)
The icons used for program entry and operation and the tissue processing status are displayed.
[2] Fume control unit door
Open this door when replacing the activated carbon filters.
[3] Retort lock cover
This cover is for the hook that locks the retort lit. Slide the lever to the left/right to open/close the cover.
[4] Retort lock lever
This lever is used to cover the hook that locks the retort lid, so that it cannot be operated inadvertently. The
lever slides to the left/right, and when it is at the left position, the hook is covered. Tissue processing is
possible only when the lever is at the left position.
[5] Paraffin oven door
Open this door to access the paraffin container.
[6] Spill tray (for paraffin oven)
This tray receives the paraffin that has leaked into the paraffin oven.
[7] Reagent bottle rack door
Open this door to access the rack in which Reagent bottles are stored.
[8] Spill tray (for Reagent bottle rack)
This tray receives the solution that has leaked into the Reagent bottle rack.
[9] Main power supply (Circuit protector 1)
Turn ON/OFF the power to the instrument.
[10] Caster
These casters are used for moving the instrument.
[11] Safety stoppers
Caster stopper.
[12] Circuit protector 2
Overcurrent is protected when the supply voltage is 220 to 240 V.
[13] Inlet
Connect the power cord.
[14] External interface unit (optional)
Normally this opening is plugged. Use it to connect an optional UPS (uninterruptible power supply) or external
alarm.
[15] Exhaust port
Air treated in the fume control unit is released from here. By installing an optional exhaust duct and using an
exhaust duct hose, an external exhaust duct can be connected.
[16] USB data port
You can connect an optional USB flash drive and output data to it in text format.
 Loading...