-63-
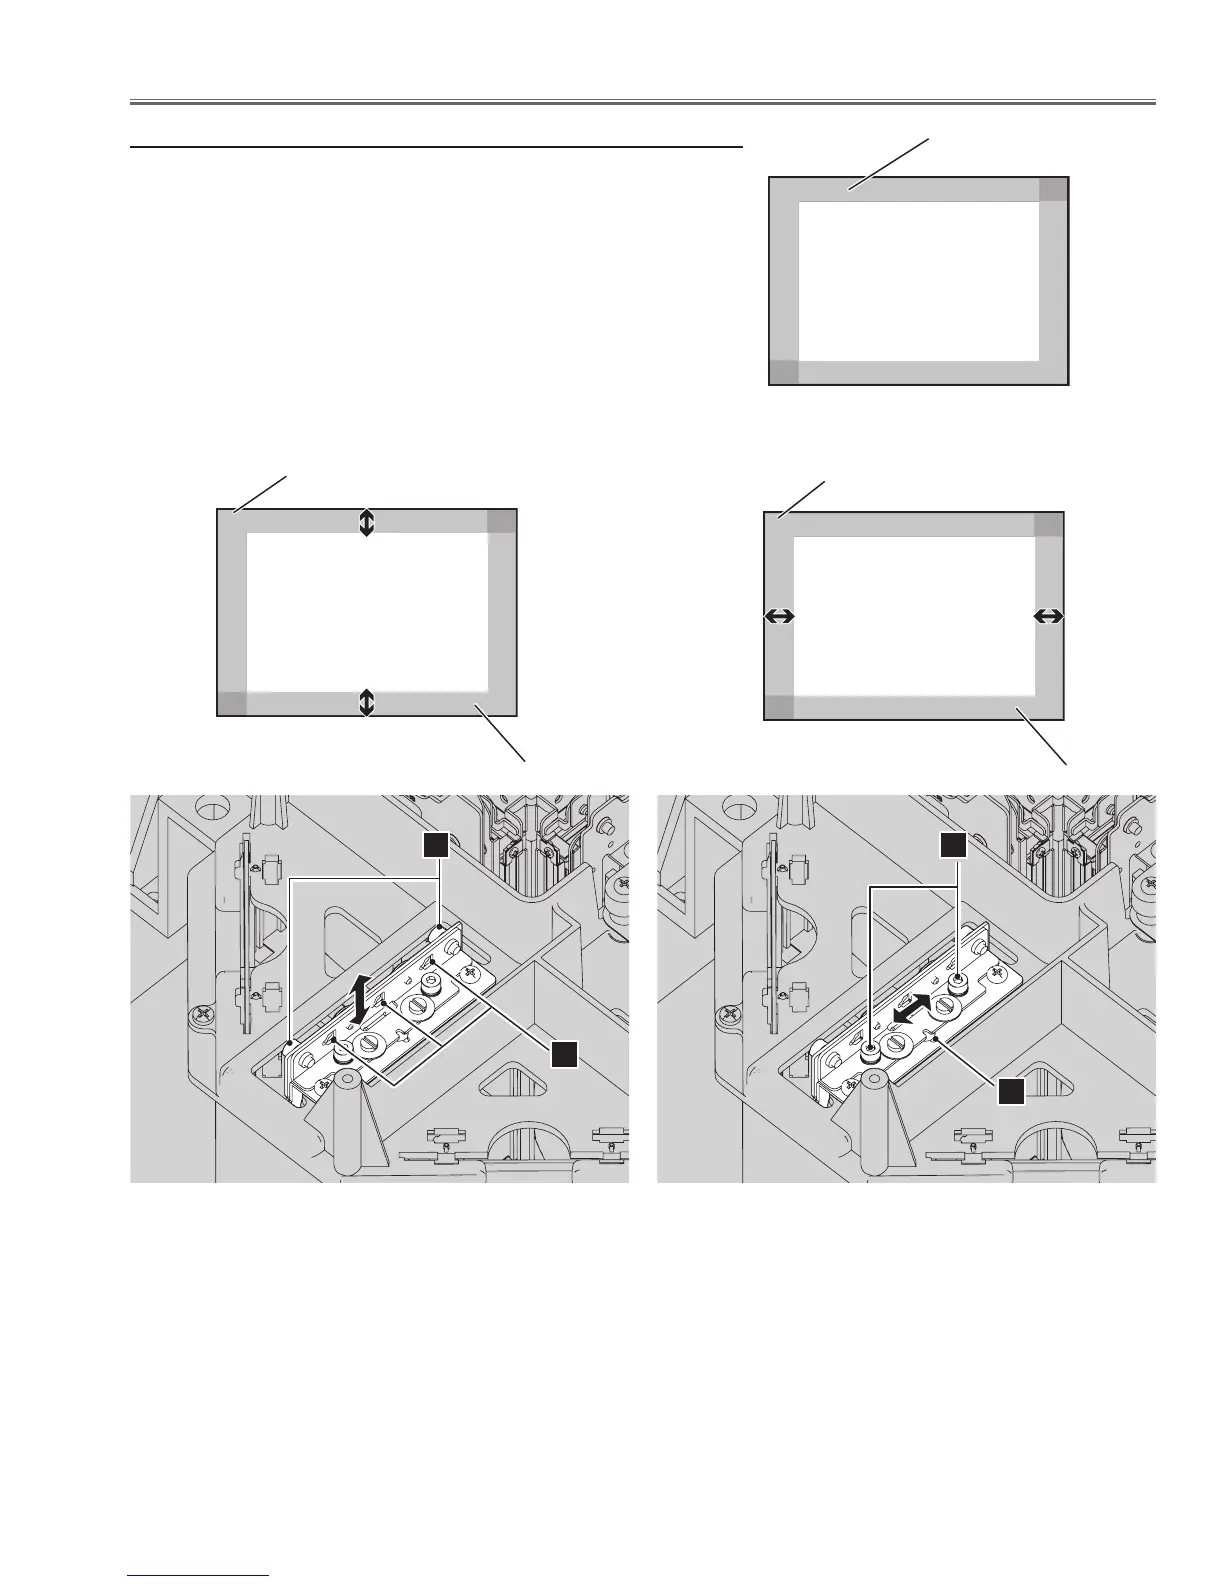
Optical Adjustment
x Relay lens adjustment
1 Move the relay lens to make the same width of yellow and blue
color-offset on the top/bottom and left/right of the screen.
1) To adjust the image vertically as shown in Fig.2-1, loosen 2
screws A, and move the slots B by using a slot screwdriver.
2) To adjust the image horizontally as shown in Fig.2-2, loosen 2
screws C, and move the slot D by using a slot screwdriver.
2 Tighten screws A and C to fix the relay lens.
Same color-offset
band width
Yellow band
Blue band
Fig.2-1
Fig.2-2
(Target screen image)
Yellow band
Blue band
A
B
C
D
 Loading...