-51-
Optical Parts Disassembly
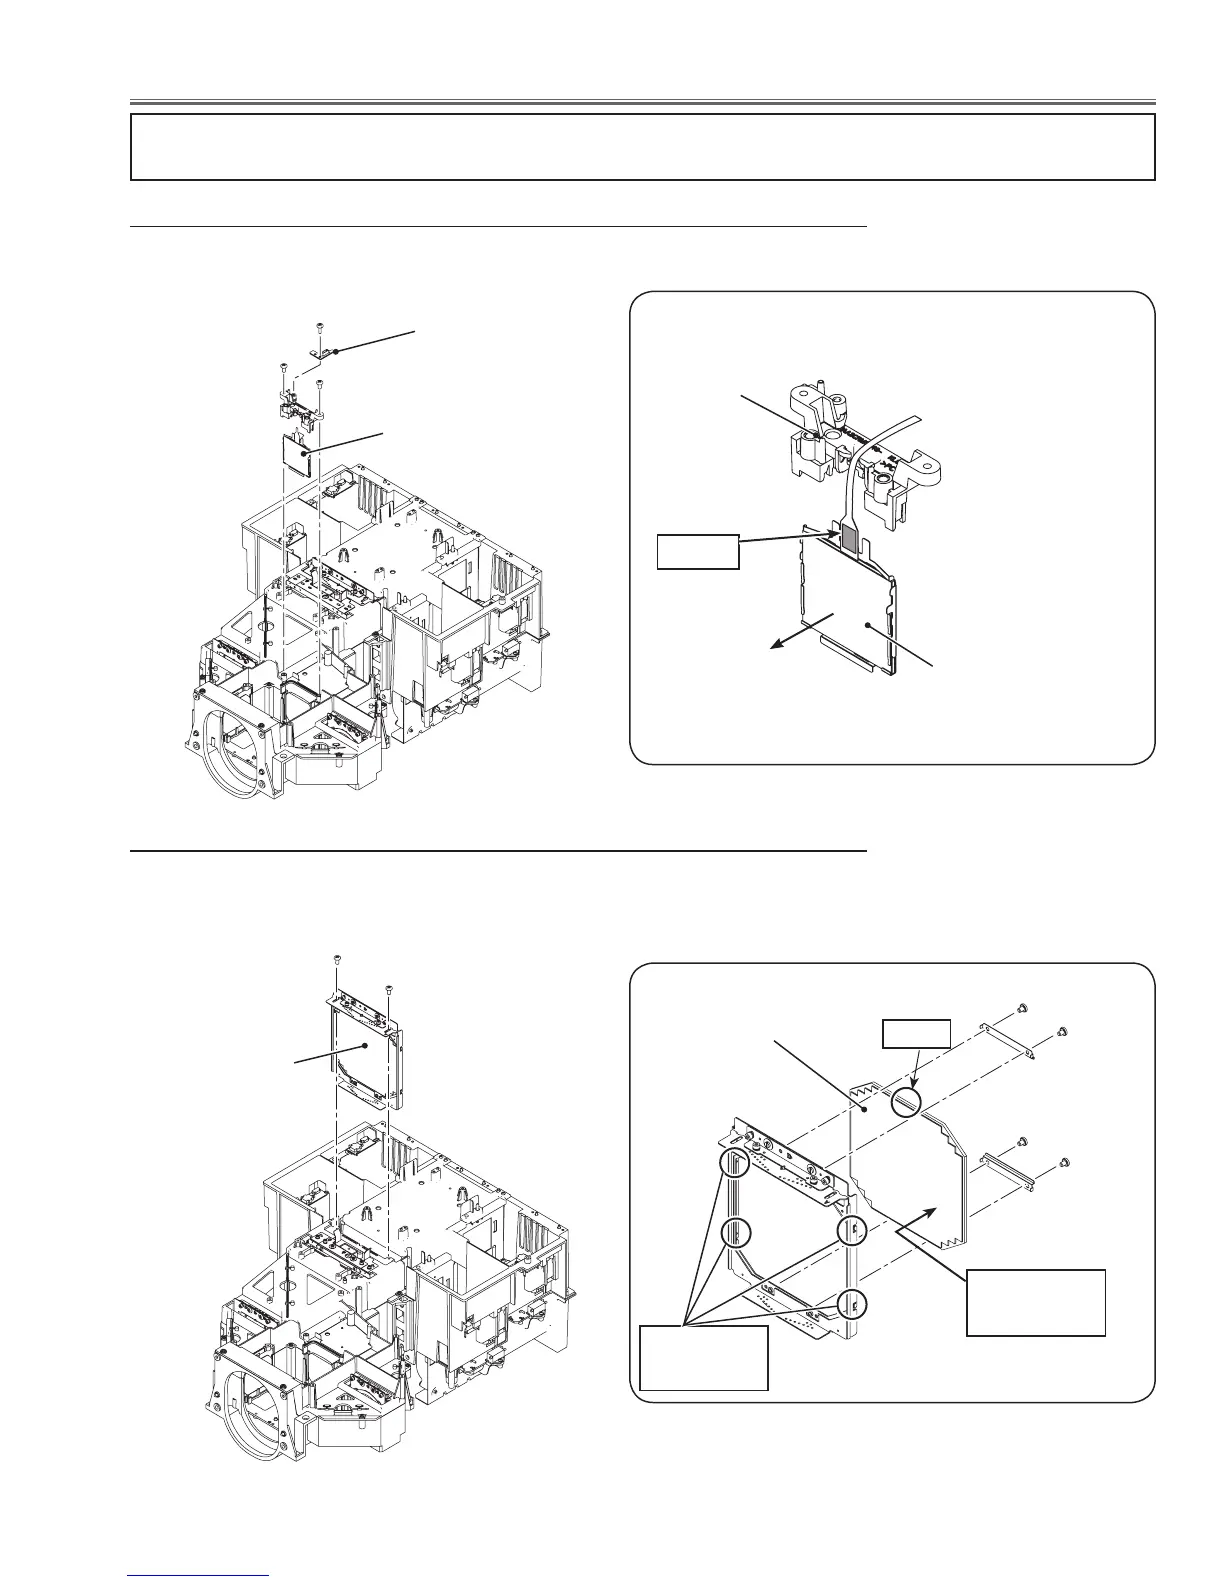
5 Integrator assy removal
Remove 2 screws-A(M3x6) and remove the integrator assy upward off.
Integrator assy
A
A
(M3x4)x2
(M3x4)x2
Integrator
Bumpy surface
comes this side.
Remove the cabinet top assy and main board before taking the following disassembly.
4 Optical filter (LC-CS) removal
Remove 1 screw-A (T3x8) to take the illumi sensor board and remove 2 screws-
B(M3x6) and YE LCD Cover, and remove the Optical filter (LC-CS) upward off.
B
A
Optical filter (LC-CS)
Optical filter (LC-CS)
QR code
Prism side
YE LCD cover
B
Illumi sensor board
Notch
Bend hooks to
fix the lens.
 Loading...