-73-
To enter the service mode
To enter the “Service Mode”, press and hold the MENU and SELECT button for more than 3 seconds, or press and
hold the MENU button on the remote control for more than 20 seconds. The service menu appears on the screen
as follows.
To adjust service data
Select the adjustment group no. by pressing the MENU button (increase) or SELECT button (decrease), and
select the adjustment item no. by pressing the pointer U or V button, and change the data value by pressing the
W or X button. Refer to the “Service adjustment data table” for further description of adjustment group no., item
no. and data value.
To exit the service mode
To exit the service mode, press the ON/STAND-BY button.
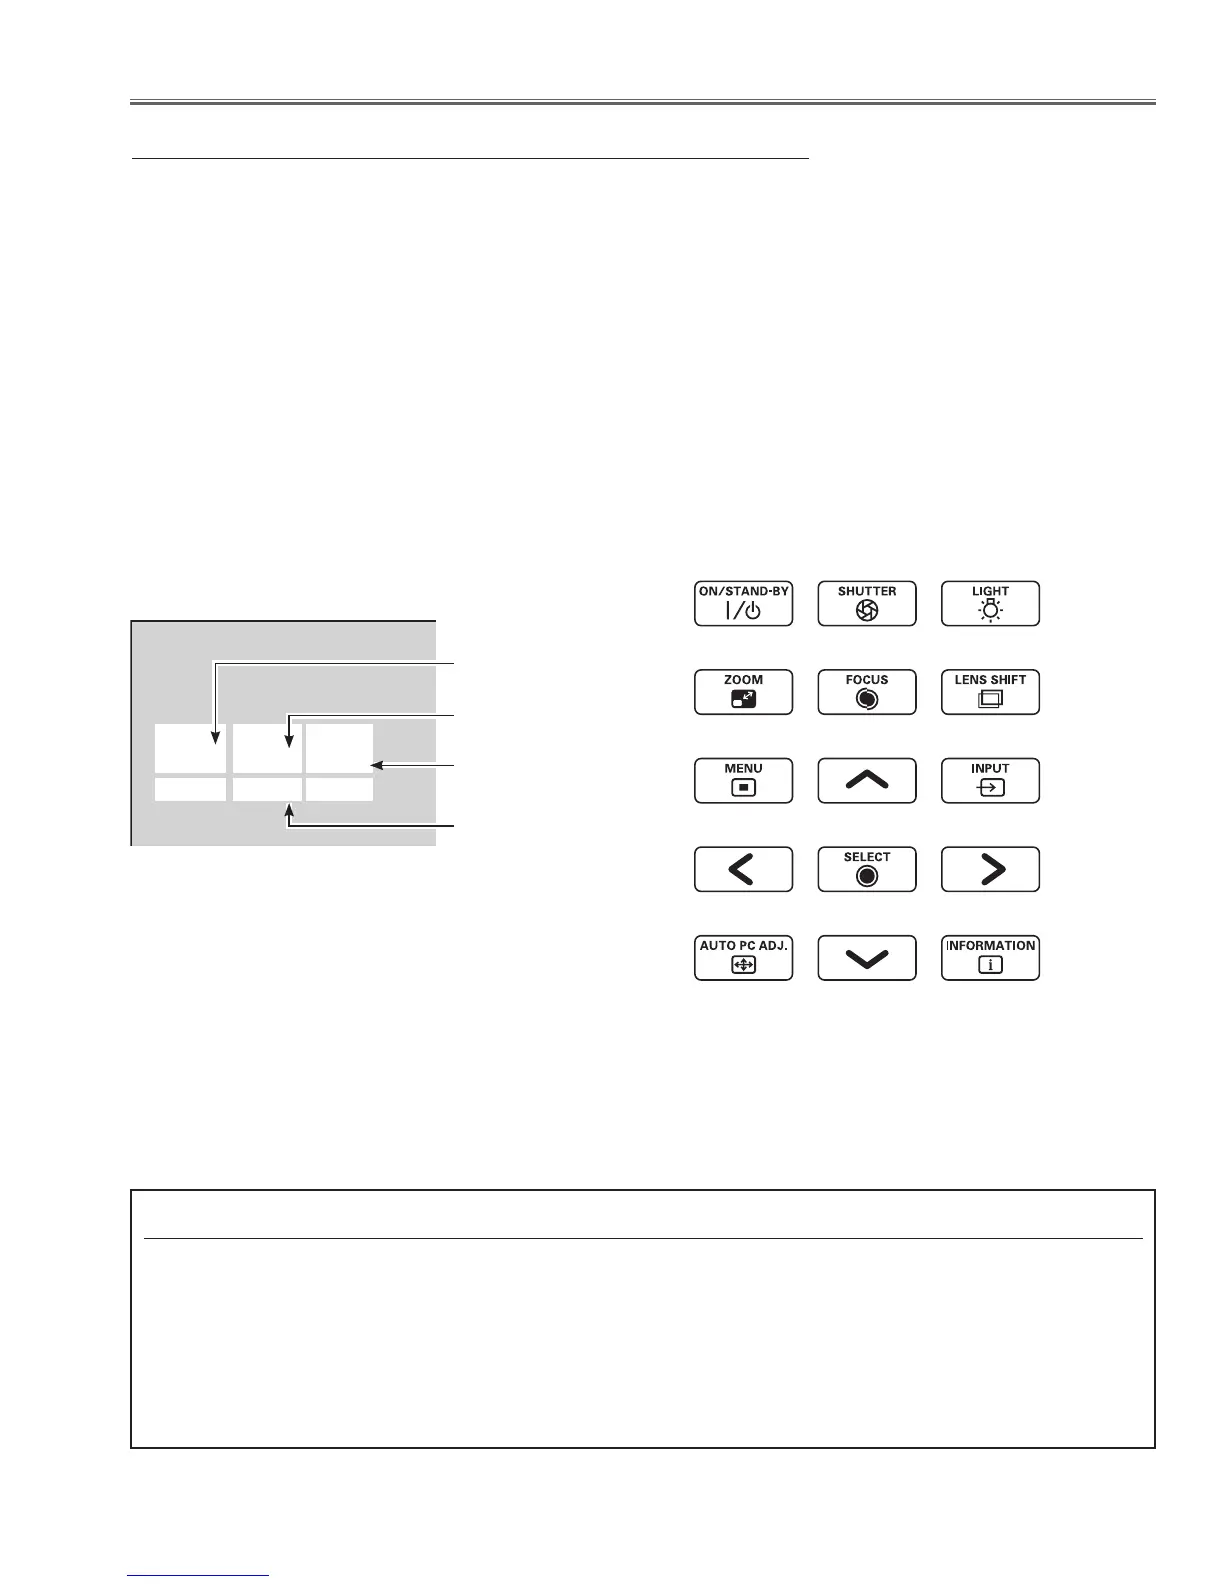
Service adjustment menu operation
Electrical Adjustments
Service Mode
Input Input 1
Image Standard
Group No. Data
0 0 32
Ver. 1.00
Data value
Item No.
Group No.
Firmware
Version No.
Disabling the wind sensor function
When the main board is replaced with new one, the projector detects the clogged filter and sets into the standby
mode because the wind sensor setting value in the memory IC on the new board is not setup correctly. To avoid
this operation, disable the wind sensor function temporarily following to the procedure below.
1. Enter the service mode, select Group No. "240" and Item No. "2". Change Data value from "1" to "0". Now the
function of wind sensor is disabled.
2. After completing the "Circuit Adjustment", set up to enable the function of the wind sensor. (Group No. "240" ,
Item No. "2", Data value is set to "1")
3. Execute the adjustment "Filter calibration".
 Loading...