-35-
Mechanical Disassembly
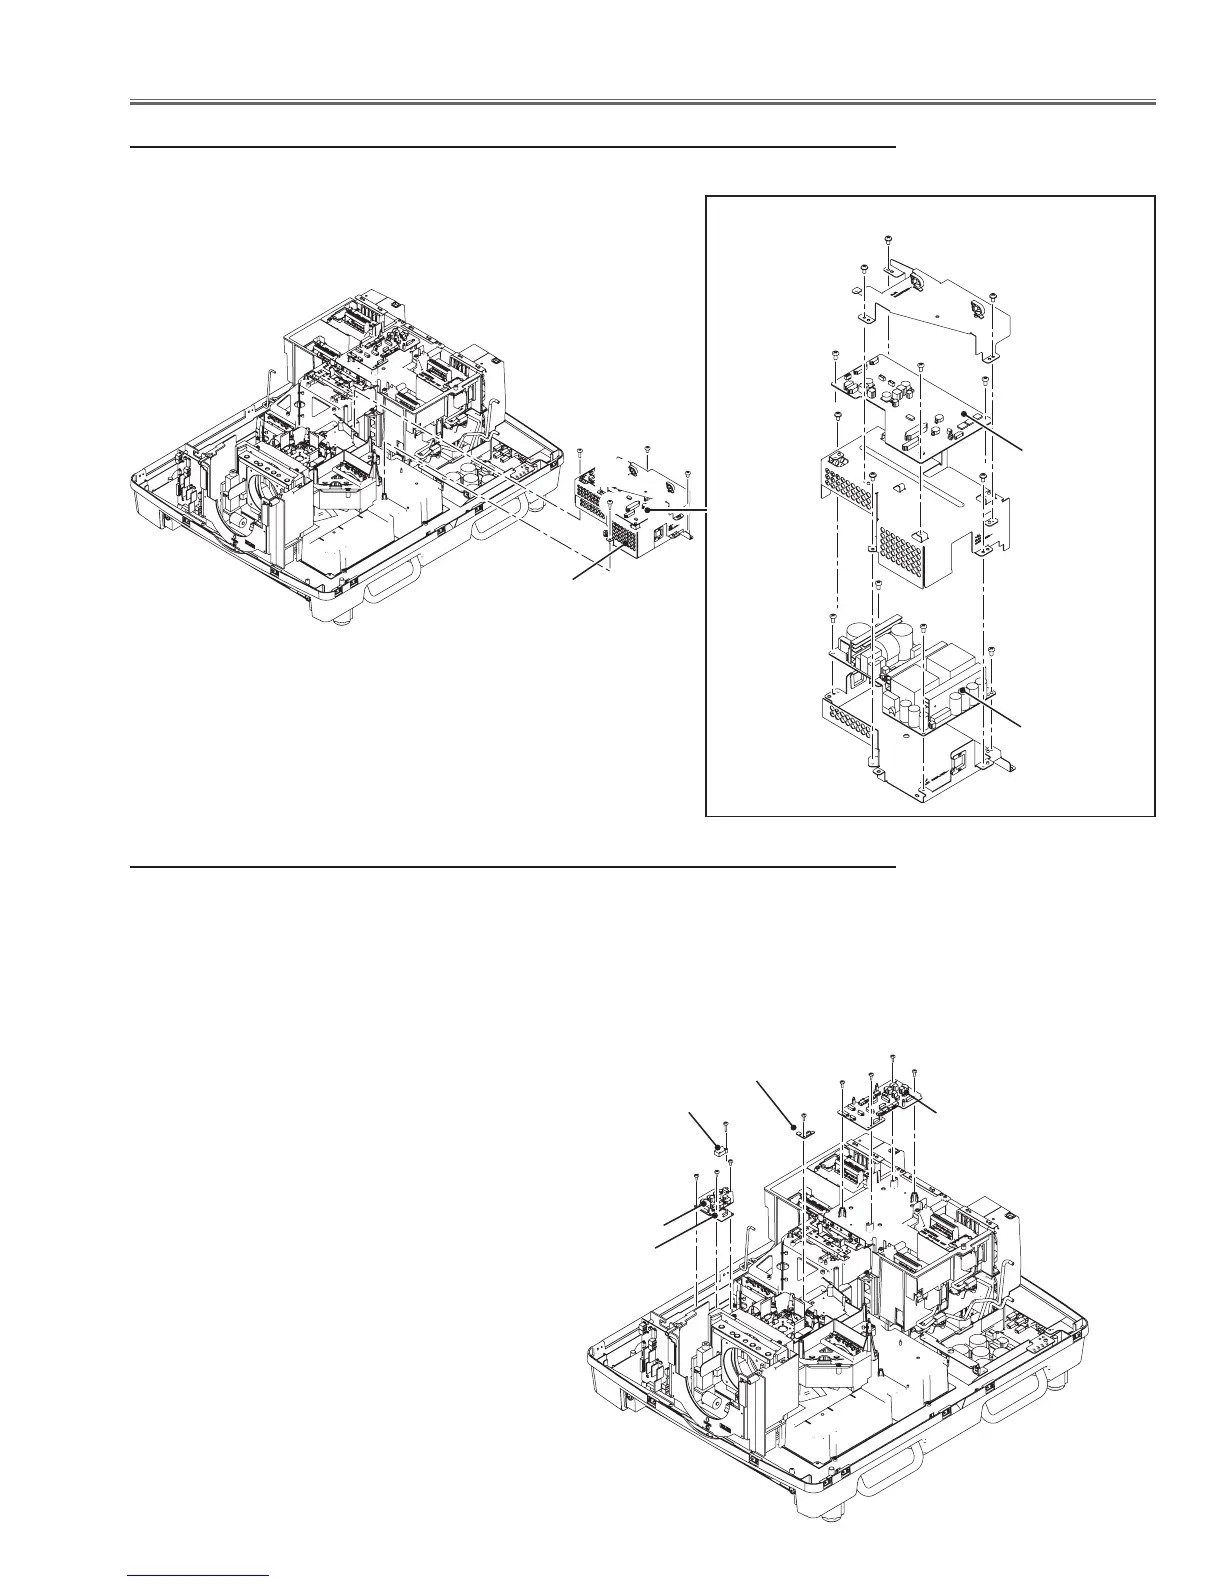
8 Power box assy removal
1 Remove 2 screws-A(M4x6), 2 screw-B(T4x10) and remove power box assy.
Power box assy
DC Power
board
AC-DC Power
board
A
A
B
B
(M3x6)x3
(M3x6)x3
(M3x6)x3
(M3x6)x4
9 Lamp sign, Illumi sensor, Ex temp boards removal
1 Remove 4 screws-A(T3x8) to remove the lamp sign board.
2 Remove 1 screw-B (T3x8) to remove the illumi sensor board.
3 Remove 2 screws-C (T3x8) to remove the RGB fannet board, remove 1 screw-D
(T3x8) to remove the Ex. temp board.
4 Remove 1 screw-E (T3x14) to remove the Wind sensor (S901).
A
A
A
B
C
C
D
E
Lamp sign board
Illumi sensor board
RGB fannet board
Ex temp board
Wind sensor S901
 Loading...