-67-
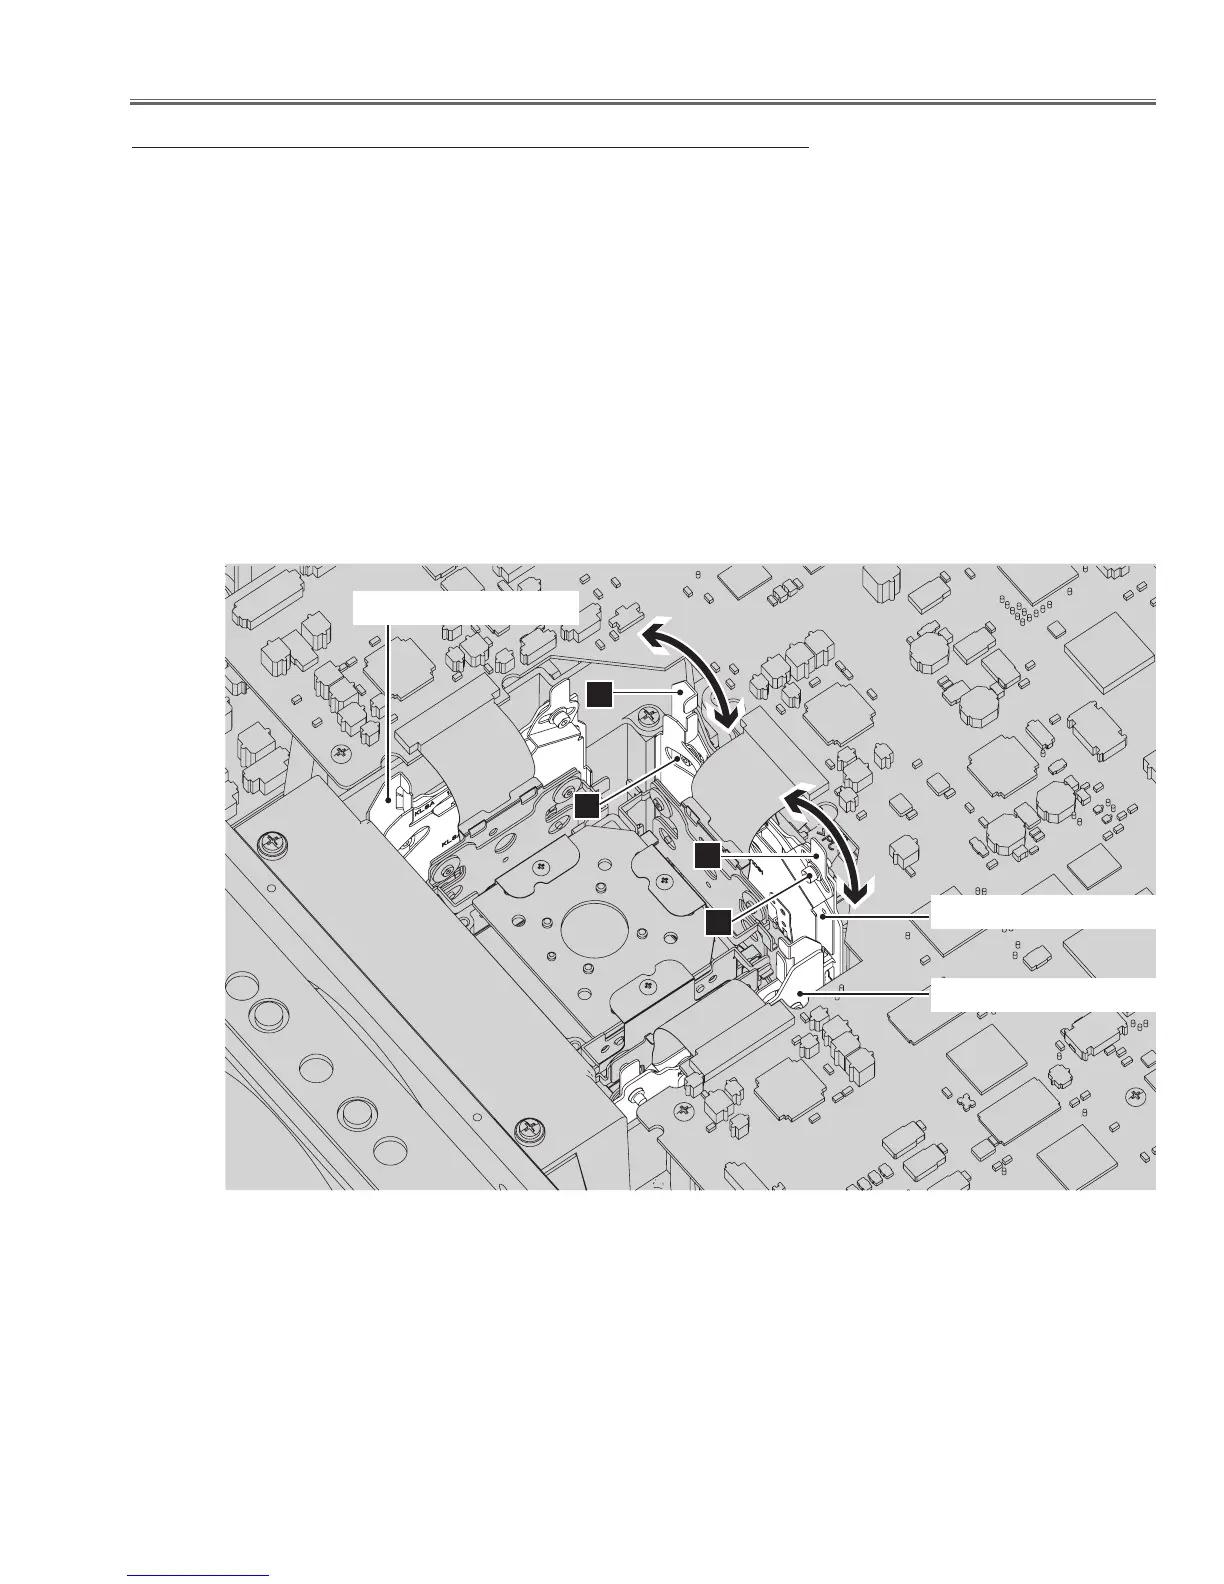
Optical Adjustment
3. Contrast adjustment
Before adjustment :
1 Remove the shutter assy on the prism/LCD panel assy.
2 Select the internal test pattern signal "All black" from the projector's menu "Menu -> Setting -> Test pattern".
Adjustment :
1 Loosen 1 screw A on the polarized glass mounting base and 1 screw C on the optical filter(HCP) mounting base.
2 Turn the polarized glass mounting base with lever B to obtain the darkest brightness and proper black color uni-
formity on the screen.
3 Turn the optical filter(HCP) mounting base with lever D to obtain the darkest brightness and proper black color
uniformity on the screen.
4 Tighten the screws A and C to fix the optical filter and polarized glass mounting base.
Repeat steps 2 to 5 for remaining R and B contrast adjustment.
The adjustment should be taken in order of G-panel, R-panel and B-panel and taken in the darkest room to adjust
preciously.
A
B
D
C
G-polarized glass assy
B-polarized glass assy
R-polarized glass assy
 Loading...