BioPAT
®
Trace | Multi Trace Operating Instructions 39
Initial Installation
6 Initial Installation
6.1 Setup
6.1.1 Device Setup
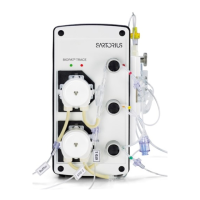
The BioPAT
®
Trace | Multi Trace must be setup near the bioreactor you want
to monitor (at max. distance of 2m). The location must be free of vibrations
and protected against corrosive atmospheres and chemical contamination.
Additionally, the BioPAT
®
Trace | Multi Trace should be protected against
exposure to direct sunlight.
WARNING
Risk of electric shock due to incorrect connection!
Operating the equipment with the wrong supply voltage and|or the wrong
fuses can cause the danger of an electric shock.
Follow the instructions and requirements listed below concerning the
powerconnection.
The AC adapter supplied with the device is equipped with a power plug, a
mains adapter and a plug to the device. Insert the device plug into the con-
nection socket on the rear panel of the BioPAT
®
Trace | Multi Trace and con-
nect the other end to your mains outlet. The device can be switched on and
off by pressing the On/off switch. When the device is switched on, a green
LED lights up on the front panel.
To connect the BioPAT
®
Trace | Multi Trace to the local network, plug the
Ethernet cable into the Ethernet connection on the back panel of the device.
The operating software supplied is used to control the device via a PC.
Likewise, this PC must also be connected to the local network or directly to
the device using the cross-over Ethernet cable supplied.
After connecting the device to the PC, check to make sure that the system
times of the two units are synchronized. Proceed as described in
Chapter “8.3.7.3 Basic Settings”, page 95.

 Loading...


