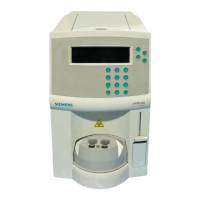
PFA-100 System – Instruction Manual (US) – Version 1.0.1
811
2. Press the numeric key 2 to select the Maintenance option.
3. Press the numeric key 6 to select the Remove O-Ring option.
The system will display the message Load O-Ring Service Tool,
Then Press Continue.
4. Place the O-Ring service tool into the incubation wells of the analyzer
so that the cassette is flush with the carousel surface.
5. Press the softkey located next to Continue.
The system will rotate the carousel to the O-Ring removal position and
bring the O-Ring in contact with position A of the O-Ring service tool.
After approximately 30 seconds, the carousel will rotate back allowing
the removal of the O-Ring service tool.
6. Remove the O-Ring service tool and press the softkey located next to
Continue.
If the O-Ring service tool fails to remove the O-Ring, the last four
instructions should be repeated once more. If the service tool still fails to
remove the O-Ring, contact the Siemens Service.
7. Invert the O-Ring service tool and tap against the palm of your gloved
hand to remove the O-Ring. Follow the manual O-Ring cleaning or
replacement procedure.
Previous Screen
1 - Run Control
2 - Maintenance
3 - Setup
4 - Print Log
5 - Clean O-Ring
6 - Remove O-Ring
7 - Install O-Ring
Previous Screen
1 - Paper Advance
2 - Self Test
3 - Printer Test
4 - Trigger Prime
Note: The inability to remove the O-Ring can be the result of debris and
sticky blood residues. Take care to thoroughly clean the O-Ring on a
regular basis as described in Chapter 11.3.1 and Chapter 11.3.4.
 Loading...