1-6
DNW-A75/A75P
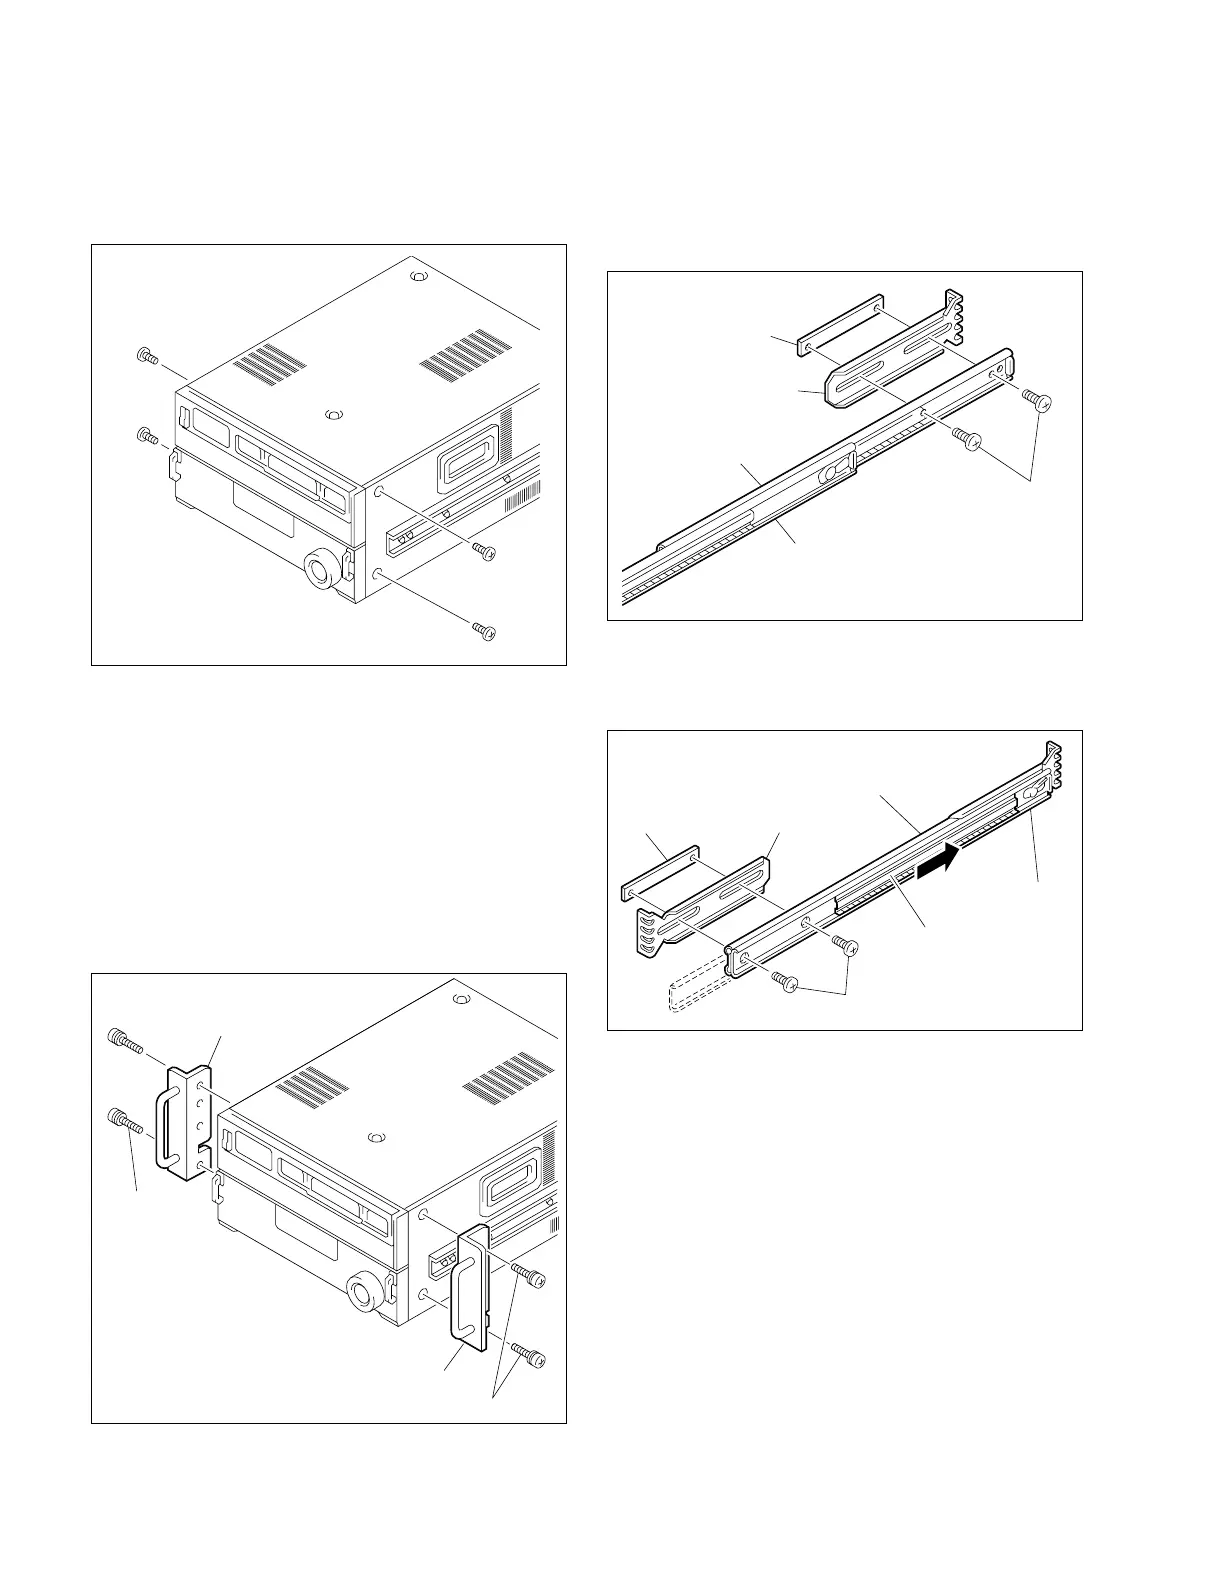
1-6. Rack Mounting
. Loosely attaching the rail brackets
10. Slide the intermediate rail as shown in the figure, and
then loosely attach the rail bracket to the outer rail
with a plate nut (large) and the two screws.
11. Slide the ball retainer in the direction of the arrow,
loosely attach the rail bracket to the outer rail with a
plate nut (large) and the two screws.
Plate nut (large)
Rail bracket
Outer rail
Intermediate rail
B4 x 8
Plate nut (large)
Rail bracket
Outer rail
Intermediate rail
B4 x 8
Ball retainer
. Attaching the rack angles (handles)
8. Remove the four screws from both sides
(left and right) of the unit.
n
Keep these screws (B4 x 6).
Be sure to use these screws when directly fixing the
side panels without the rack angles.
The use of longer screws such as the screws (PSW4 x
16) for fixing the rack angles will cause a malfunction
of the unit.
9. Attach the two rack angles to both sides (left and right)
of the unit with the supplied four screws (PSW4 x 16).
Tightening torque: 120 x 10
_2
N . m {12.2 kgf . cm}
B4 x 6
B4 x 6
B4 x 6
B4 x 6
PSW4 X 16
PSW4 x 16
PSW4 x 16
Rack angle
Rack angle