1-7
DNW-A75/A75P
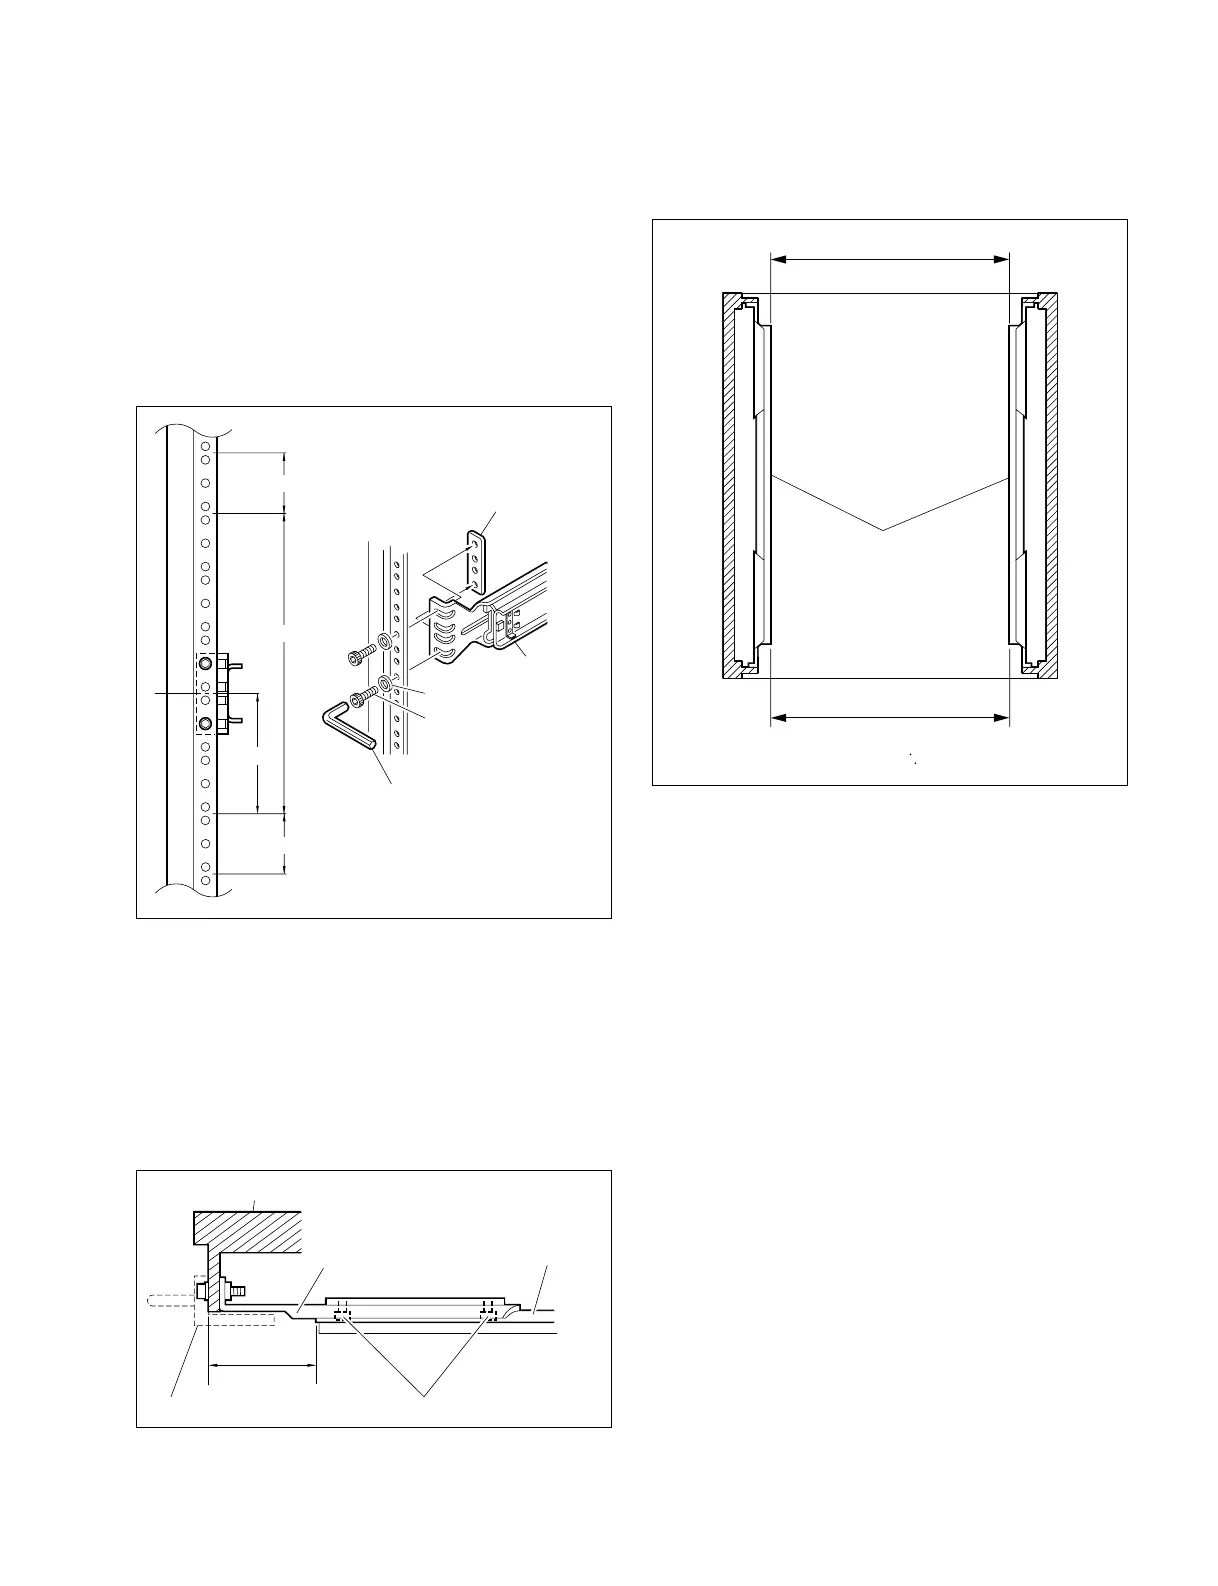
1-6. Rack Mounting
A'
A
Intermediate rails
Width : A = A' = 416 mm
15. Check that the two intermediate rails attached to the
rack are parallel.
16. To fix the two outer rails to the rack, fully tighten the
eight loosely fitted hexagon socket head cap screws in
step 12 using the L-shaped hexagon wrench.
Rack
50 to 55 mm
Outer rail
Rack angle
B4 x 8
Rail bracket
. Attaching the outer rails
12. Loosely attach each outer rail to the 2U position from
the bottom of the 5U space in the rack for installing
this unit, with the eight hexagon socket head cap
screws, eight flat washers, and four plate nuts (small).
n
Leave a space on the top or bottom of this unit by 1U
to reduce an increase in the internal temperature of this
unit.
13. As shown in the following figure, adjust each front-
side position of outer rails on both sides (left and right)
so that the distance from the surface of the rack to the
tip of the rail becomes within the range of 50 to 55
milimeters.
14. Fully tighten the eight screws (B4 x 8) fixing the four
rail brackets.
Tightening torque: 120 x 10
_2
N . m {12.2 kgf . cm}
Plate nut (small)
Rail
Flat washer
Hexagon socket
head cap screw
L-shaped hexagon wrench
By 5U
2U
Leave a space by 1U
Leave a space by 1U