Chapter 5 Special Editing and Recording/Playback
76
Chapter 5 Special Editing and Recording/Playback
1
Stop the tapes at the points where you want to set
the recorder side and player side IN points.
2
Press the recorder side PREVIEW button.
A preview starts. The points selected in step 1 are
set as the IN points, and the IN buttons of the
recorder and player light.
3
While monitoring the player video and audio, at
the point where you want to set the OUT point,
press the recorder side or player side OUT button
together with the ENTRY/SHIFT button.
The OUT point is set, and the OUT button that you
pressed lights.
Note
Setting an OUT point while viewing the recorder
video and audio will shift the OUT point due to the
time taken by digital processing (process delay)
carried out on the recorder side.
4
Conduct another preview and modify the edit
points as required.
5
Press the AUTO EDIT button.
The edit starts.
When the edit finishes, the recorder stops at the
OUT point and player stops about 2 seconds after
the OUT point.
To edit even more quickly
1
Stop the tapes at the points where you want to set
the recorder side and player side IN points.
2
Press the AUTO EDIT button.
The edit starts.
3
While monitoring the player video and audio,
when you reach the point you want to set as the
OUT point, press the player side or recorder side
OUT button together with the ENTRY/SHIFT
button.
The point where the edit started is set as the IN
point, and the point where the pressed the OUT
and ENTRY/SHIFT buttons is set as the OUT
point.
Special Editing
Chapter 5 Special Editing and Recording/Playback
Chapter 5 Special Editing and Recording/Playback
77
When you execute multiple edits in succession, you
can edit from the second time on by setting the IN and
OUT points of the player side only.
After execution of an edit, the recorder returns
automatically to the OUT point. Therefore, the
recorder side OUT point of the current edit becomes
the IN point of the next edit.
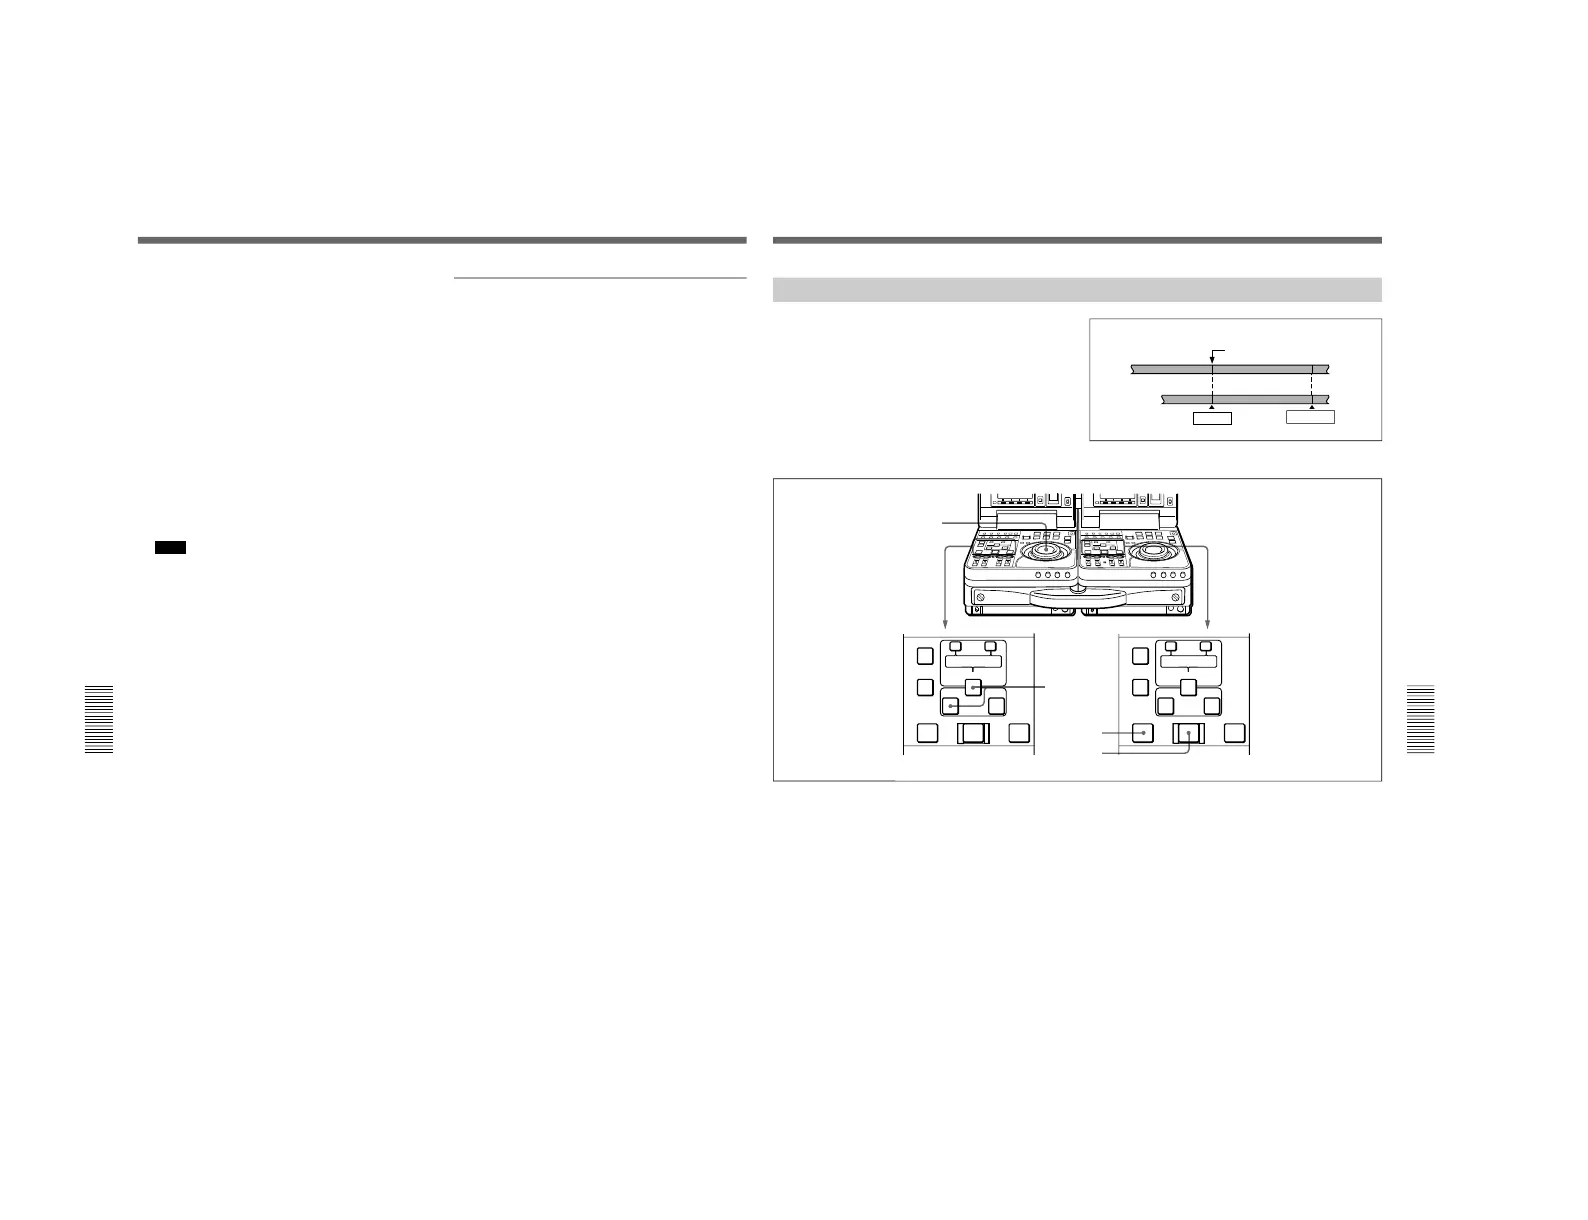
Continuous Editing
OUT point of previous edit
= IN point of next edit
Recorder
Section edited in
previous edit
Section edited
in next edit
Player
IN point
OUT point
Use the following procedure.
1
Set the player side IN point.
2
Press the recorder side PREVIEW button to
conduct a preview.
3
Press the AUTO EDIT button.
The edit starts.
When the edit ends, the recorder stops at the OUT
point and player stops 2 seconds after the OUT
point.
To stop an edit
Press the ENTRY/SHIFT button together with the
OUT button.
The edit ends, and the point where you pressed the
buttons becomes the OUT point.
To abort an edit
Press the STOP button on the recorder.
 Loading...