39
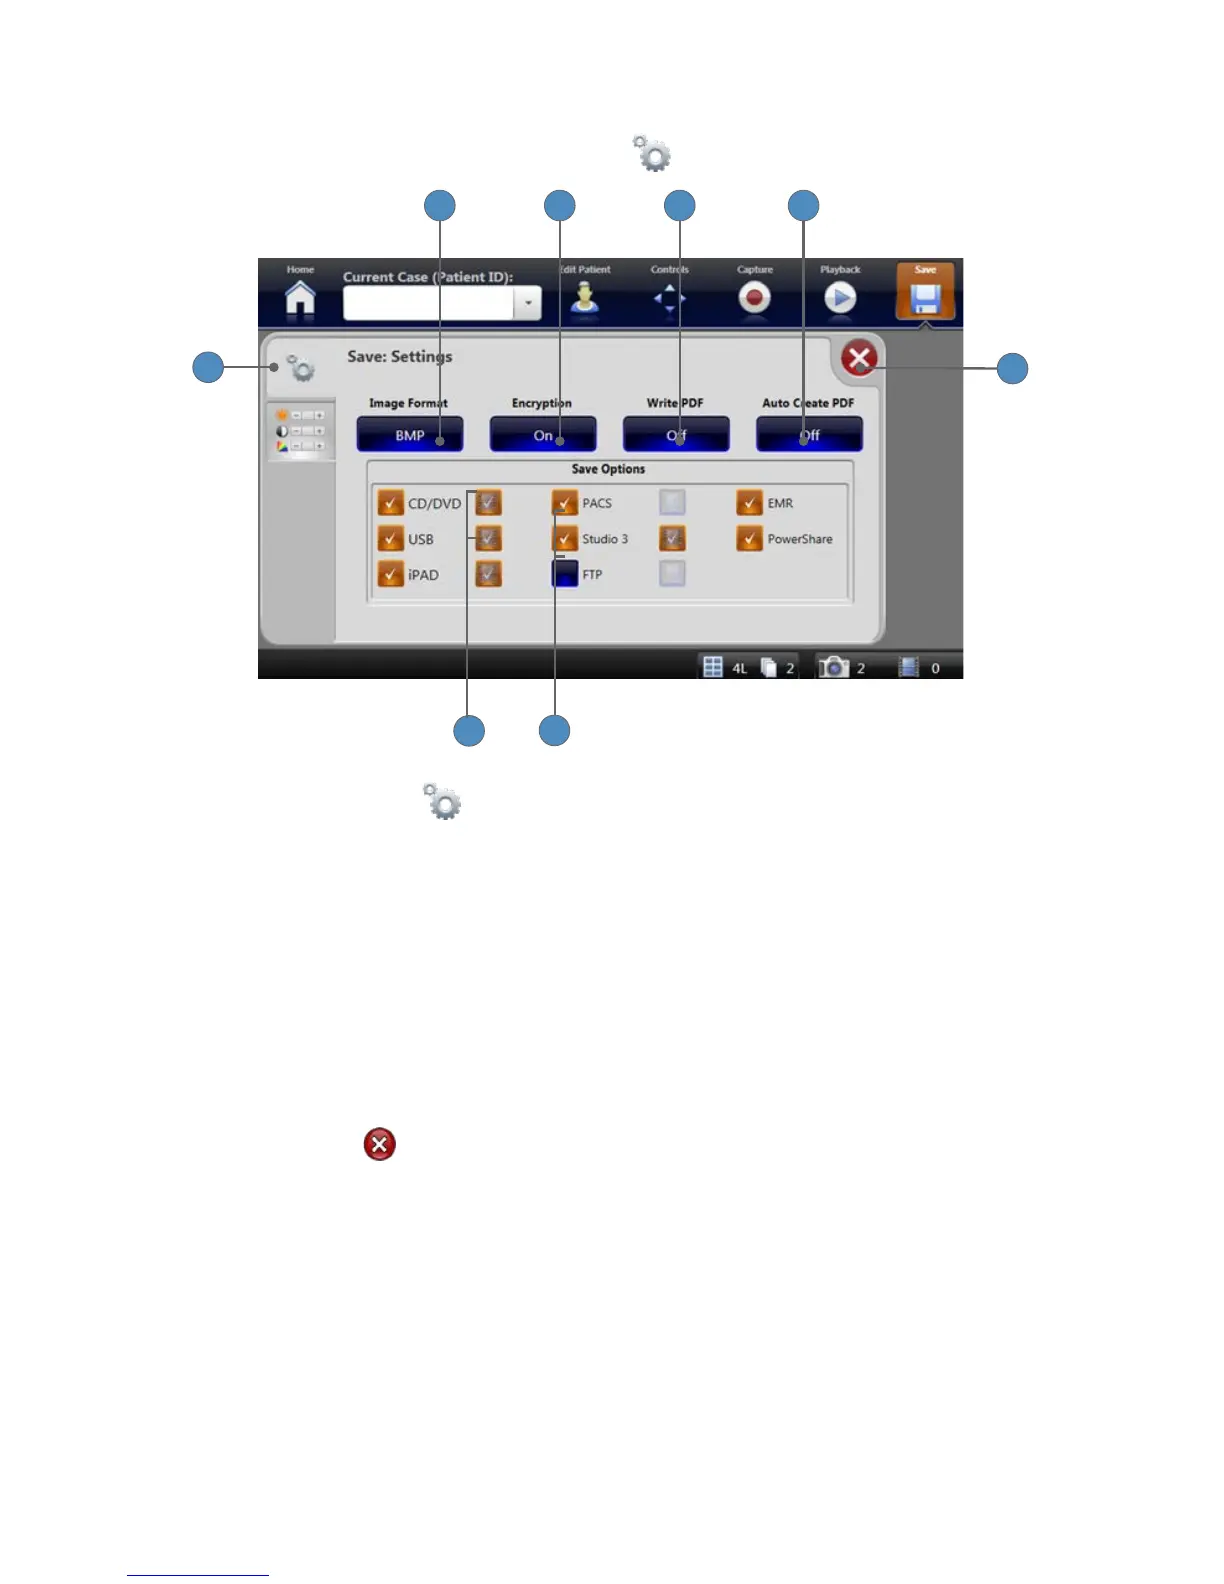
Save Settings
Save settings are accessible though the SETTINGS tab
on the Save screen�
5432
6
7
1
8
1� Select the SETTINGS tab to open the “Save: Settings” screen�
2� Press the IMAGE FORMAT button to set the format in which to save pictures� The available
image formats are BMP, TGA, TIFF, PNG, JPG, JPEG, and JPEG2000�
3� Press the ENCRYPTION button to enable encryption of patient information when you save
to external media� Choose between ON and OFF�
4� Press the WRITE PDF button to create a PDF document of selected images whenever you
press “Save�” Images print to PDF according to settings selected in “Printer Settings�” Choose
between ON and OFF�
5� Press the AUTO CREATE PDF button to automatically create a PDF document of images
each time the required number of “Auto Print” images is captured (as dened in the “Printer
Settings: Page Layout” screen)� Choose between ON and OFF�
6� Press the EXIT button to close the settings screen and return to the Save screen�
7� Select the checkboxes in the Save Options window to enable data to be saved to:
• CD/DVD
• USB
• iPad
• PACS
• Studio 3
• FTP
• EMR
• PowerShare
8� Select the video icons next to each option to enable you to save videos to each of these
options�
Note: You cannot save videos to EMR or PowerShare.