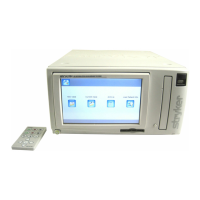
50
6� The IMAGE COUNT FONT SIZE button adjusts the size of the font used for the image count
in the capture screen�
7� The CHANNEL MODE button selects between Single- or Dual-channel mode�
8� The FLIP SCREEN button selects if and where images show on the surgical display when
they are captured� Select between None (no display), One (entire display), or Side (side of
display)�
9� The REC DISPLAY button causes the words “Rec” and “Rec Stopped” to appear on the
surgical display when recording is started or stopped� Select between On and O�
10� The DEVICE PRESET button turns Device Presets On or O�
11� The VOICE ANNOTATION button activates the voice annotation screen after every image
capture� (This feature is only available for systems equipped with the SDC3 Voice Package or
SDC3 Device Control Package�) Select between On and O�
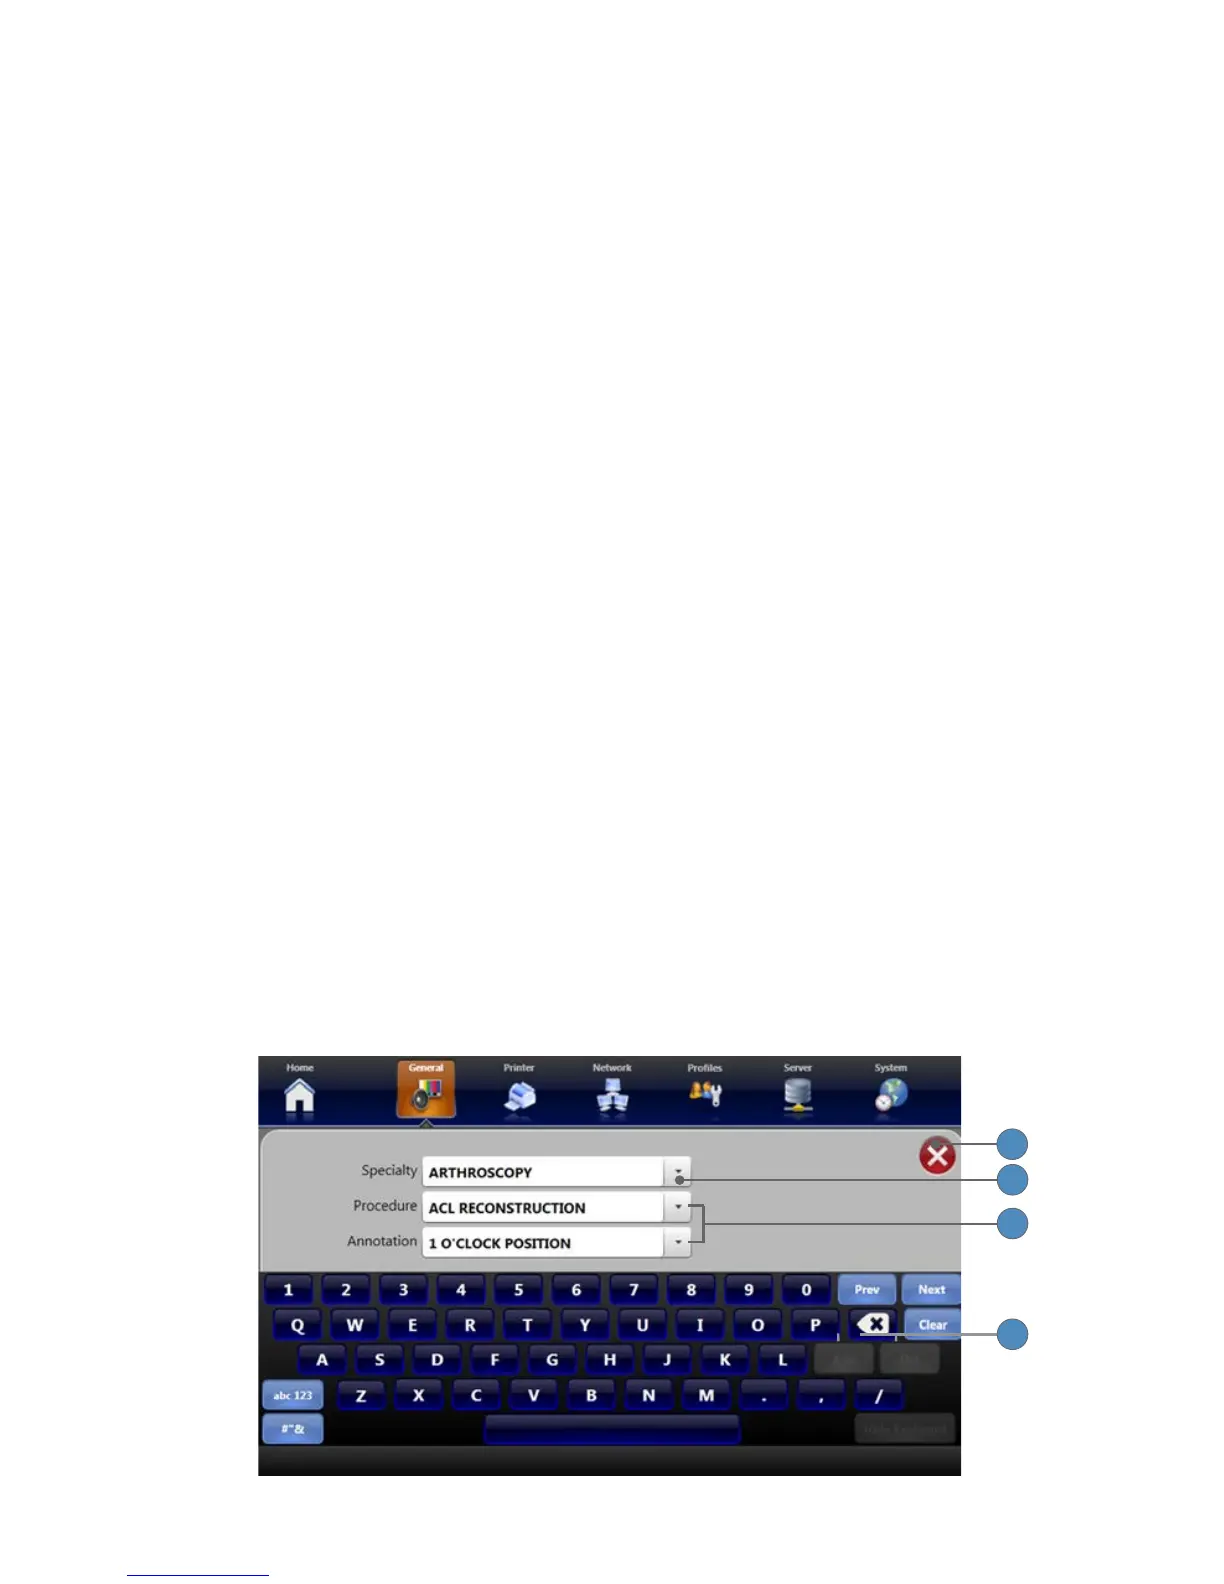
12� The EDIT ANNOTATION button opens a screen to edit global annotations� These
annotations are then available during patient cases� (See the “Editing Global Annotations”
section immediately following this section�)
13� The LIVE VIDEO TIMEOUT button sets the time that an image selected on the Playback
screen replaces the live video feed on the On Screen Display� Choose between 3 seconds, 10
seconds, and None (when set to None, the image playback will remain on the OSD until you
manually change it back to Live Video)�
14� The LIVE PREVIEW button determines what displays in the preview window of the Capture
screen� Select On for live camera image, or O for the last captured image�
15� The GUI MONITOR button allows the touchscreen interface to appear on an external
touchscreen monitor (the monitor must be connected via VGA and Serial connection to the
SDC3 console)� Select Internal for the interface to appear on the SDC3 screen, or External for
the interface to appear on the external monitor�
16� The CALIBRATE button starts calibration of the LCD screen� Use this button if touch controls
are not accurate�
17� Press the RECORD MODE button to move between “Real Time” and “At the End�”
Editing Global Annotations
1
4
3
2