4.3. Instrument’s calibration – Calibration
The instrument is factory calibrated with the supplied accelerometers. In case of using other transducers
calibration of the measurement channels should be performed by the user. Periodic calibration of standard
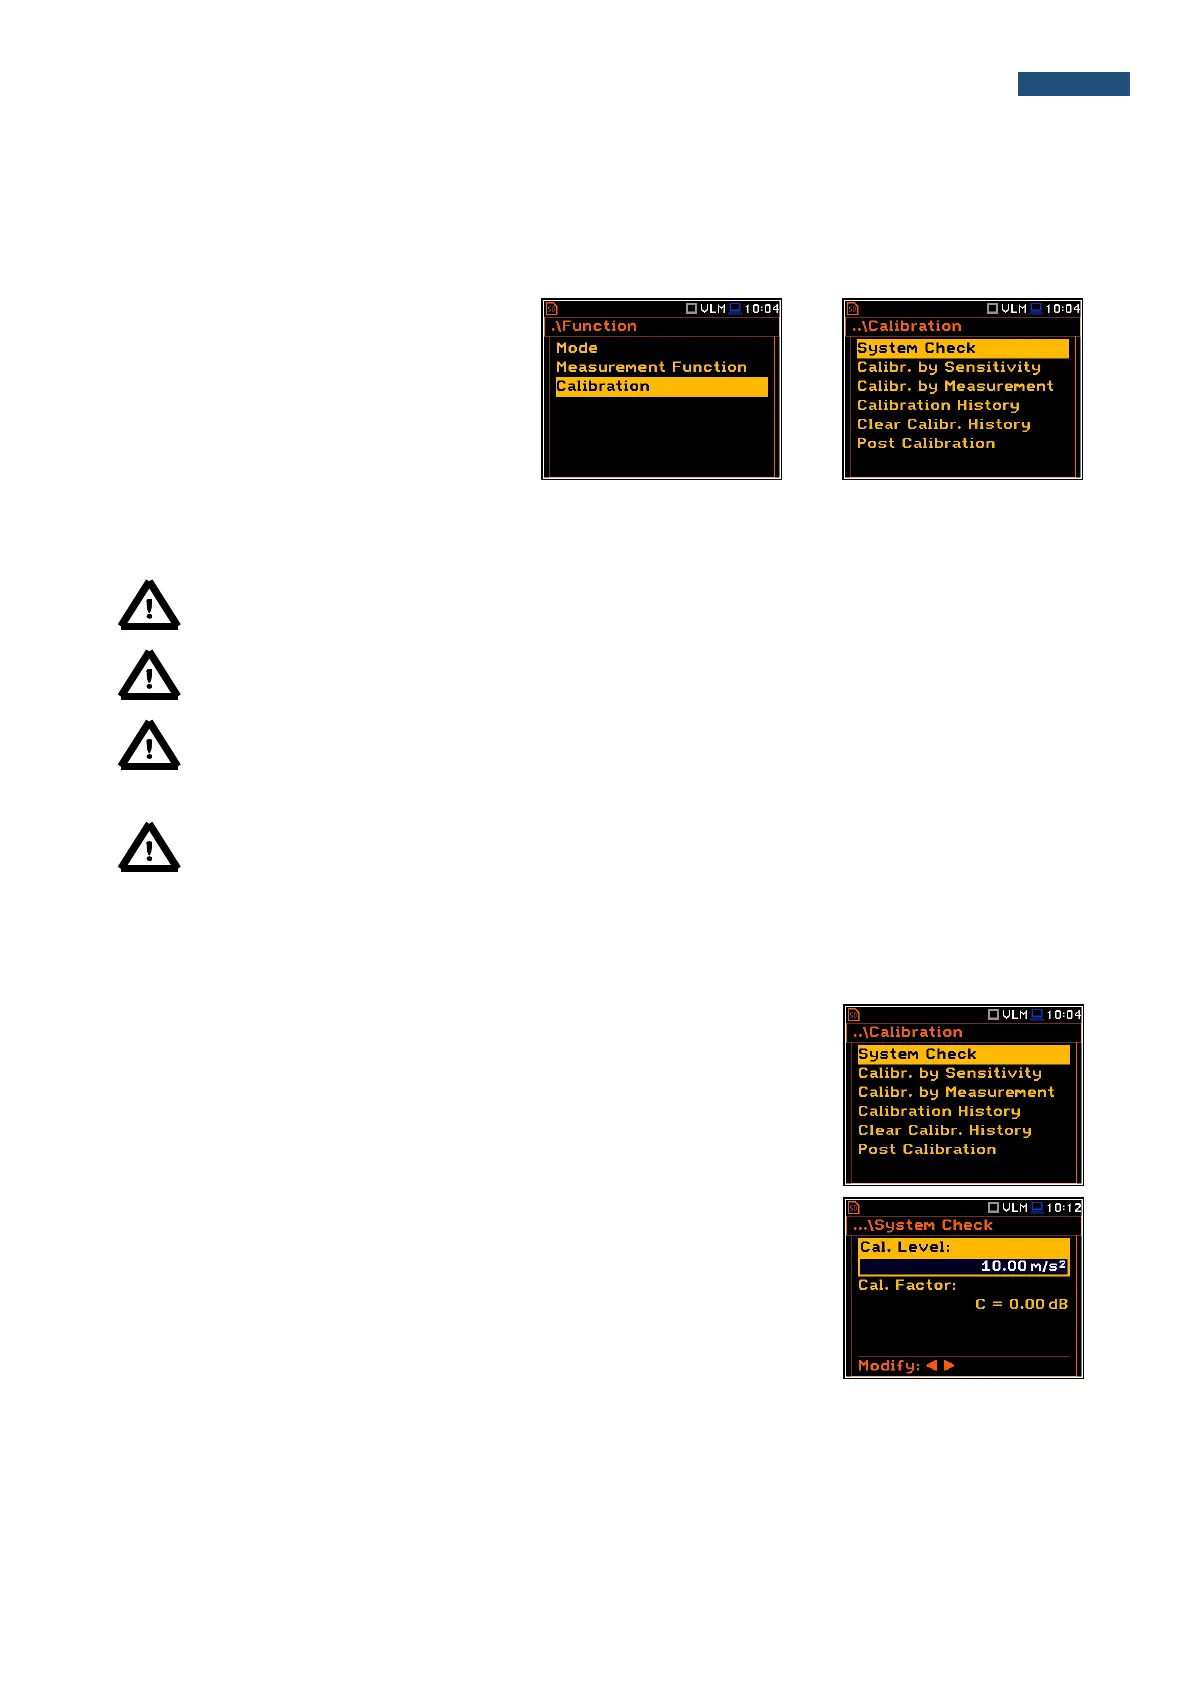
accelerometers is also required. To select the calibration function, the user should enter the Calibration sub-list.
The Calibration sub-list consists of positions
which are used to perform the in-situ checks
and calibration (System Check,
Calibr. by Sensitivity,
Calibr. by Measurement), check and clear
the calibration records (Calibration History
and Clear Calibr. History) as well as
perform additional calibration after the
measurement session and add the results to
the file (Post Calibration).
Note: The calibration factor is always added to the results and measurement range limits in the
Level Meter, 1/1 Octave, 1/3 Octave modes.
Note: It is advised to perform the system check of the instrument each time before the measurements
begin. If system check shows negative result, then it is necessary to perform calibration.
Note: The calibration level and the calibration result are expressed in different units depending on the
settings of the instrument. The metric or non-metric Vibration units are set in the Vibration Units
window (path: <Menu> / Auxiliary Setup / Vibration Units). Additionally, the linear or logarithmic units
are set in the Display Scale window (path: <Menu> / Display / Display Scale).
Note: It is not possible to check and calibrate the instrument during the execution of live
measurements. It is possible to open different lists and sub-lists but the positions in these lists are
displayed greyed out inversely and so - not accessible. The flashing “►” icon on the top line indicates
that the instrument is in the measurement process. To change the sensitivity, the current
measurement in progress must be finished!
ISO 20816-1:2016 standard advises users to perform in-situ checks of
measurement instrumentation. Checking should be carried out immediately
before and after measurements are made.
1. Select System Check in the Calibration sub-list and press the <ENTER>
push-button.
2. Select the calibrator signal level.
3. Attach the vibration calibrator to the instrument’s accelerometer.
4. Switch on the calibrator and wait approximately 30 seconds before starting
the system check measurement.
5. Start the calibration measurement by pressing the <Start/Stop> push-button.