3. Attach the instrument’s accelerometer to the vibration calibrator using an
appropriate or recommended fixing method.
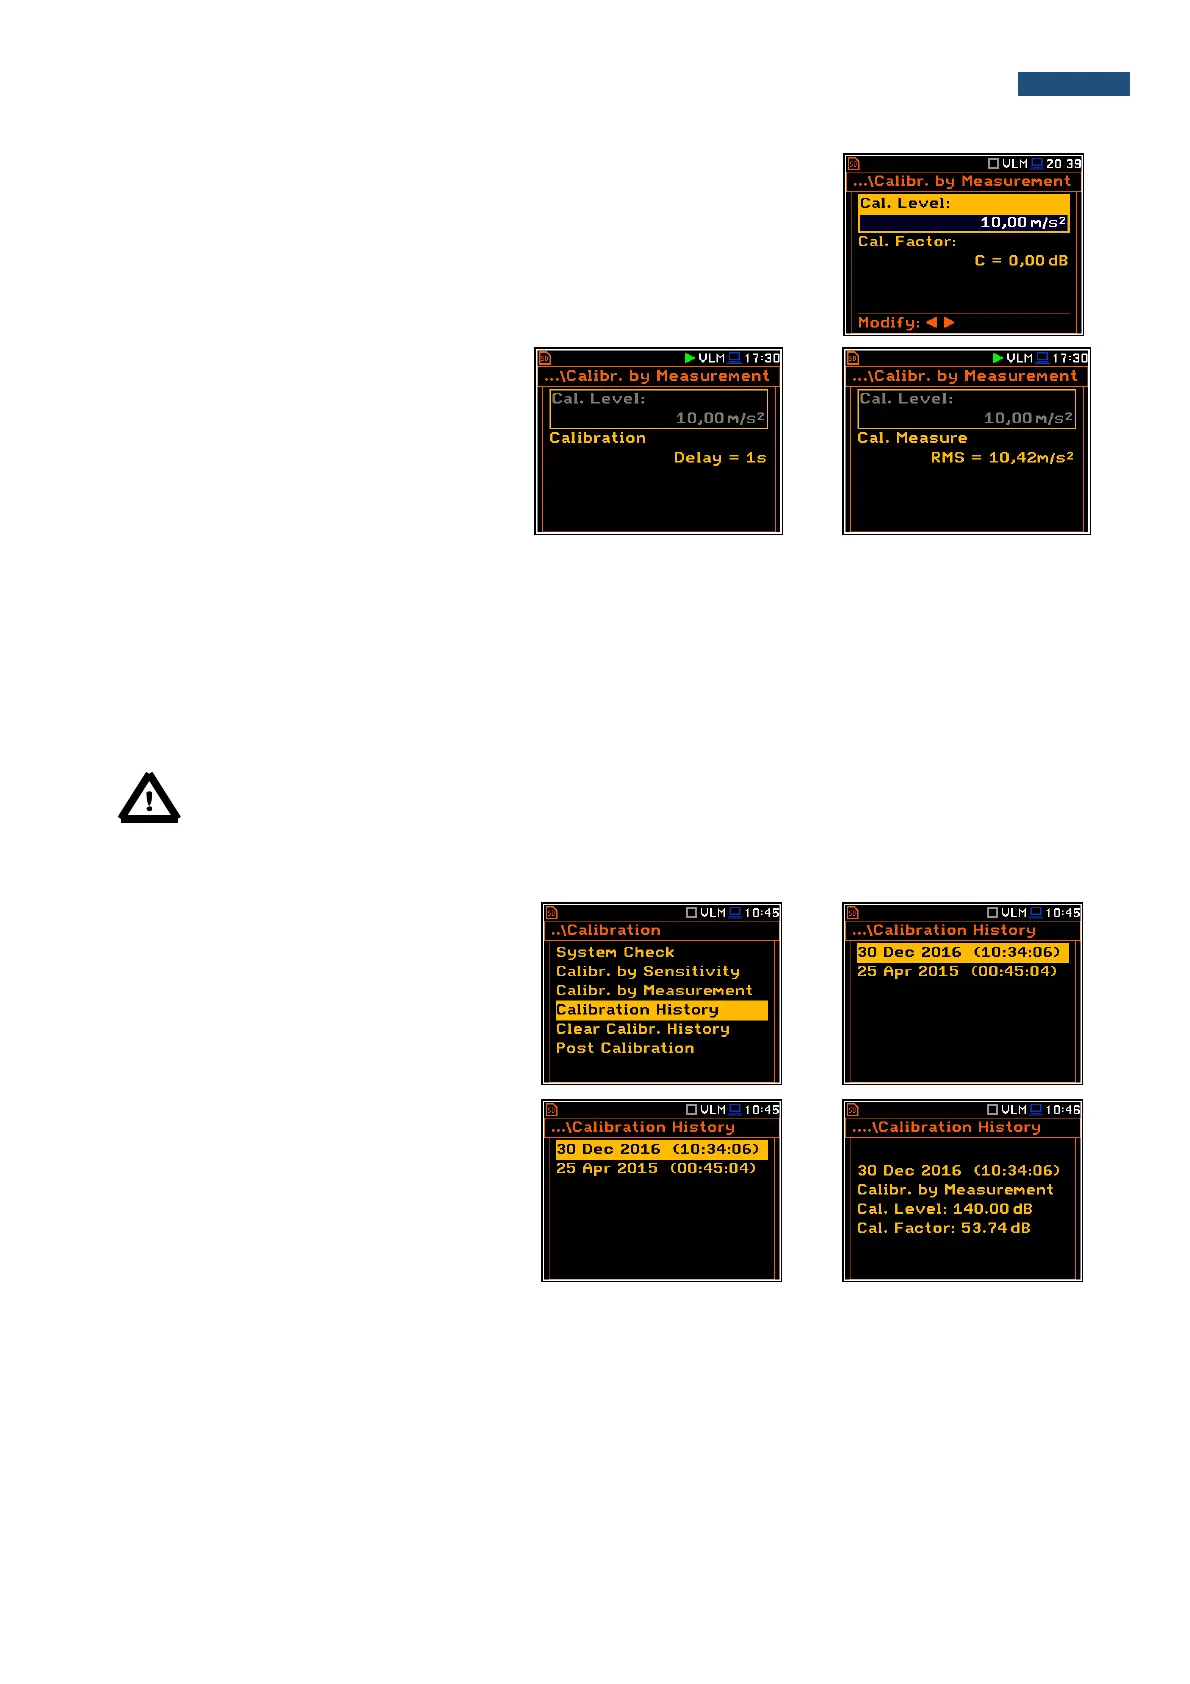
4. Switch on the calibrator and wait approximately 30 seconds before starting
the calibration measurement.
5. Start the calibration measurement by pressing the <Start/Stop> push-
button.
The calibration measurement starts after
3 second delay. Waiting for the calibration
measurement the Delay is counted down on
the display. The measurement lasts 5
second. After the end of the measurement, its
result is displayed in the bottom line.
6. Save new calibration factor by pressing <Enter>, or <Esc> to exit calibration without saving.
It is recommended to repeat the calibration measurement a few times to ensure the integrity of the calibration.
The obtained results should be almost identical (with ±0.1 dB difference). Some possible reasons for unstable
results are as follows:
• the accelerometer is not properly attached to the calibrator,
• there are external disturbances,
• the calibrator or the measurement channel (the accelerometer or the instrument itself) are damaged.
Note: During the calibration measurement, the external disturbances (vibrations or acoustic noise)
should not exceed a value of 1/10 of the level of the calibration level signal being used.
4.3.4. History of performed calibrations – Calibration History
The Calibration History window displays
records of performed calibrations.
To review the calibration records, the user
should select the required line in the
Calibration History window and press
<ENTER>.
The calibration record window contains the
information regarding the performed
calibration.