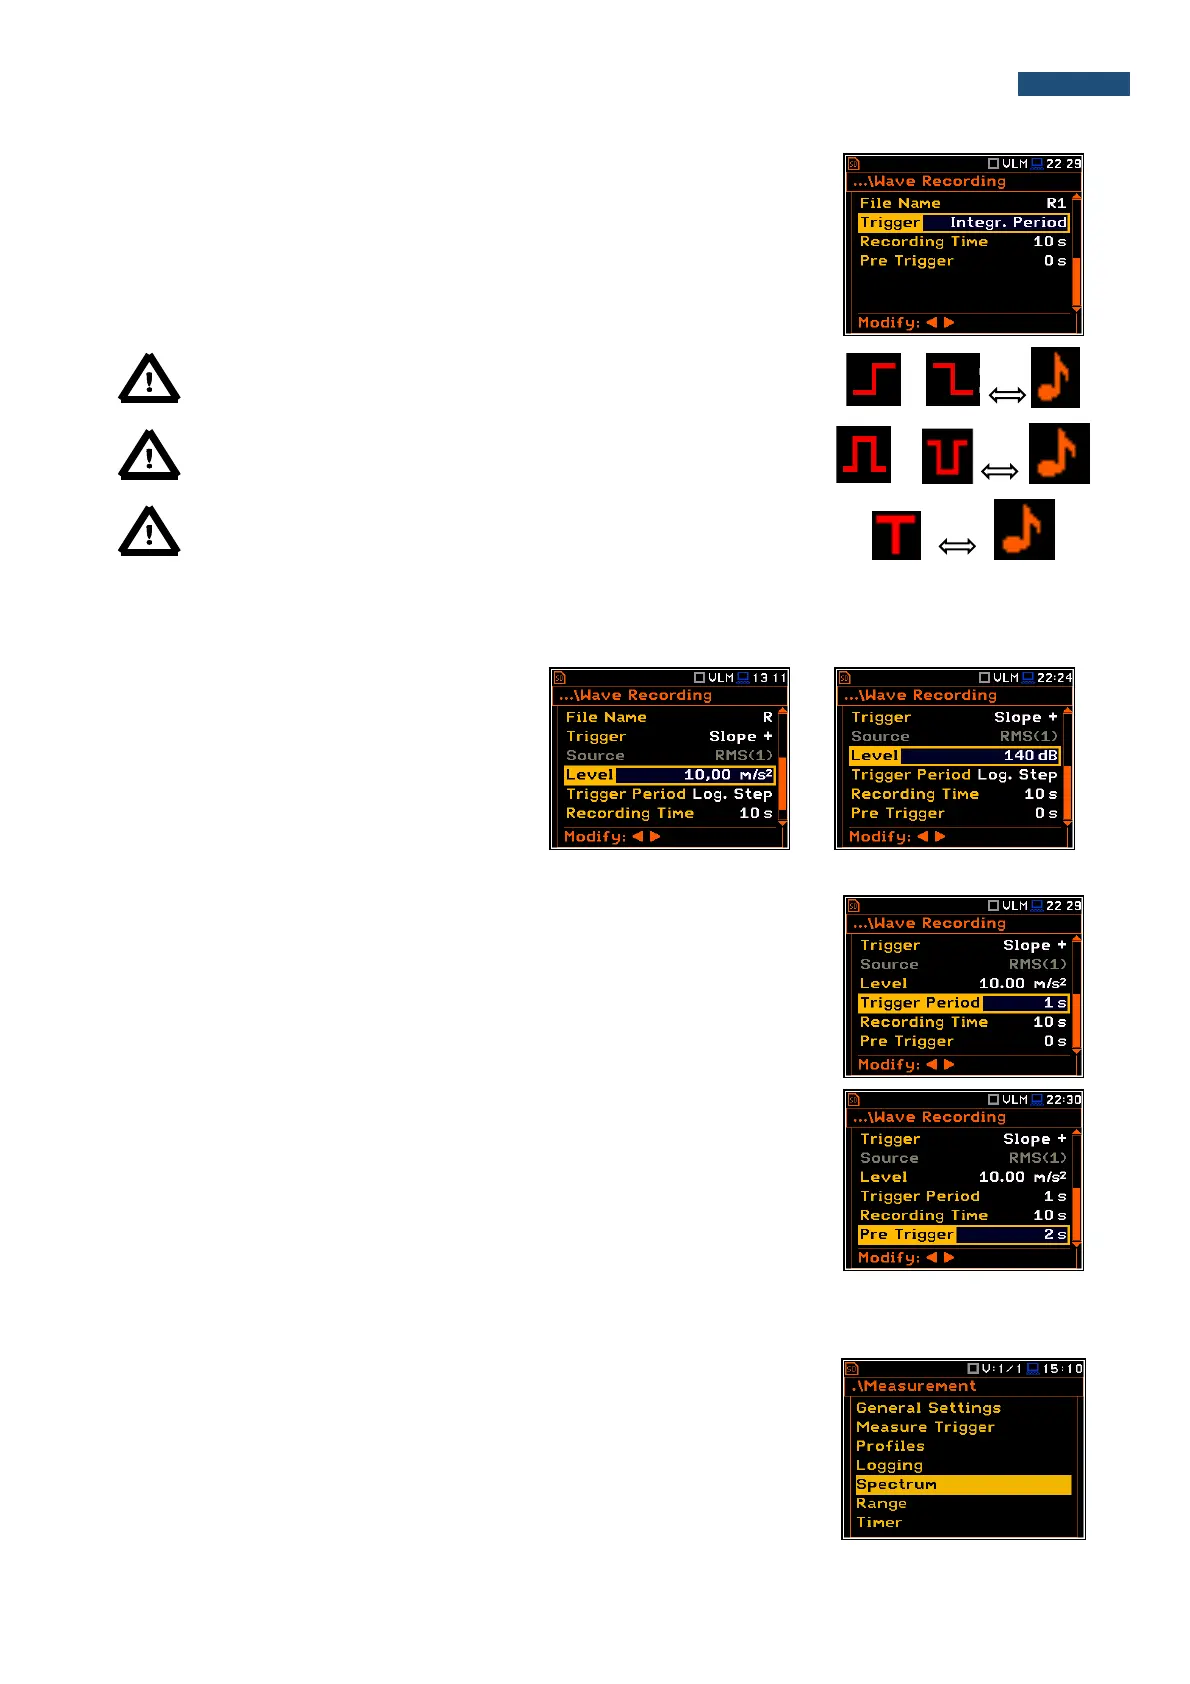
If the Integr. Period trigger was defined, the signal is recorded every time the
measurement starts and ended after the Integration Period time, defined in the
General Settings window (path: <Menu> / Measurement / General Settings).
Note: When wave recording is waiting for the slope trigger the “trigger
slope” icon appears alternatively with the „ note” icon.
Note: When wave recording is waiting for the level trigger the “trigger
level” icon appears alternatively with the „note” icon.
Note: When wave recording is waiting for the “external” or
“integration period” trigger the “trigger” icon appears alternatively with
the „note” icon.
The Source position indicates the triggering signal source. Only one measured result can be used as a source
of the triggering signal in all modes, namely the output signal from the RMS detector coming from the first profile
which is denoted here as RMS(1). This position does not become active.
The level of triggering signal for the wave
recording (Level) can be set with 1 dB steps
in the range from 1mm/s
2
(60 dB) to 10 km/s
2
(200 dB). In case of Vibration measurements,
the level can be expressed not only in
decibels but also in linear units. The vibration
unit scale can be set in the Display Scale
window (path: <Menu> / Display /
Display Scale / Scale).
In the Trigger Period position, it is possible to select the time interval of
checking the triggering conditions. This parameter can be set at: Log. Step
(same as Logger Step value), 0.5ms, 100.0ms and 1s.
In the Recording Time position, it is possible to select the time of signal
recording after triggering starts. If another triggering condition that satisfies the
selected conditions appears then the signal will be recorded for an additional
Recording Time. The available values can be selected from 1s to 8h.
When Pre Trigger is higher than 0 then the wave signal start to be recorded
before the triggering condition moment. The period of such recording depends
on the sample frequency and bits per sample. The maximum pre trigger period
is:
• for 24 bits per sample: 2s for 48 kHz, 4s for 24 kHz and 8s for 12 kHz.
• for 16 bits per sample: 4s for 48 kHz, 8s for 24 kHz and 16s for 12 kHz.
5.5 Setting up the 1/1 Octave and 1/3 Octave spectra – Spectrum
The Spectrum position appears in the Measurement list when the 1/1 Octave
or 1/3 Octave function is selected in the Measurement Function list (path:
<Menu> / Function / Measurement Function / 1/1 Octave or 1/3 Octave). See
section 10 for more details.