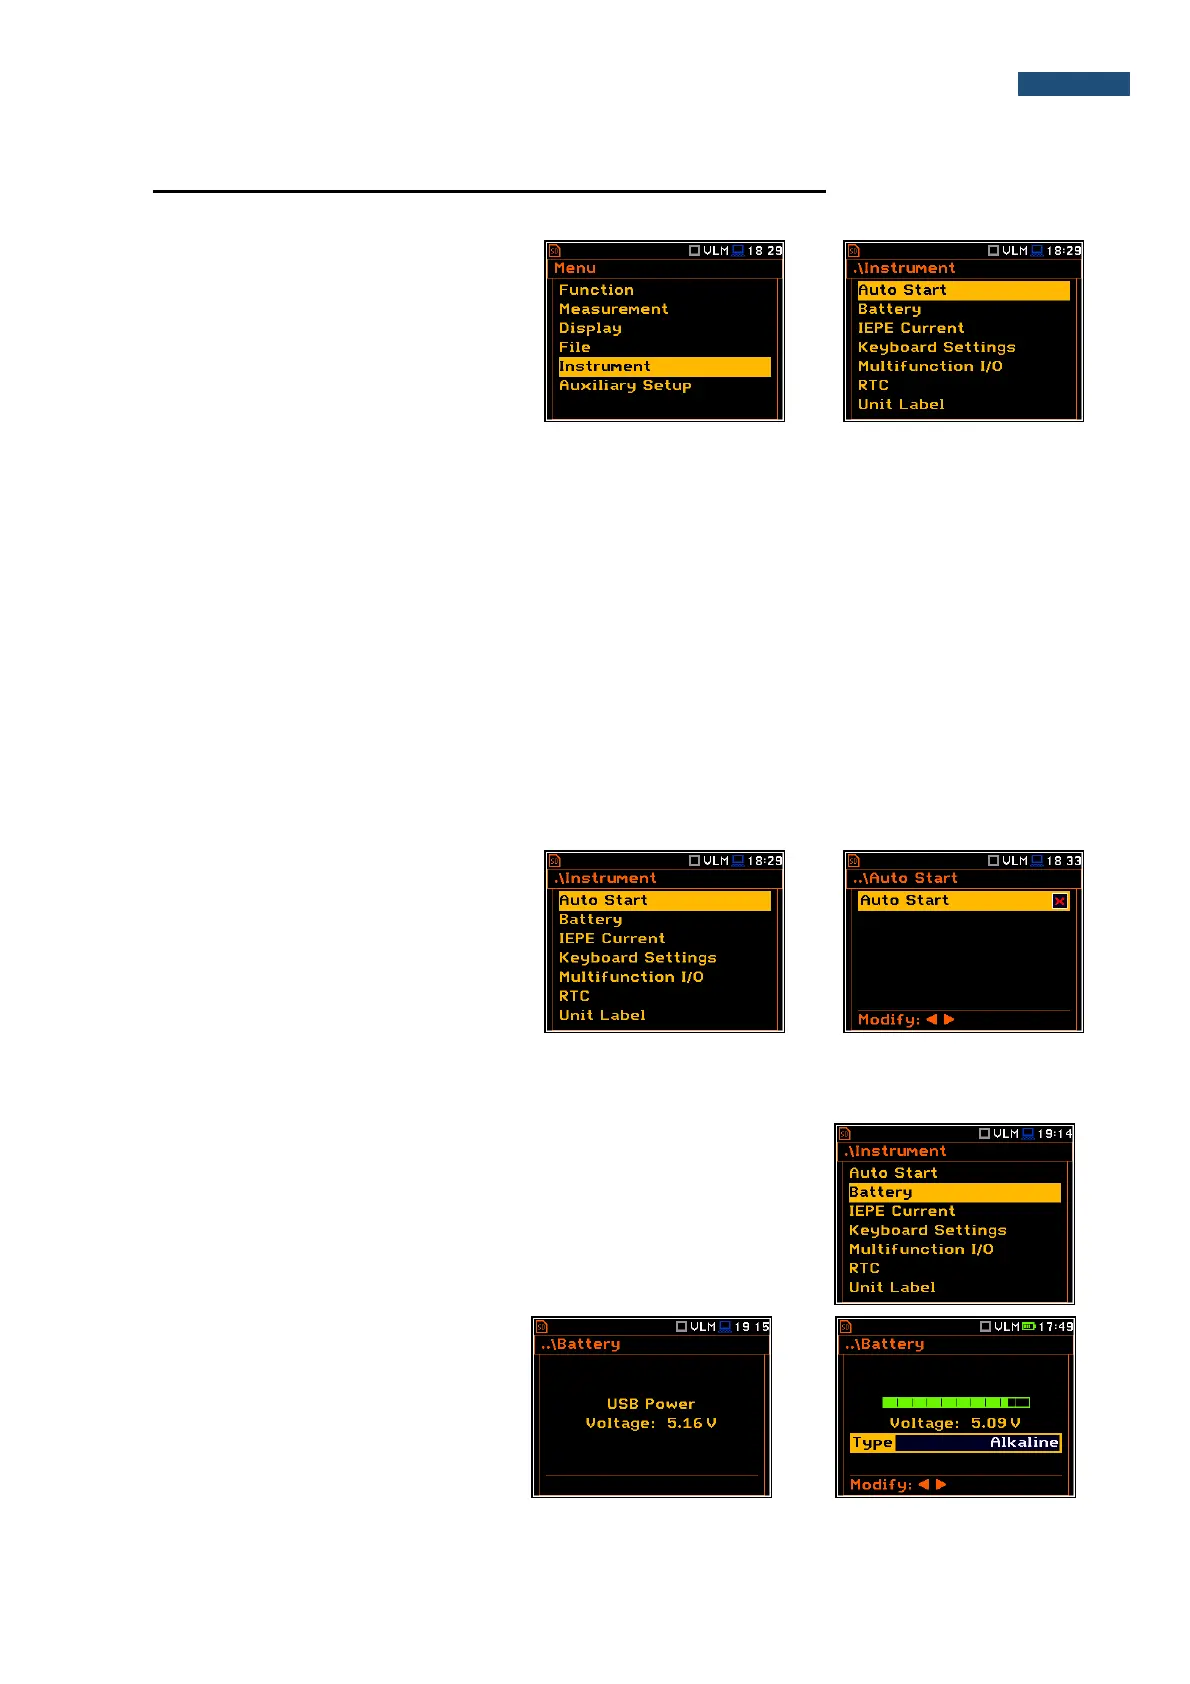
8. SETTING UP THE HARDWARE PARAMETERS – Instrument
The Instrument list is directly related to the
settings of the hardware components of the
instrument. To open the Instrument list, the
user should press the <Menu> push-button,
select the Instrument position and press
<ENTER>.
The Instrument list contains the following items:
Auto Start enables the user to start the measurement just after switching the instrument on;
Battery enables the user to get information about current power source;
IEPE Current enables the user to choose the correct IEPE current supply for vibration
transducers;
Keyboard Settings enables the user to set the operating mode of the <Shift> and the <Start/Stop>
push-buttons;
Multifunction I/O enables the user to select the available functionality of the I/O port;
RTC enables the user to set up the Real-Time Clock;
Unit Label enables the user to check information about the type of the instrument, its serial
number, the current software versions installed and the standards, the
instrument fulfils.
8.1. Measurement auto start - Auto Start
The Auto Start position enables the user to
start the measurement just after the switching
the instrument on without pressing the
<Start> push-button.
8.2. Checking the instrument powering – Battery
The Battery position enables the user to check the power source of the
instrument: internal battery condition, source and voltage of the external power
supply; and to define the battery type for corrct checking of their condition. The
instrument can be powered from internal four AA rechargeable or standard
alkaline batteries or from the USB interface when its USB Device socket is
connected via the SC 56 cable to a PC or other USB power.
The view presented on the display for each
power source is different.
When the instrument is powered from a set
of internal batteries the user should select
the correct battery type (Alkaline and
Rechargeable). It is essential for the right
detection of the capacity of the battery
pack.