17. CHECK AND ADJUSTMENT
17-11
17.5 Inspection and Adjustment of Optic Axis for Auto -Tracking
Pressing [A/M]key activates auto tracking to the prism.
Confirm if the center of telescope reticle and the center of the prism is coincided .
Any error between them requires adjustment according to the following procedure.
There are two ways to adjust error; one is auto adjusting and the other is manual adjusting .
Adjustment normally will be done manually.
Before to do adjustment by auto, it is needed to do Chapter 17.3.4 "Collimation of the
Instrument" and Chapter 17.3.6 "Adjustment of Vertical Angle 0 Datum". Also auto adjustment
is not possible when error is exceeding 1'. You must adjust manually.
1) Auto Adjustment Procedure
After doing Chapter 17.3.4 "Collimation of the Instrument" and Chapter 17.3.6 "Adjustment of
Vertical Angle 0 Datum", do as following.
Operating procedure Operating key Display
Level the instrument properly with the plate
level.
Press [MENU] key, from normal
measurement mode.
[MENU]
MENU 1/1
F1 : PARAMETERS
F2 : PROGRAMS
F3 : REMOTE
Select [F1:PARAMETERS]. [F1]
PARAMETERS 1/1
F1 : TRK
F2 : MEAS
F3 : COM
Select [F1:TRK]
[F1]
TRK 1/3
F1 : SEARCH
F2 : WAIT TIME
F3 : SCAN WIDTH
Press [F4]key, TRK menu 2/3 will be
displayed.
[F1]
TRK 2/3
F1 : ADJ AXIS(M)
F2 : ADJ AXIS(A)
F3 : TRK SPEED
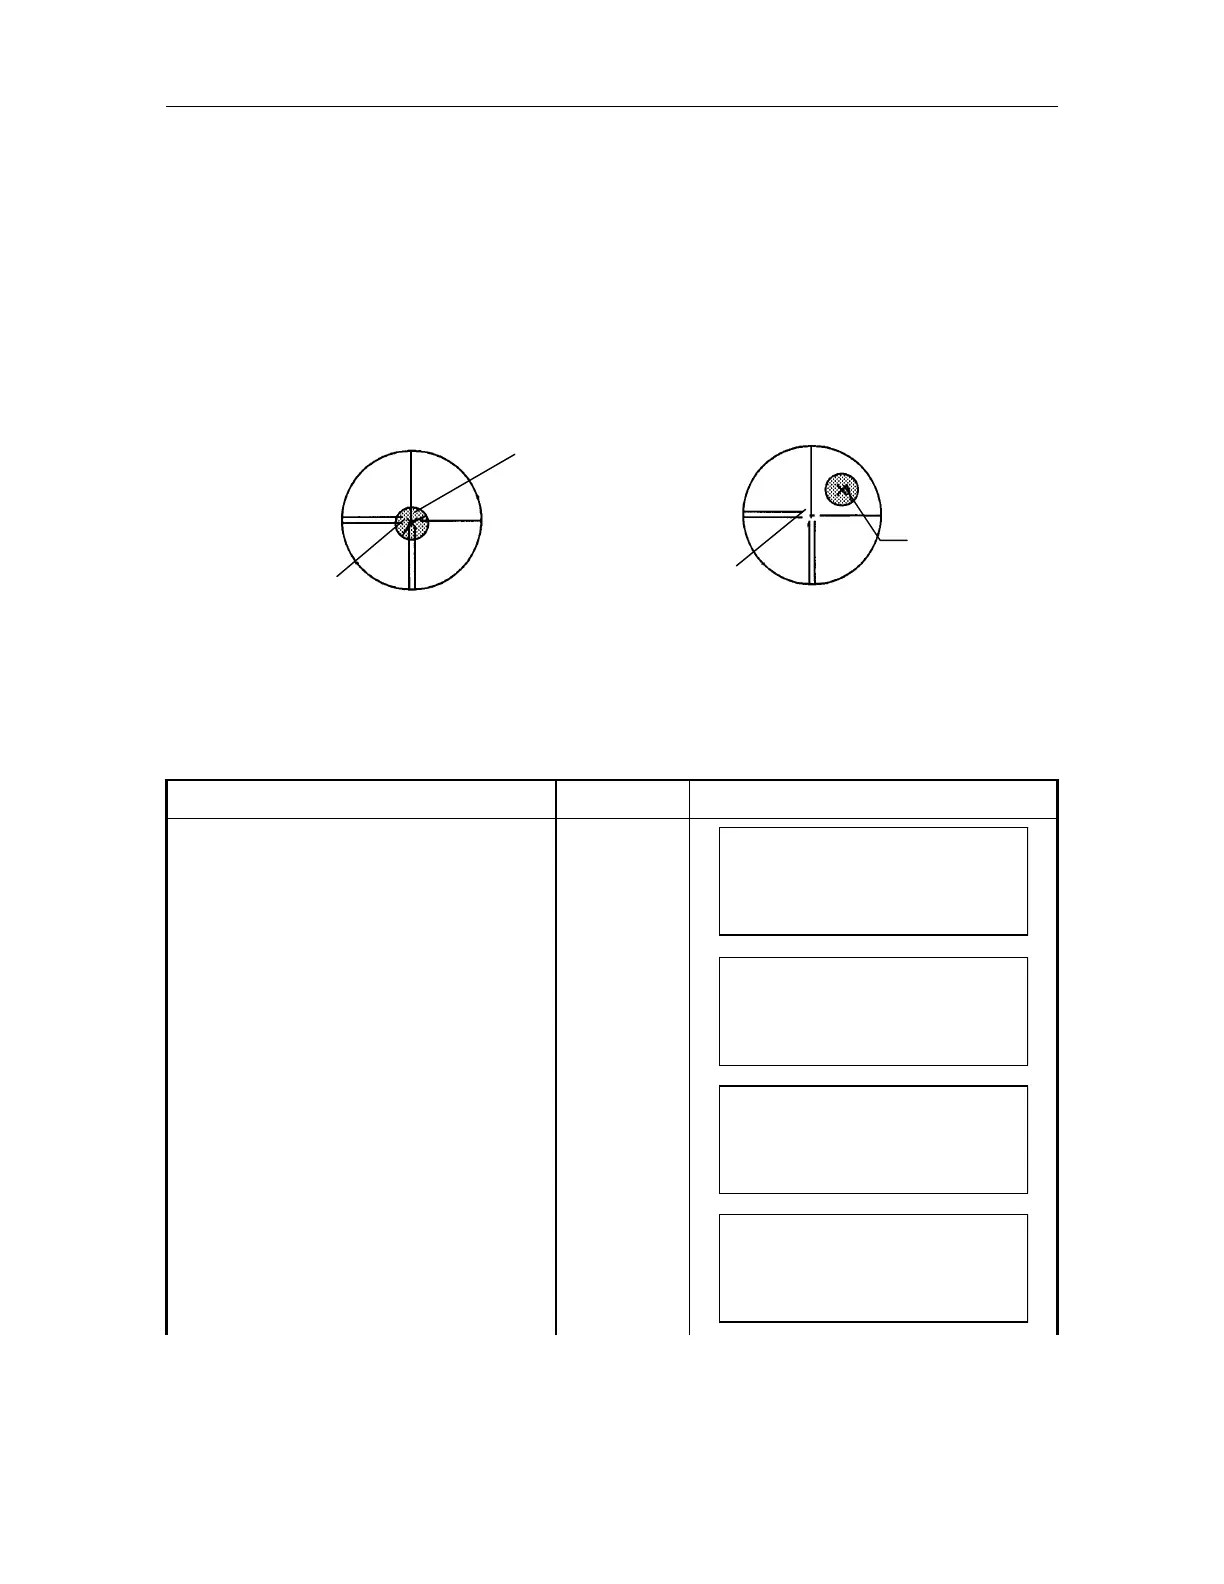
Normal position
Prism center
Telescope reticle center
Centers of prism and telescope is shifted
Prism center
Telescope reticle center