Multi Pro 1750 Page 7 − 15 Drive Train
Driveshaft Cross and Bearing Service
The following procedure can be used to replace the
cross and bearings from either the rear wheel drive-
shafts or the transaxle driveshaft.
1. Remove driveshaft from vehicle (see Rear Wheel
Driveshafts or Transaxle Driveshaft in this section).
IMPORTANT: When placing yoke in vise, clamp
lightly on the solid part of the yoke to prevent yoke
damage. Also, the use of a vise with soft jaws is rec-
ommended.
2. Lightly clamp yoke in vise. Remove snap rings that
secure bearings at the inside of each yoke. Remove
yoke from vise.
IMPORTANT: Yokes must be supported when re-
moving and installing bearings to prevent damage.
3. Use a press to remove cross and bearings from
yokes:
A. Place a small socket against one bearing and a
large socket against the yoke on the opposite side.
B. While supporting the large socket, apply pres-
sure on small socket to partially push the opposite
bearing into the large socket.
C. Remove yoke from press, grasp partially re-
moved bearing and tap on yoke to completely re-
move the bearing.
D. Repeat process for remaining bearings.
E. Thoroughly clean and inspect all components.
4. To install new cross and bearings:
A. Apply a coating of grease to bearing bores of end
yoke and shaft yoke. Also, apply grease to bearings
and seal of bearing assembly. Make sure that all
bearing rollers are properly seated in bearing cage.
B. Press one bearing partially into yoke.
IMPORTANT: Take care when installing cross
into bearing to avoid damaging bearing seal.
C. Carefully insert cross into bearing and yoke.
D. Hold cross in alignment and press bearing in until
it hits the yoke.
E. Carefully place second bearing into yoke bore
and onto cross shaft. Press bearing into yoke.
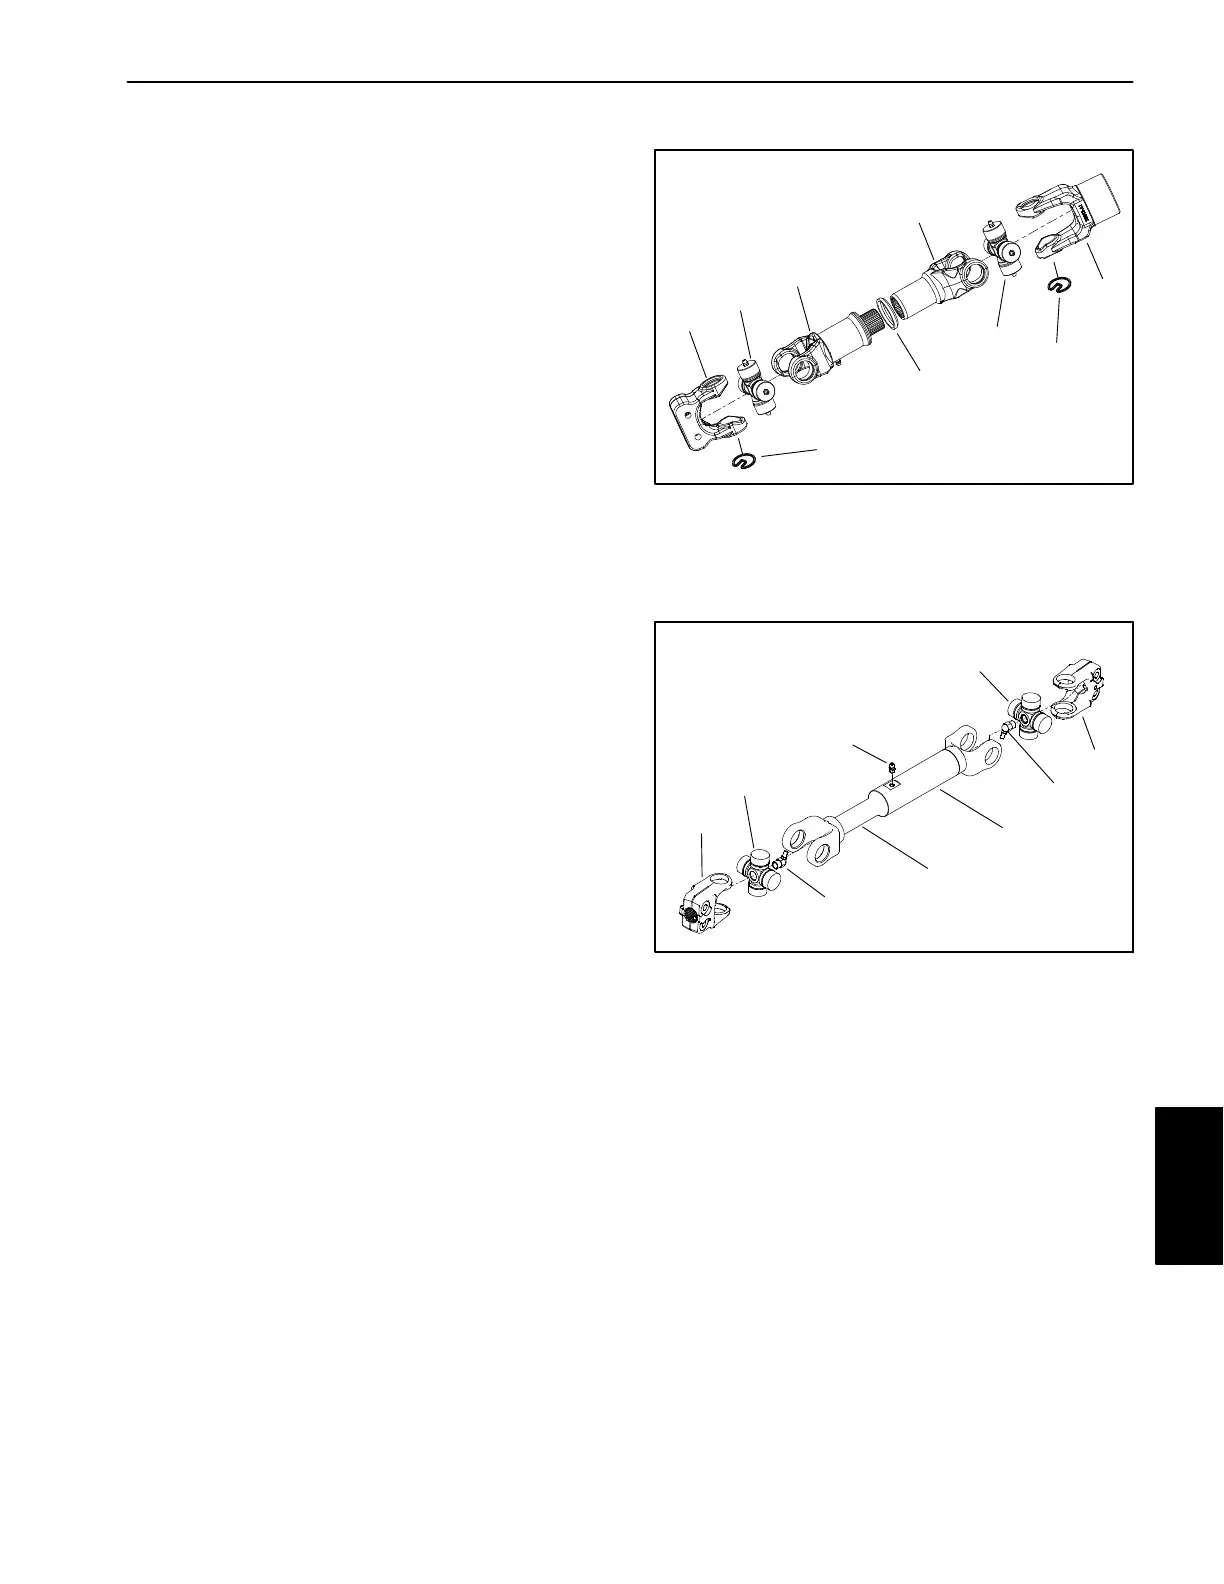
1. Snap ring
2. Cross and bearings
3. End yoke
4. Yoke and hub
5. Seal
6. End yoke
7. Tube yoke
Figure 9
4
5
6
7
1
3
2
2
1
REAR WHEEL
DRIVESHAFT
1. Slip shaft yoke
2. Splined yoke (transaxle)
3. Slip tube yoke
4. Grease fitting
5. Grease fitting
6. Keyed yoke (engine)
7. Cross and bearing kit
Figure 10
5
2
6
3
7
4
1
TRANSAXLE
DRIVESHAFT
4
7
F. Secure bearings in yokes with snap rings.
G. Repeat procedure for remaining yoke.
5. Lubricate grease fittings until grease purges from
bearing cups. Make sure to grease all cross fittings.
6. Make sure that assembled joint moves without bind-
ing. Slight binding can usually be eliminated by lightly
rapping the yoke lugs with a soft faced hammer. If bind-
ing continues, disassemble joint to identify source of
binding.
7. Install driveshaft to vehicle (see Rear Wheel Drive-
shafts or Transaxle Driveshaft in this section).
Drive Train