TRACKMASTER Ch. 10 Removal and Replacement of Components
317-160-406 Rev 4 TMX428 TMX428CP & TMX58 Service Manual 101
May 2021
Motor Drive Belt Replacement TMX428 Series
Tools required
1/4” Hex Wrench or Hex Socket
3/4" Open-end Wrench & Hex Socket
1/4” Hex Nut Driver or Flat Blade Screw Driver
Tape Measure
Approximate time to complete 1 hr 20min
1. Elevate treadmill to 12%.
2. Turn treadmill main power switch to the OFF position.
3. Unplug treadmill plug from the wall receptacle.
4. Allow treadmill to discharge for 3 minutes.
5. Remove the (5) hood securing bolts.
6. Set hood to the side of treadmill.
7. With ¾” wrench and socket, loosen spring tension & slide belt off the sprocket allowing the
motor to pivot.
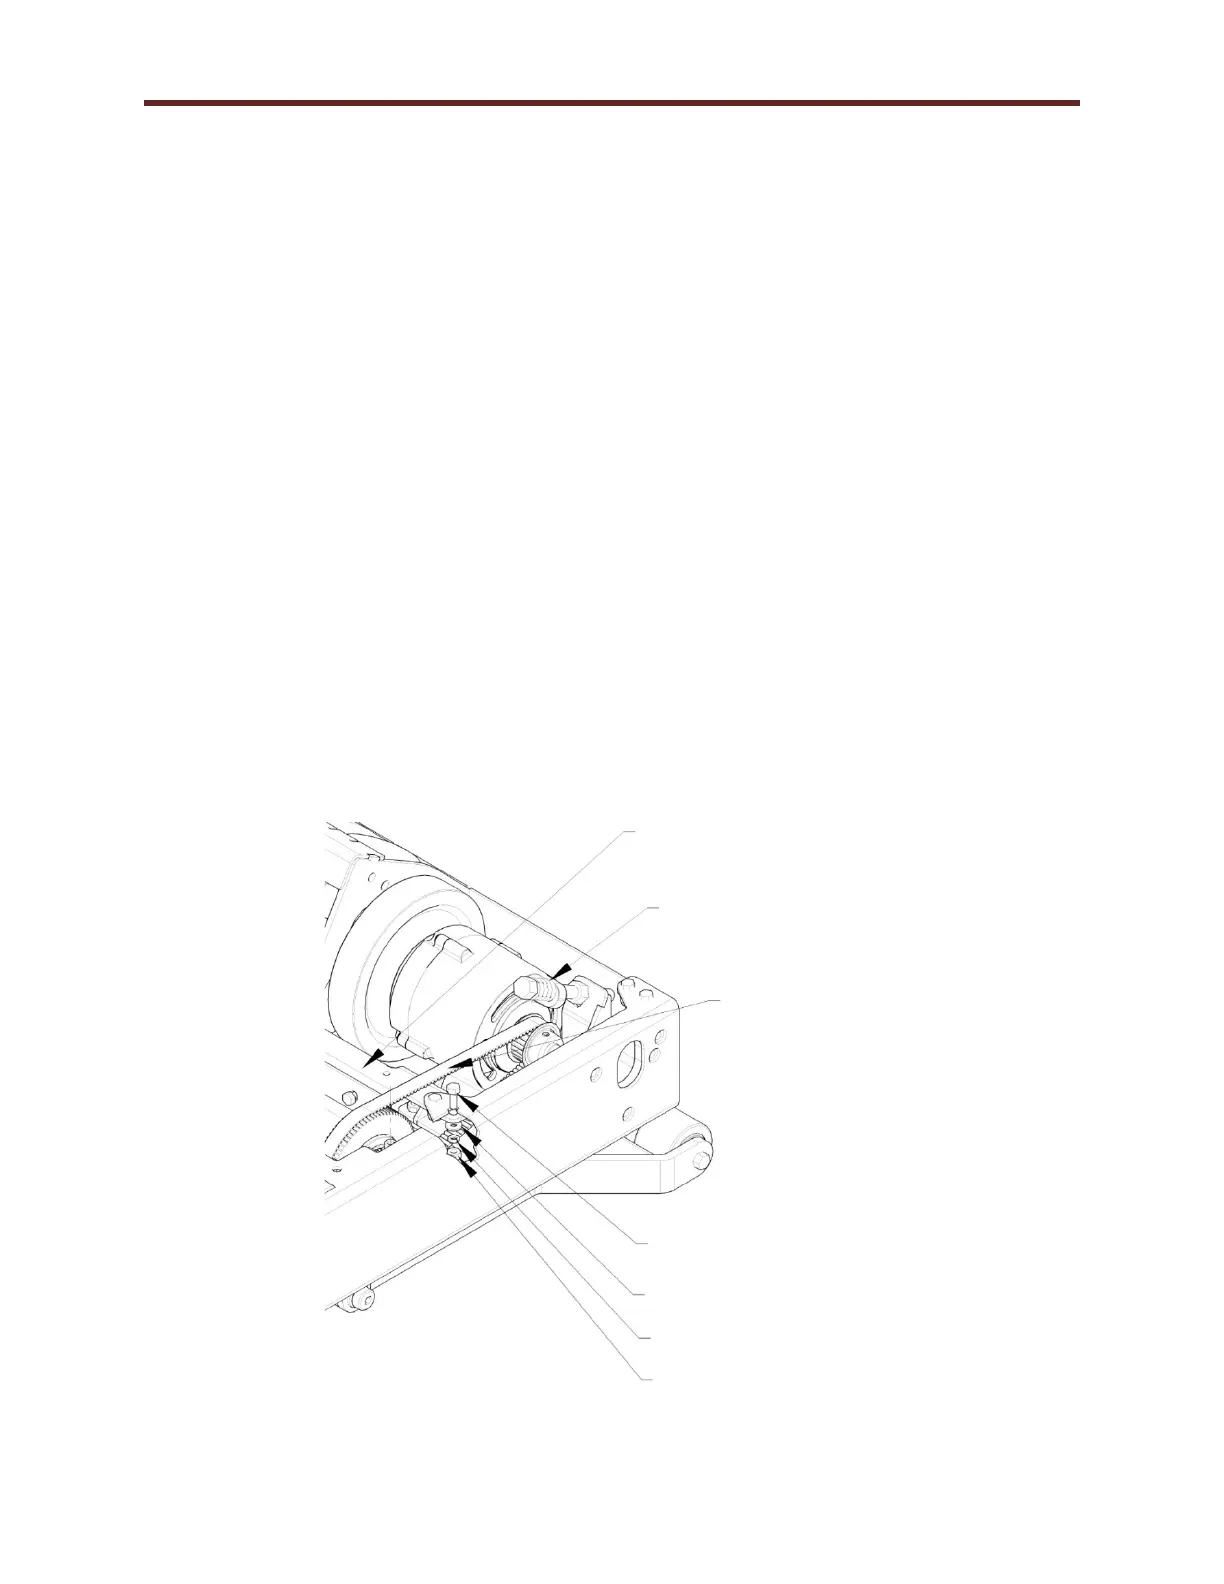
8. Using 7/16” socket and wrench, remove the (6) bolts securing the “Bracket Motor Right Hand”.
9. Loosen rear belt tension bolt, allowing the rear roller to move forward towards the front roller.
10. Remove hex socket head cap screw retaining the front roller on the right hand side.
11. Now, lift right hand end of the front roller up enough to remove the drive belt.
12. Reverse procedure to install new drive belt.
13. After installation follow drive belt/running belt: see Chapter 7 Running Belt Tension Adjustment
and Drive Belt Tension Adjustment.
(6) Bolt 1/4”-20 x 1 1/4" Long
(6) Bolt 1/4” Flat
Washer
(6) Bolt 1/4” Lock
Washer