Removal and Replacement of Components Ch. 10 TRACKMASTER
94 TMX428 TMX428CP & TMX58 Service Manual 317-160-406 Rev 4
May 2021
Drive Replacement TMX428 Series
Tools Required
1/4” Hex Socket or Flat Blade Screw Driver
5/16” Hex Socket with 6” Extension or Nut Drive
Approximate time to complete 45 min
1. Elevate the treadmill to approximately 15% grade.
2. Turn the treadmill main power switch to the OFF position.
3. Unplug the treadmill from the wall receptacle.
4. Allow treadmill to discharge for 3 minutes.
5. Remove the (5) hood securing bolts.
6. Remove hood and set aside.
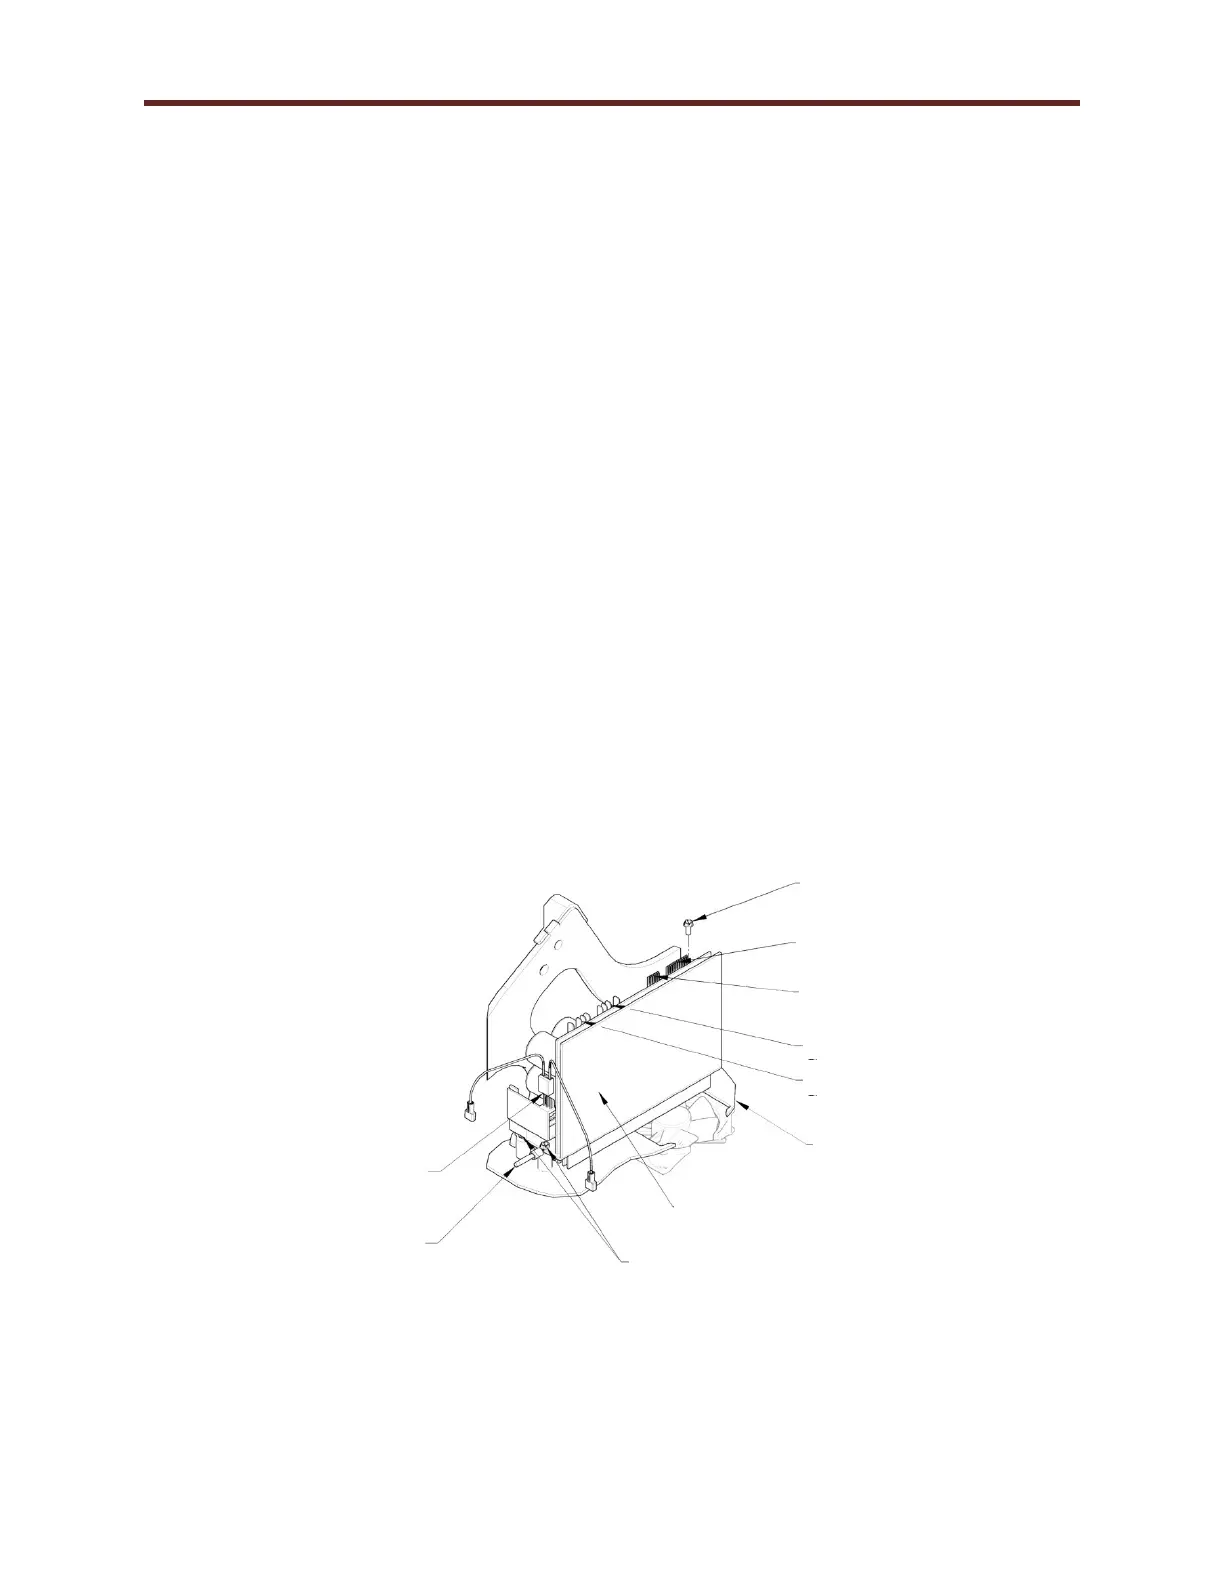
7. Remove Motor Feedback 6-pin cable on J1 from drive.
8. Remove 10-pin communication cable on J2 from drive.
9. Remove Incoming Power 4-pin connector on TB1 from drive.
10. Remove Motor Power 4-pin cable on TB2 from drive.
11. Remove the 3 pin connector from Regen Circuit Board on front side of drive.
12. With 5/16” socket loosen front two screws and remove the back screw.
13. The drive will slide back allowing the drive to be removed.
14. Reverse procedure to reinstall Drive; see Chapter 6 Belt Speed Calibration Procedure
(Calibration Program).
Motor Power TB2 Connector
Connector
Incoming Power TB1 Connector
Connector
Drive Ground to Main
Wire Harness