Removal and Replacement of Components Ch. 10 TRACKMASTER
114 TMX428 TMX428CP & TMX58 Service Manual 317-160-406 Rev 4
May 2021
NOTE: The wire’s location for replacement.
8. Reverse step 1 through step 7 to reinstall replacement CE Filter.
Replacing the Relay
Tools Required
Flat Blade Screwdriver
Pliers or Adjustable Wrench
Grounding Wrist Strap
Approximate time to complete: 30 min
1. Turn treadmill main power switch to the OFF position.
2. Unplug the treadmill plug from the wall receptacle.
3. Allow the treadmill to discharge for 1 minute.
4. Remove the (5) hood-securing bolts.
5. Remove the hood and set it aside.
CAUTION: Use ESD precautions, including wearing a grounding wrist strap that is
connected to an exposed metal connection point on the treadmill chassis.
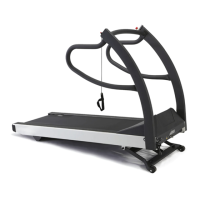
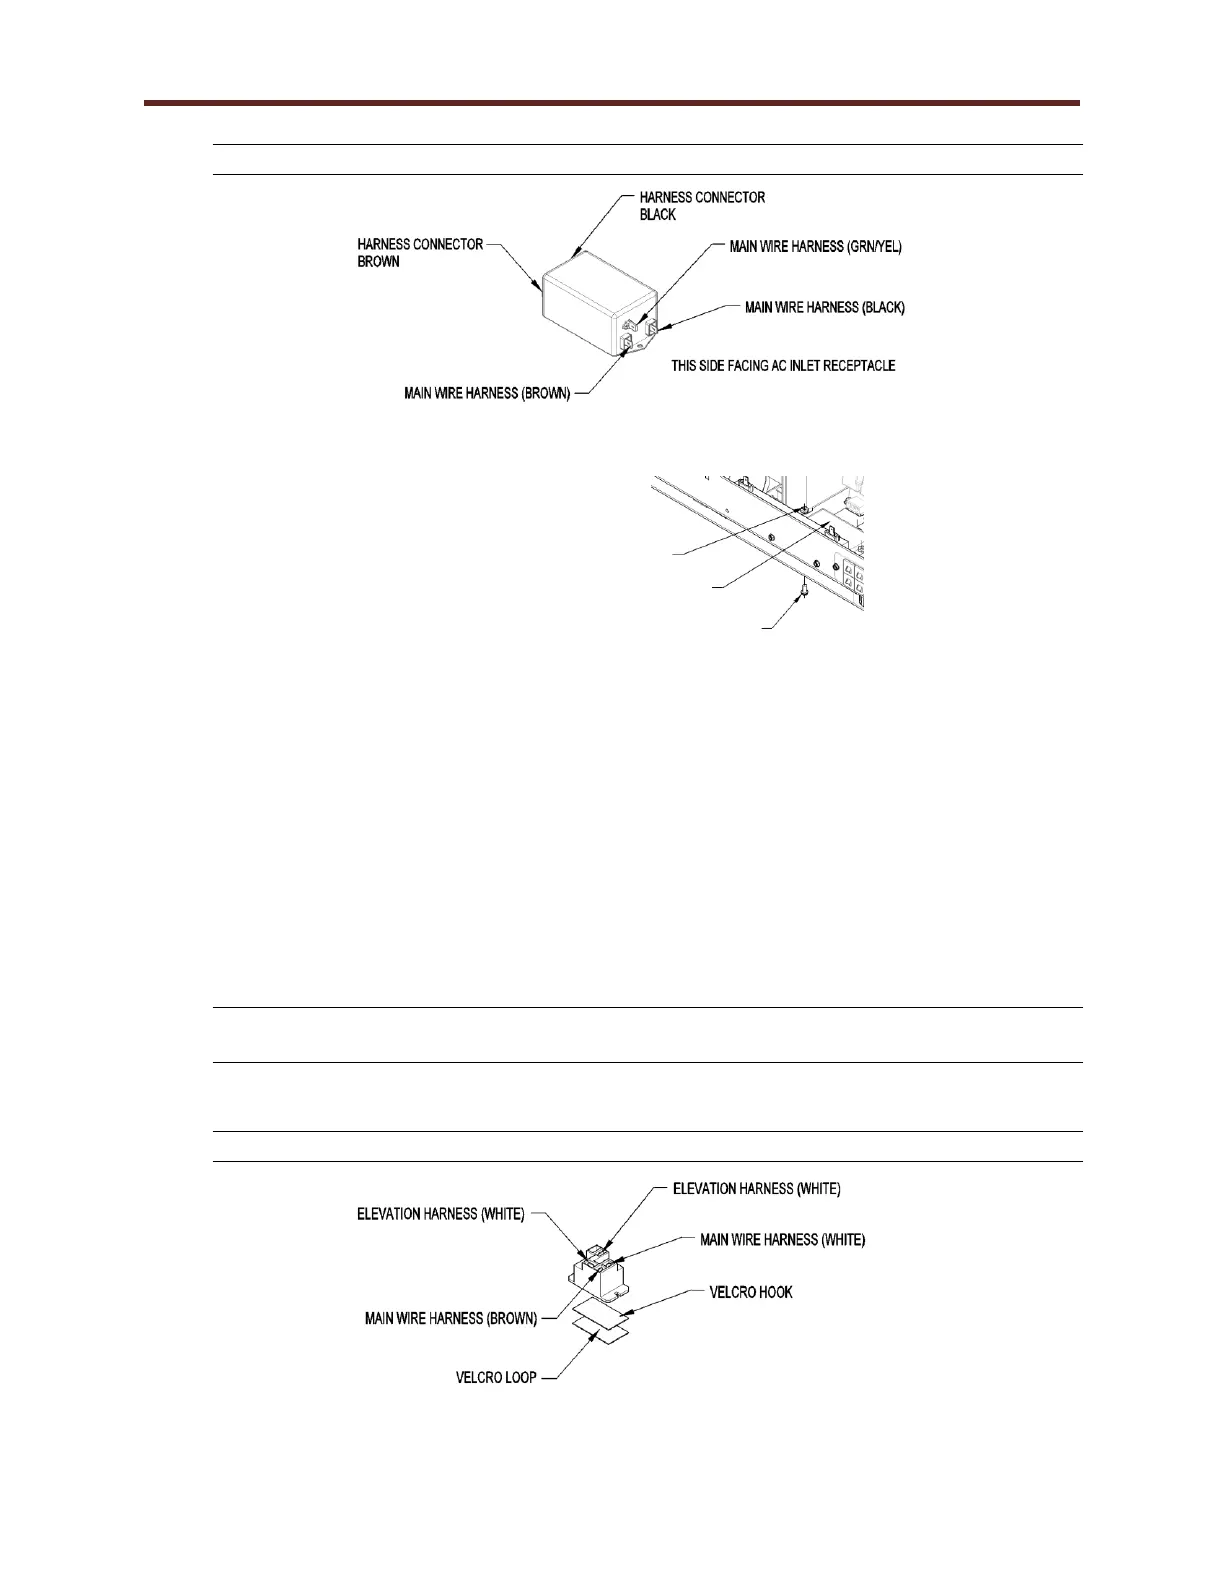
6. With pliers remove the quick disconnect wires connection from the relay.
NOTE: The wire’s location for replacement.
Reverse step 1 through step 6 to reinstall replacement relay.