Removal and Replacement of Components Ch. 10 TRACKMASTER
108 TMX428 TMX428CP & TMX58 Service Manual 317-160-406 Rev 4
May 2021
Relocate Emergency Stop Button (ESB) & Stop Tether Switch (STS)
Tools Required
1/8” Allen Wrench
1/4” Flat Blade Screwdriver
2 Pair Flat Nose Pliers
Approximate time to complete 1 hr
1. Turn the treadmill main power switch to the OFF position.
2. Unplug treadmill plug from the wall receptacle.
3. Allow treadmill to discharge for 3 minutes.
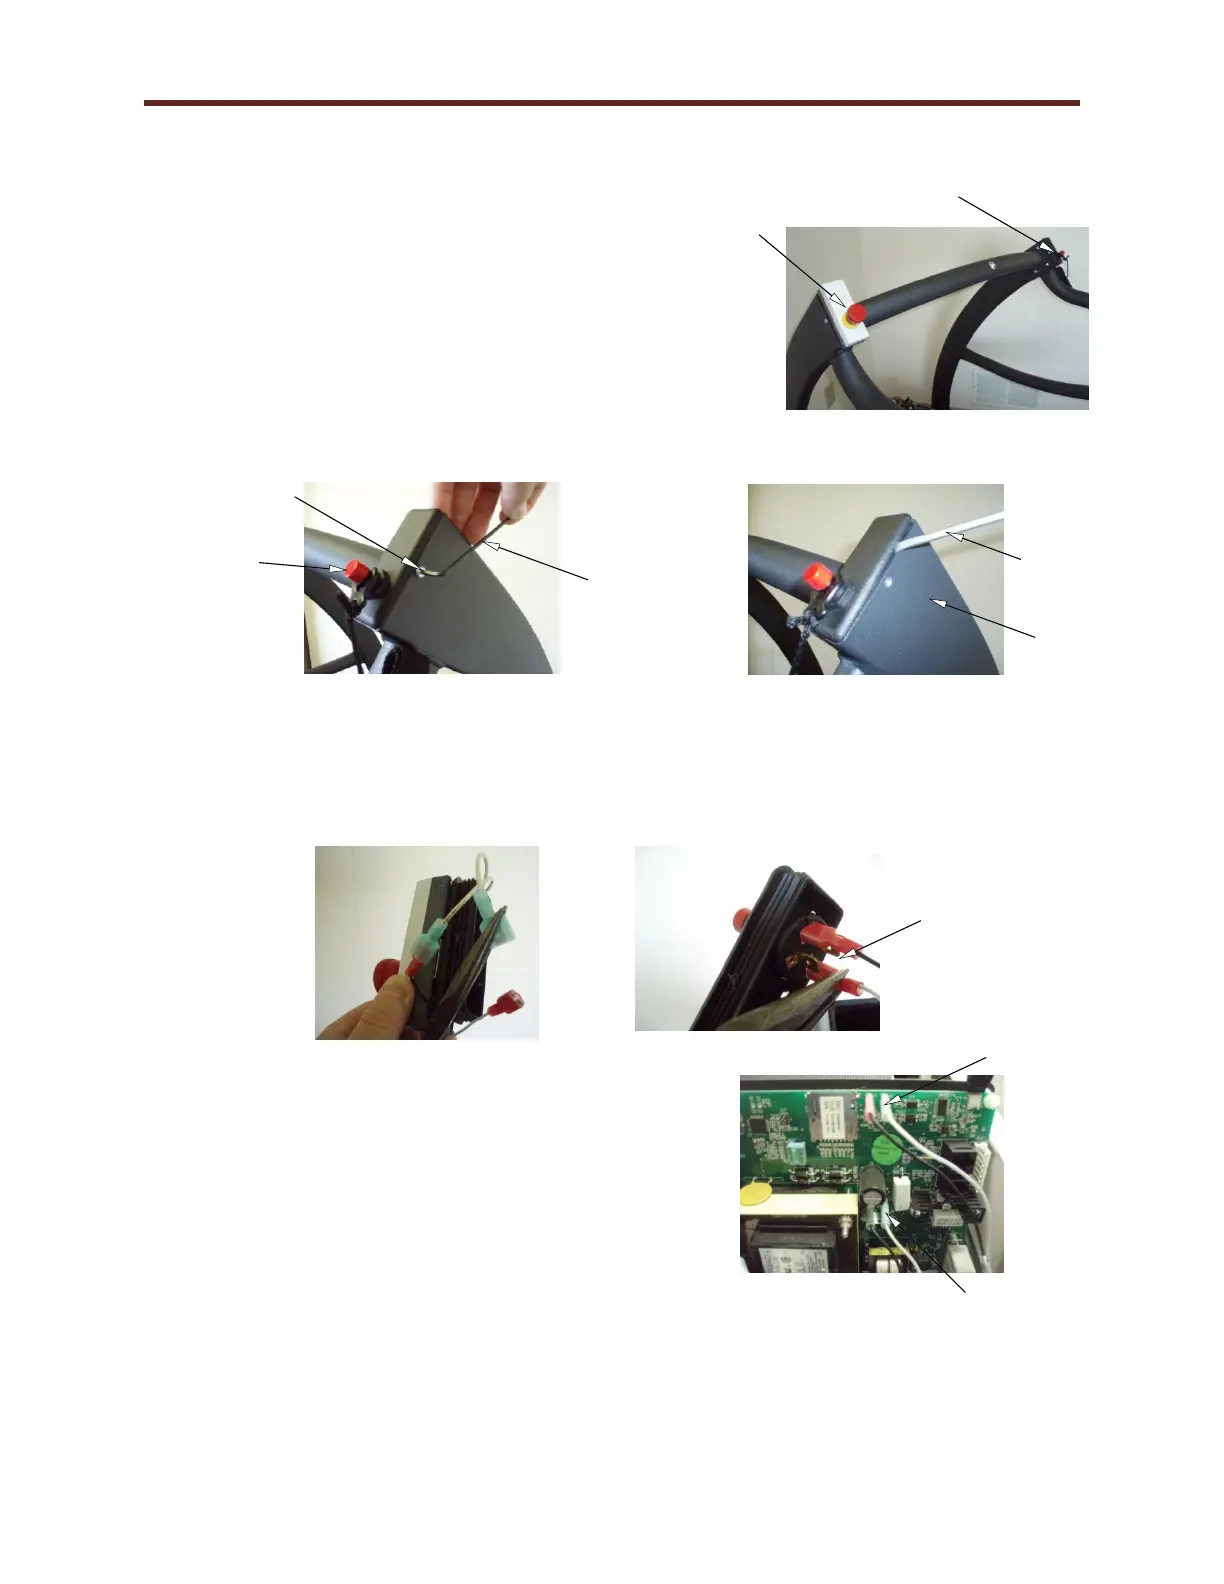
4. Using a 1/8” Allen wrench, remove the (4) 10-32 screws (Fig. A)
holding the ESB & STS assembly to the fabricated handrail.
5. Using a flat blade screwdriver, remove the ESB & STS
assembly from the fabricated handrail (Fig. B).
6. Completely removing the ESB & STS assembly and gently pulling to expose the wires.
7. Using two pairs of pliers, gently separate the connectors on the ESB (Fig. C).
8. On the STS using a pair of pliers, remove the connector from the tether assembly (Fig. D).
9. Reverse Steps 1 thru 8 to reinstall ESB & STS.
10. Remove the (5) hood securing bolts.
11. Remove hood and set aside.
12. Since relocating the ESB & STS, we will need to
swap J4 & J5 with J6 & J7 on the controller board.
Use caution; carefully remove the wires with pliers
and slowly wiggle up and down while pulling.
Avoid causing excessive flexing to the board.
13. Replace the hood. Secure the hood using original screws.
STS Connection on
outer spade blades.