4-28 SHB 803 en – Edition 2.4 * 803s410.fm
Engine
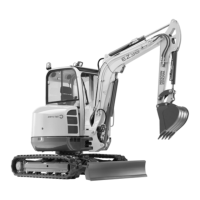
☞Mark position E of injection pump gear F in relation to gear position G.
☞After marking, do not turn the crankshaft.
➥Tighten the screw of the pulley with a long spanner to fix the crankshaft in place.
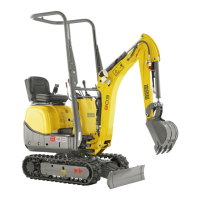
☞Loosen lock nut H of gear F and unscrew until the shaft end of the injection pump.
☞Use an extractor J to pull off/loosen gear F on the conical shaft.
☞Loosen lock nut H completely and remove it from the gear casing with the spring
washer and gear F.
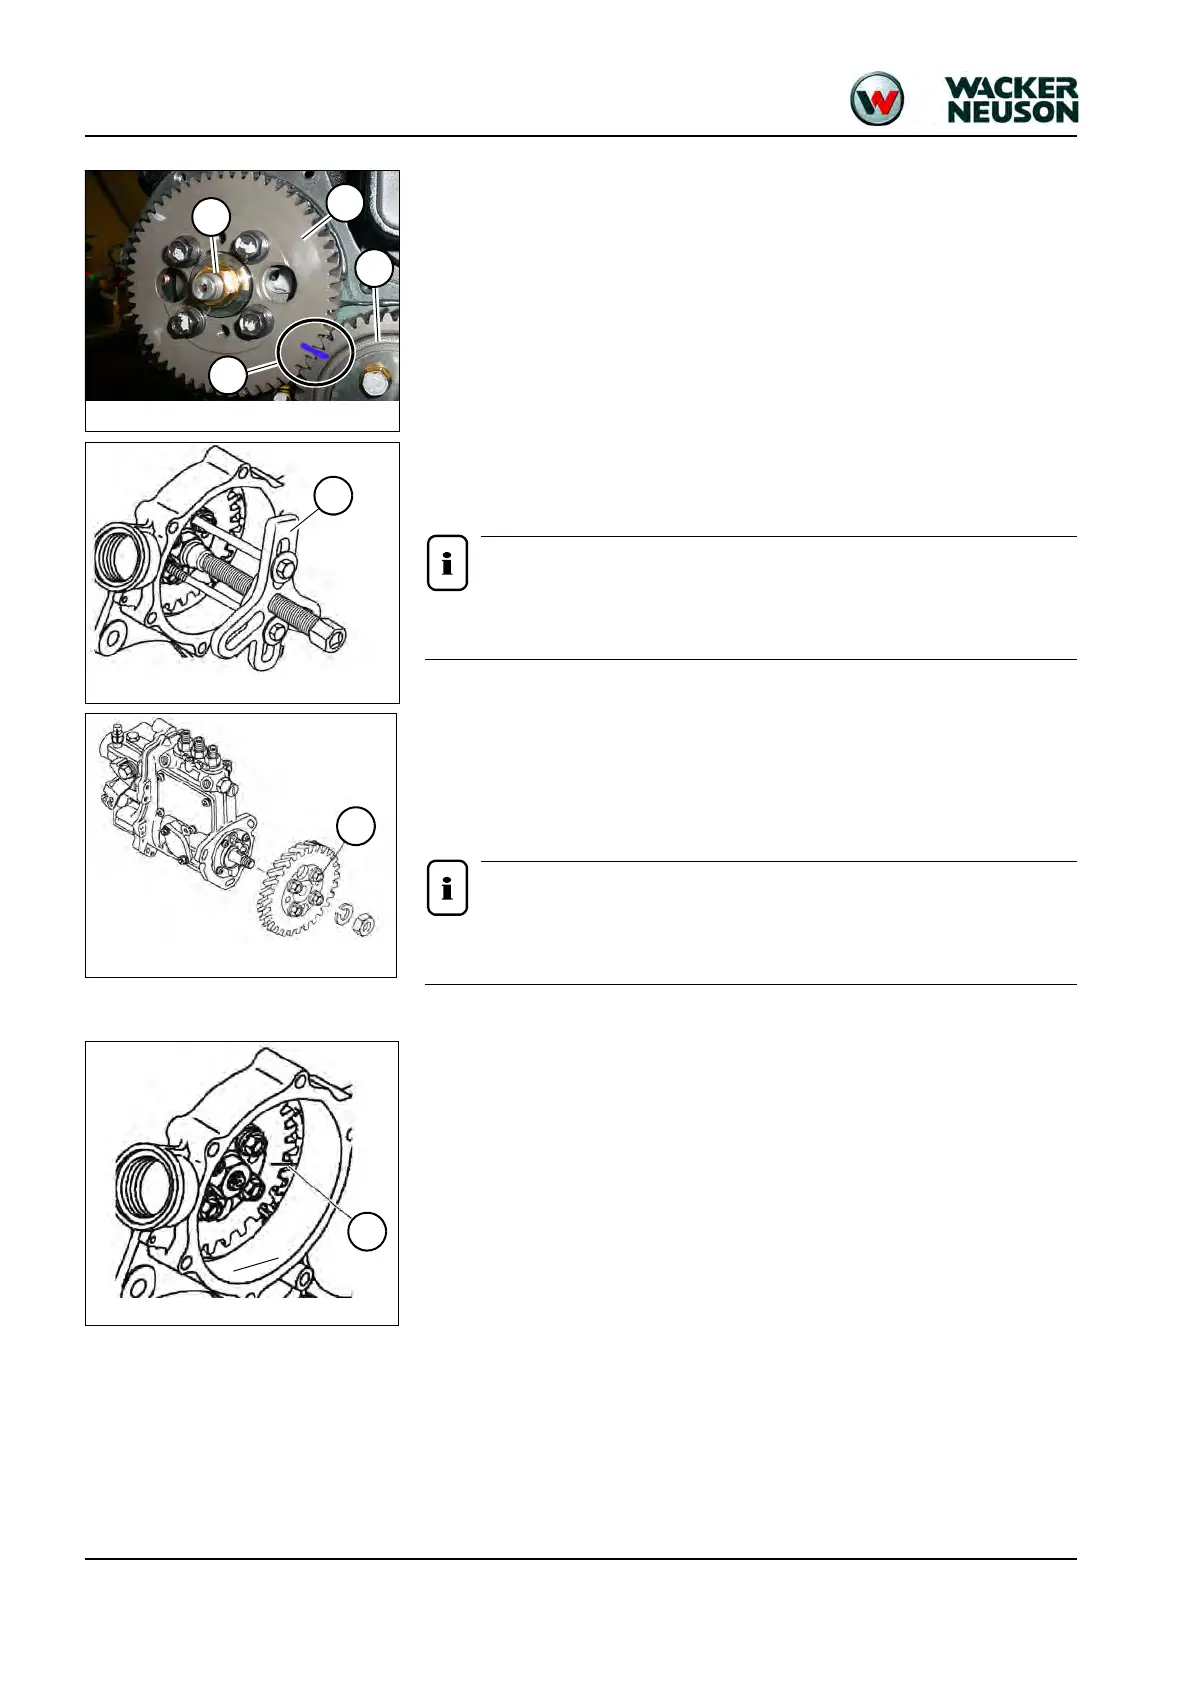
Gear F of the injection pump can be removed from the gear casing. We recom-
mend, however, leaving gear F meshed with the gear G in the gear casing.
• Do not loosen screws K of the gear of the injection pump, as these specify the precision
setting of the fuel injection pump set by the manufacturer!
➥It is very difficult or even impossible to subsequently set the correct injection time.
☞Remove the fuel injection pump.
➥To this purpose unscrew the three fastening screws of the injection pump.
After removing the injection pump, do not turn the crankshaft anymore.
Tampering with the sealed screws is prohibited.
Fitting the fuel injection pump
☞Check the position of the gears by means of mark E made during removal.
☞Fit a new O-ring on the flange of the injection pump with grease.
☞Ensure that the shaft of the injection pump is clean and dry.
☞The feather key on the shaft of the injection pump must be aligned with the groove in
the hub and gear.
☞Fit the injection pump and tighten the securing screws hand tight.
Fig. 40: Mark on gear
E
G
F
H
Fig. 43: Gear casing mark
E
 Loading...