3-28 SHB 803 en – Edition 2.4 * 803s312.fm
Maintenance
Air filter elements degrade prematurely when in service in acidic air for longer
periods of time. This risk is present, for example, in acid production facilities,
steel and aluminum mills, chemical plants and other nonferrous-metal plants
☞Check air filter elements every 50 operating hours at the latest, and replace
it if necessary!
General instructions for air filter maintenance:
• Store air filter elements in their original packaging and in a dry place!
• Do not knock the air filter element against other objects as you install it!
• Check air filter attachments, air intake hoses and air filter elements for damage, and
immediately repair or replace if necessary!
• Check the screws at the induction manifold and the clamps for tightness!
• Check the function of the discharge slot of the dust valve D, clean and replace it if
necessary.
☞Squeeze the discharge slot of dust valve D.
☞Clean the discharge slot if necessary.
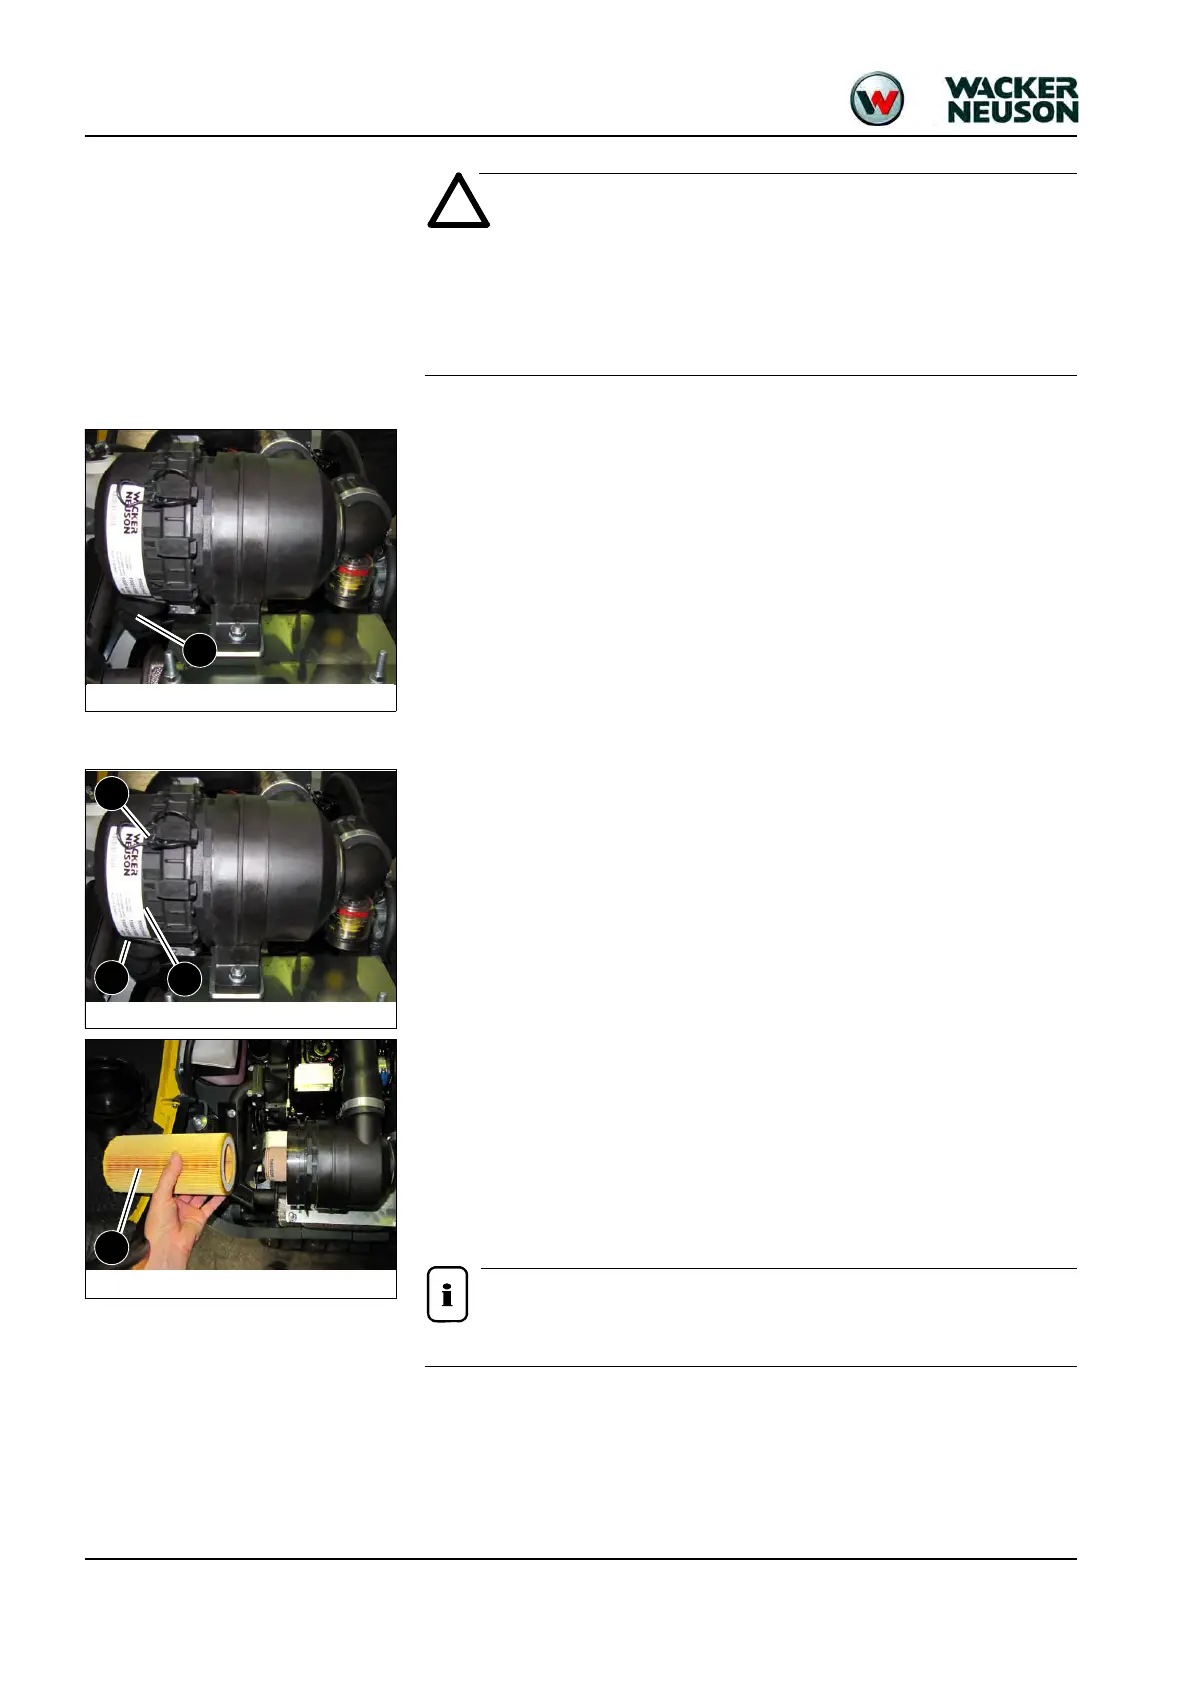
Replacing air filter elements
Replace the outside air filter element B as follows:
☞Stop the engine
☞Raise the lock lever
☞Remove the starting key and carry it with you
☞Let the engine cool down
☞Open the engine cover
☞Remove dirt and dust from the air filter element and the area around the air filter
☞Open bow clips F on housing section E
☞Remove housing section E
☞Carefully remove air filter element B with slightly turning movements
☞Ensure that all dirt (dust) inside the housing section and cover E, including dust valve
D, has been removed
☞Clean the parts with a clean lint-free cloth, do not use compressed air
☞Check the new outside air filter B for damage and carefully insert it in the housing sec-
tion (install only intact air filter elements)
☞Position housing section E (ensure that it is properly seated)
☞Close bow clips F on housing section E
Ensure that dust valve D shows downward once it is installed!
Fig. 21: Removing the housing section
F
E
F
Fig. 22: Removing the outside air filter
B