Xerox 4595 Copier/Printer User Guide
3-27
3. Scan
Specify a Forwarding Destination
Enter values for the fields appropriate to the selected protocol,
and specify a forwarding destination to save to.
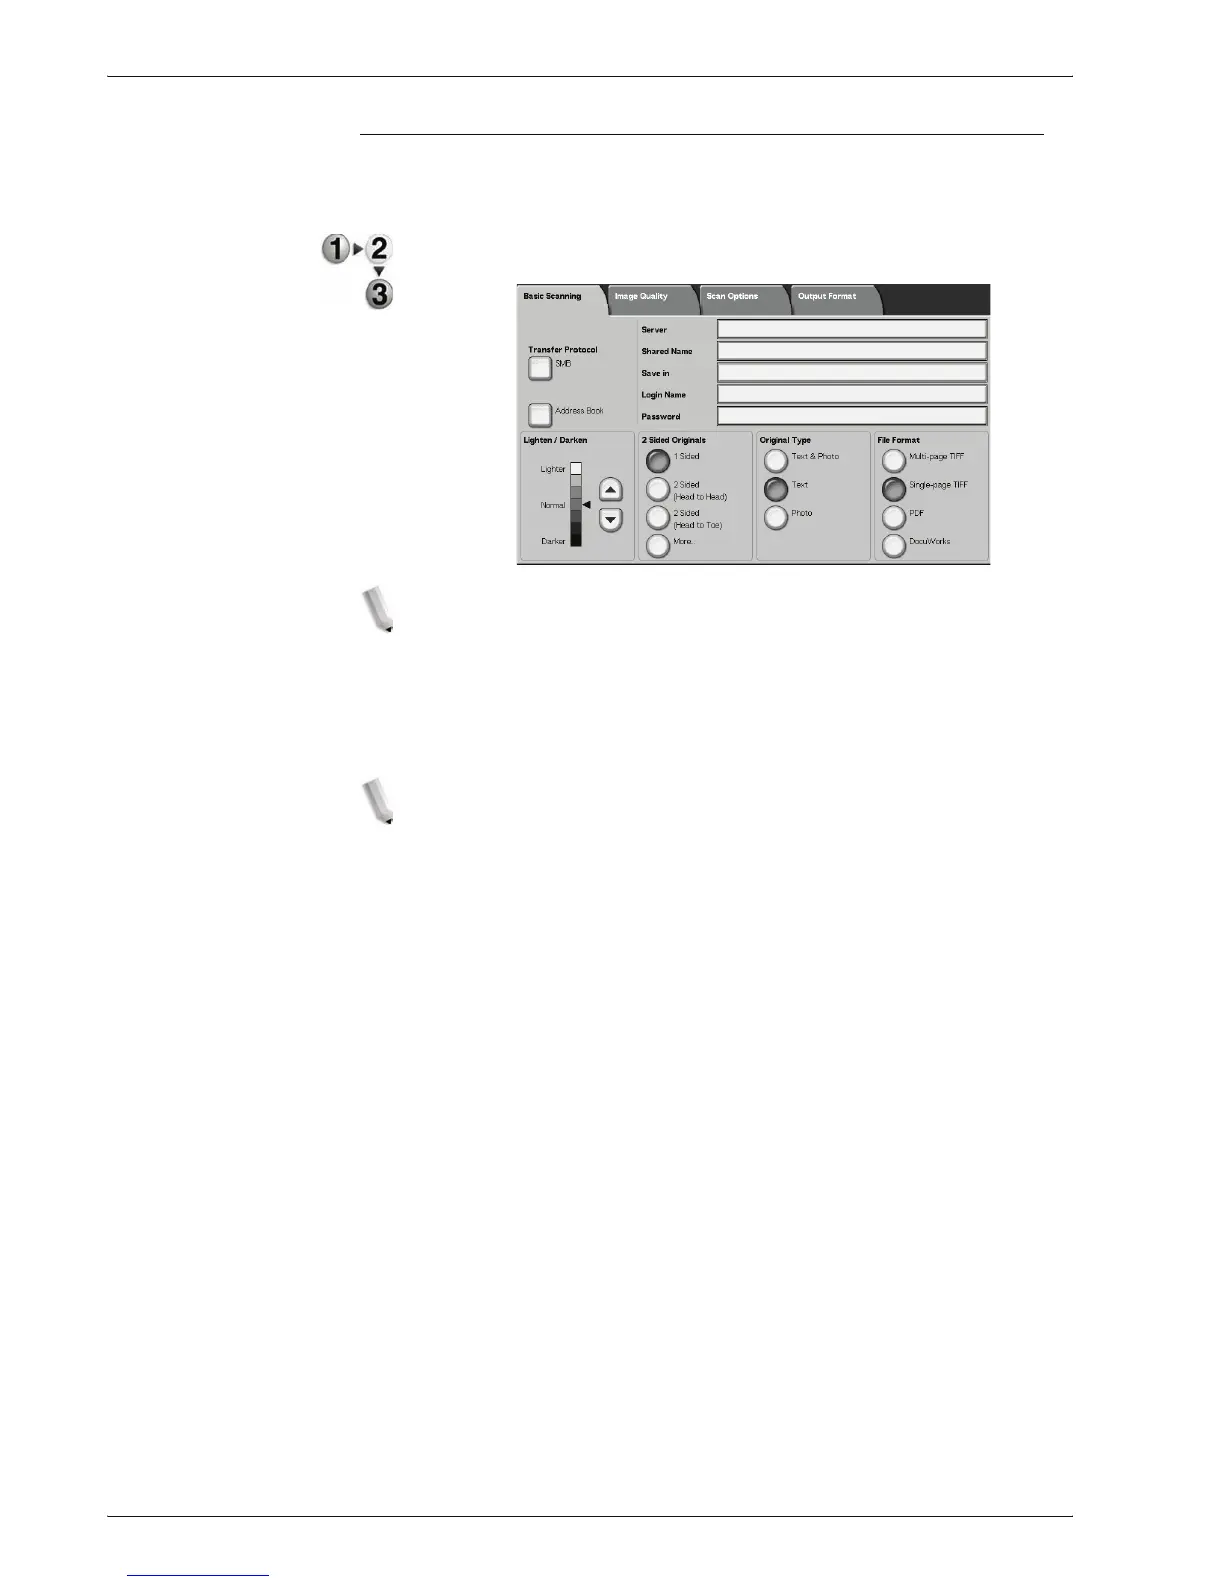
1. From the Basic Scanning tab, select and complete the
required fields to specify a forwarding destination.
NOTE 1:You can also choose Address Book to enter a recipient
from the Address Book.
NOTE 2:If you have the optional Color Scanner Kit installed, the
bottom section of the screen will be different than the one shown
above.
2. Enter values using the keyboard displayed.
NOTE: Fields displayed vary depending on the selected protocol.
Server
Displayed when either FTP or SMB is selected. Enter either the
server name or server IP address. Up to 64 characters are
allowed.
Example Server Name: myhost.mycompany.com
(myhost: Host Name, mycompany.com: Domain Name)
Shared Name
Displayed when SMB is selected. Enter the Shared Name. Up to
64 characters are allowed.
Save in:
Displayed when either FTP or SMB is selected. Enter a directory.
Up to 128 characters are allowed.
Save in
Displayed when SMB (UNC Format) is selected. Enter \\Host
Name\Shared Name\Directory Name. Up to 260 characters are
allowed.