December 2006
3-14
WorkCentre M20, 4118, FaxCentre 2218 Family
IQ10
Image Quality
IQ10 Ghost Images RAP
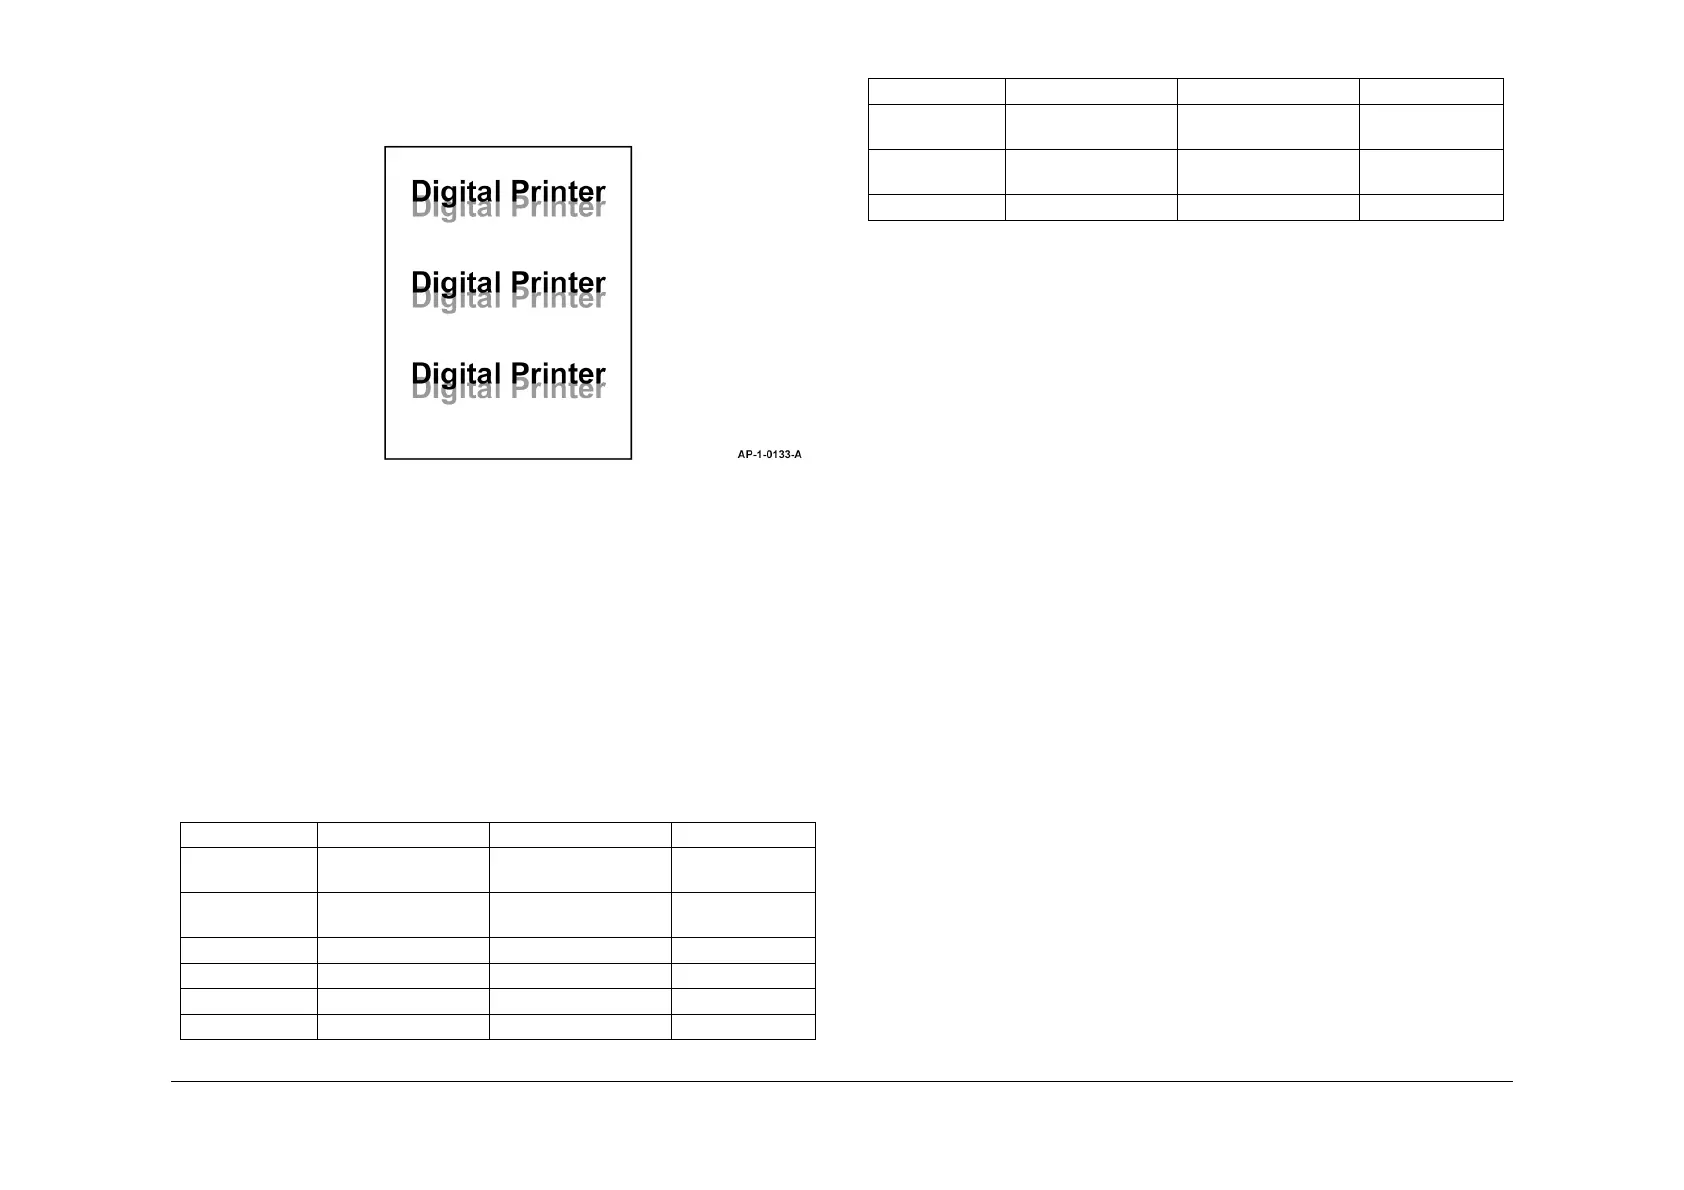
Use this RAP when the printed sheets have ghost images, as shown in Figure 1.
Figure 1 Ghost images
Procedure
WARNING
Switch off the electricity to the machine. Disconnect the power cord from the customer
supply while performing tasks that do not need electricity. Electricity can cause death or
injury. Moving parts can cause injury.
NOTE: If necessary, refer to GP 20 for the acronym list and cross reference lists of more com-
monly recognised part names.
Perform the following:
1. Measure the distance between the image and the ghosted image. Refer to Table 1 to
determine the possible cause of the defect.
• If the distance between the image and the defect matches the heat roller or pressure
roller, perform the following:
– Ensure that the paper tray settings match the paper or media size in the trays.
Ensure the media is within specification, refer to GP 22 Paper and Media Spec-
ifications.
– Go to GP 1 Engine Test Mode Entry. Perform the Fuser Temp Check (test 0).
Ensure the fuser is operating within the correct temperature range, refer to GP
11 Machine Specifications.
• If the distance between the image and the defect matches the ELA Unit - OPC drum
set or the charge roller, go to GP 1 Engine Test Mode Entry. Perform the PTL (Pre-
Transfer Lamp), test. As necessary, perform the following:
– (M20F) Refer to Wiring Diagram 3. Check the wiring between the PBA SUB -
PTL and the PBA main.
– (4118/2218) Refer to Wiring Diagram 8. Check the wiring between the PBA
SUB - PTL and the HVPS.
– Install a new PBA SUB - PTL, PL 8.25 Item 6.
– Install a new PBA main (M20F), PL 1.10 Item 4.
– Install a new HVPS (4118), PL 1.15 Item 10.
– Install a new HVPS (2218), PL 1.20 Item 10.
• If the distance between the image and the defect is approximately 1mm, install a
new Unit - LSU, PL 6.10 Item 1.
2. Clean any contamination around the ELA - toner unit set area, refer to OF5 Waste Toner
Contamination RAP.
3. If necessary, install a new ELA - toner unit set, PL 9.10 Item 2.
Table 1 Ghosted image distance
Defect distance Possible cause Component Parts List Ref.
94.3mm ELA - OPC unit drum P/O ELA Unit - OPC
drum set
PL 9.10 Item 1
38.3mm Charge roller P/O ELA Unit - OPC
drum set
PL 9.10 Item 1
43.8mm Supply roller P/O ELA toner unit set PL 9.10 Item 2
54.3mm Developer roller P/O ELA toner unit set PL 9.10 Item 2
51.9mm Cleaning roller P/O ELA toner unit set PL 9.10 Item 2
56.6mm Transfer roller Transfer roller PL 8.13 Item 10
82.6mm Heat roller P/O ELA HOU - fuser
assembly
PL 10.15 Item 1
91.1mm Pressure roller P/O ELA HOU - fuser
assembly
PL 10.15 Item 1
1mm Unit - LSU PL 6.10 Item 1
Table 1 Ghosted image distance
Defect distance Possible cause Component Parts List Ref.